ROS quick start manual
This Quick Start Manual is a quick walkthrough to set up an interface between MORAI SIM and a sample autonomous driving algorithm stack. It is intended to provide first-time users a chance to familiarize themselves with the different features of MORAI’s simulation environment. It will not provide in-depth explanations or how-to’s for specific features and/or functions - please refer to the rest of the documentation for details.
NOTICE All examples in this guide are run on the K-City Map (map code: R_KR_PG_K-City) distributed with MORAI SIM. If you do not have access to this map, please contact your account manager or reach out to a representative over any of our channels for details.
ROS Quick Start Manual
ROS Environment Setup
Install ROS Bridge
A ROS bridge connects external applications to ROS. The following commands should be used to install the necessary packages to run MORAI SIM with ROS.$ sudo apt-get update$ sudo apt-get upgrade$ sudo apt-get install curl$ sudo apt-get install python3-pip$ sudo apt-get install net-tools$ sudo apt-get install ros-melodic-rosbridge-server
Run ROS Bridge
Once everything is installed, run the newly installed ROS bridge to begin communications.$ roslaunch rosbridge_server rosbridge_websocket.launch
Initialize the ROS Environment
ROS requires the creation of a workspace within the host machine to operate. Additionally, any custom message formats must also be placed within the workspace to properly interface with the simulator.Download the example code from the link below.
Generate a ROS workspace using the commonly used default workspace name catkin_ws with the command below. This step is not required if the host machine already has a ROS workspace. Simply move onto the next step using the name of your ROS workspace in place of catkin_ws.
$ mkdir -p ~/catkin_ws/src
Copy downloaded example code into the directory
/catkin_ws/src, then run the following commands to build the workspace with the new message formats.$ cd ~/catkin_ws$ catkin_make$ source devel/setup.bash
Simulator Network Setup
Now that the ROS environment has been fully set up, the Simulator must be configured to connect to the ROS environment.
If MORAI SIM is not running, start the simulator until the main menu bar is accessible. You will have to select the K-City map and a vehicle of your choice.
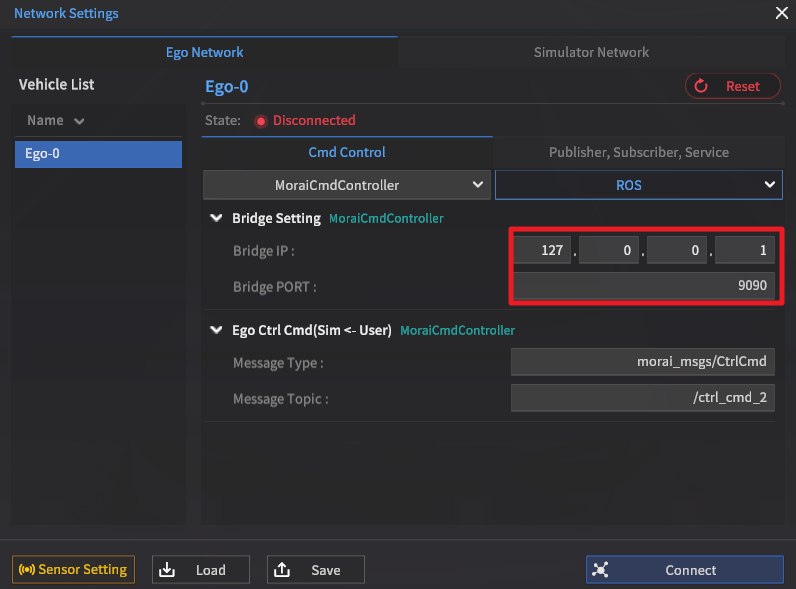
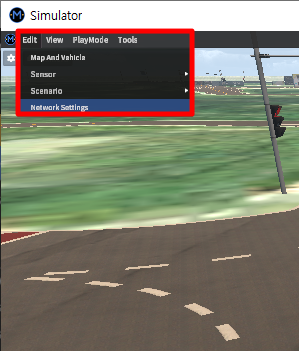
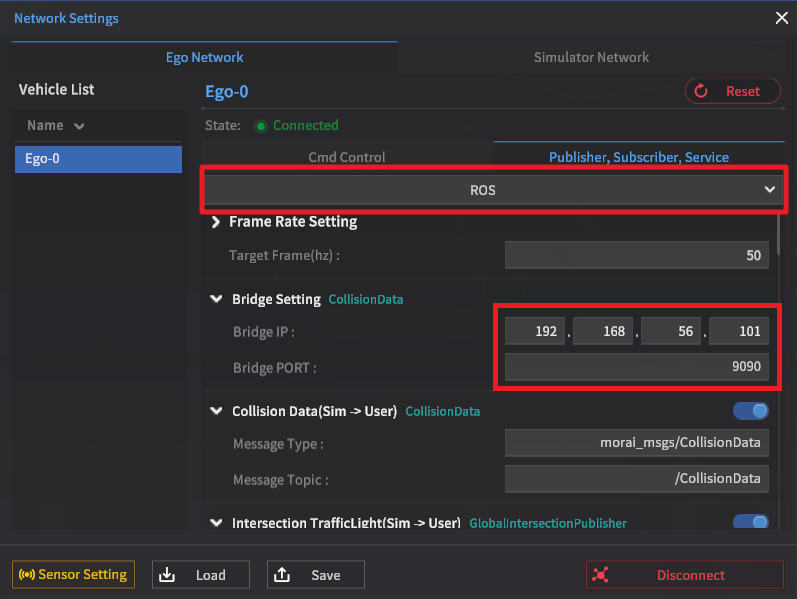
From the main menu bar, go to Edit >> Network Settings
Enter the IP address of the ROS Bridge in the input box under Bridge Setting >> Bridge IP and apply the new settings. If you are not sure what the ROS Bridge IP address is, refer to the step below.
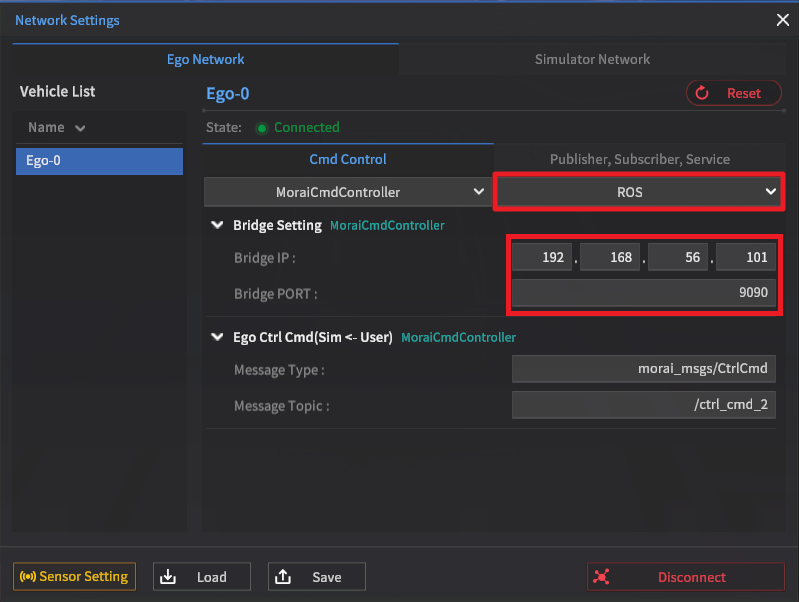
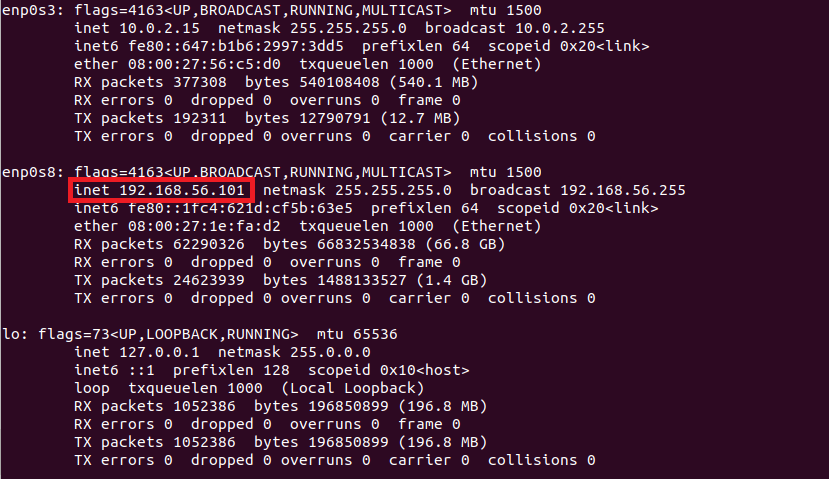
Open a Terminal to check the Bridge IP address, then run $ifconfig
In the example window shown below, the IP address is 192.168.56.101. Note that IP addresses may differ for each individual user.
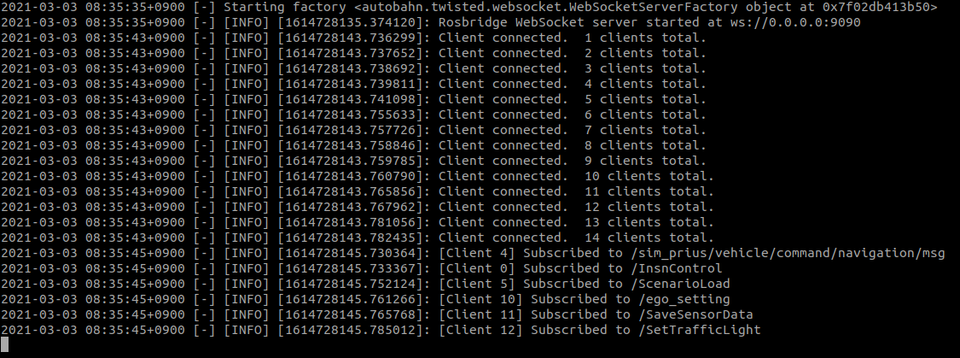
After configuring the IP and clicking Apply, the following message will appear on the Terminal indicating that the ROS Bridge is connected.
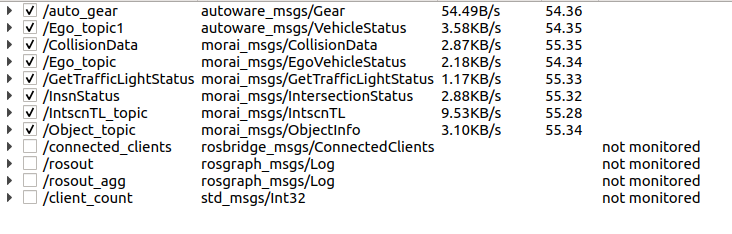
Once the connection has been made, run an rqt command to again confirm that the connection was successful.
For further information click the link below for detailed description and setup instructions for ROS and ROS networks.
ROS Network Settings
Drive Test
Enable file access permissions
The ROS environment and workspace files that we have set up must be given user permission to work properly on a Linux system. Run the following code to prevent file execution errors as shown in the figure below.
$ cd ~/catkin_ws/src/gen_ros && chmod -R a+x scripts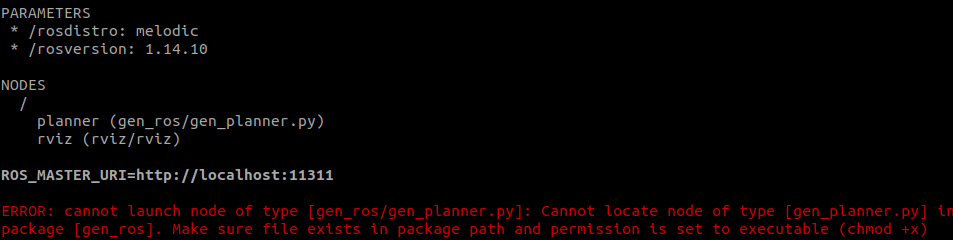
Run code
Make sure the ROS bridge is connected prior to executing the sample autonomous driving SW.
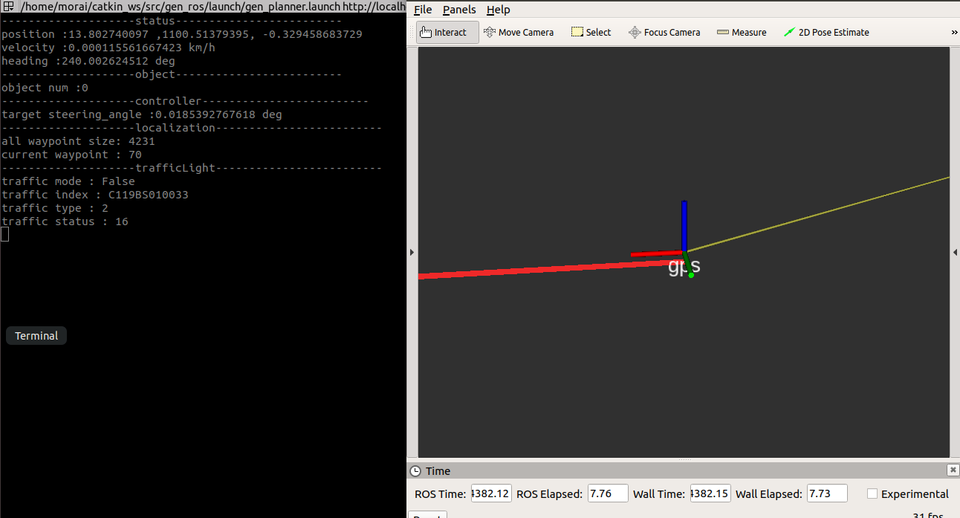
Run the sample program with the command
$ roslaunch gen_ros gen_planner.launch. It should be located with the rest of the ROS msg files downloaded off of GitHub.After the command is executed, the Linux terminal should start outputting data and a visualization window using Rviz should pop up as shown in the figures below.
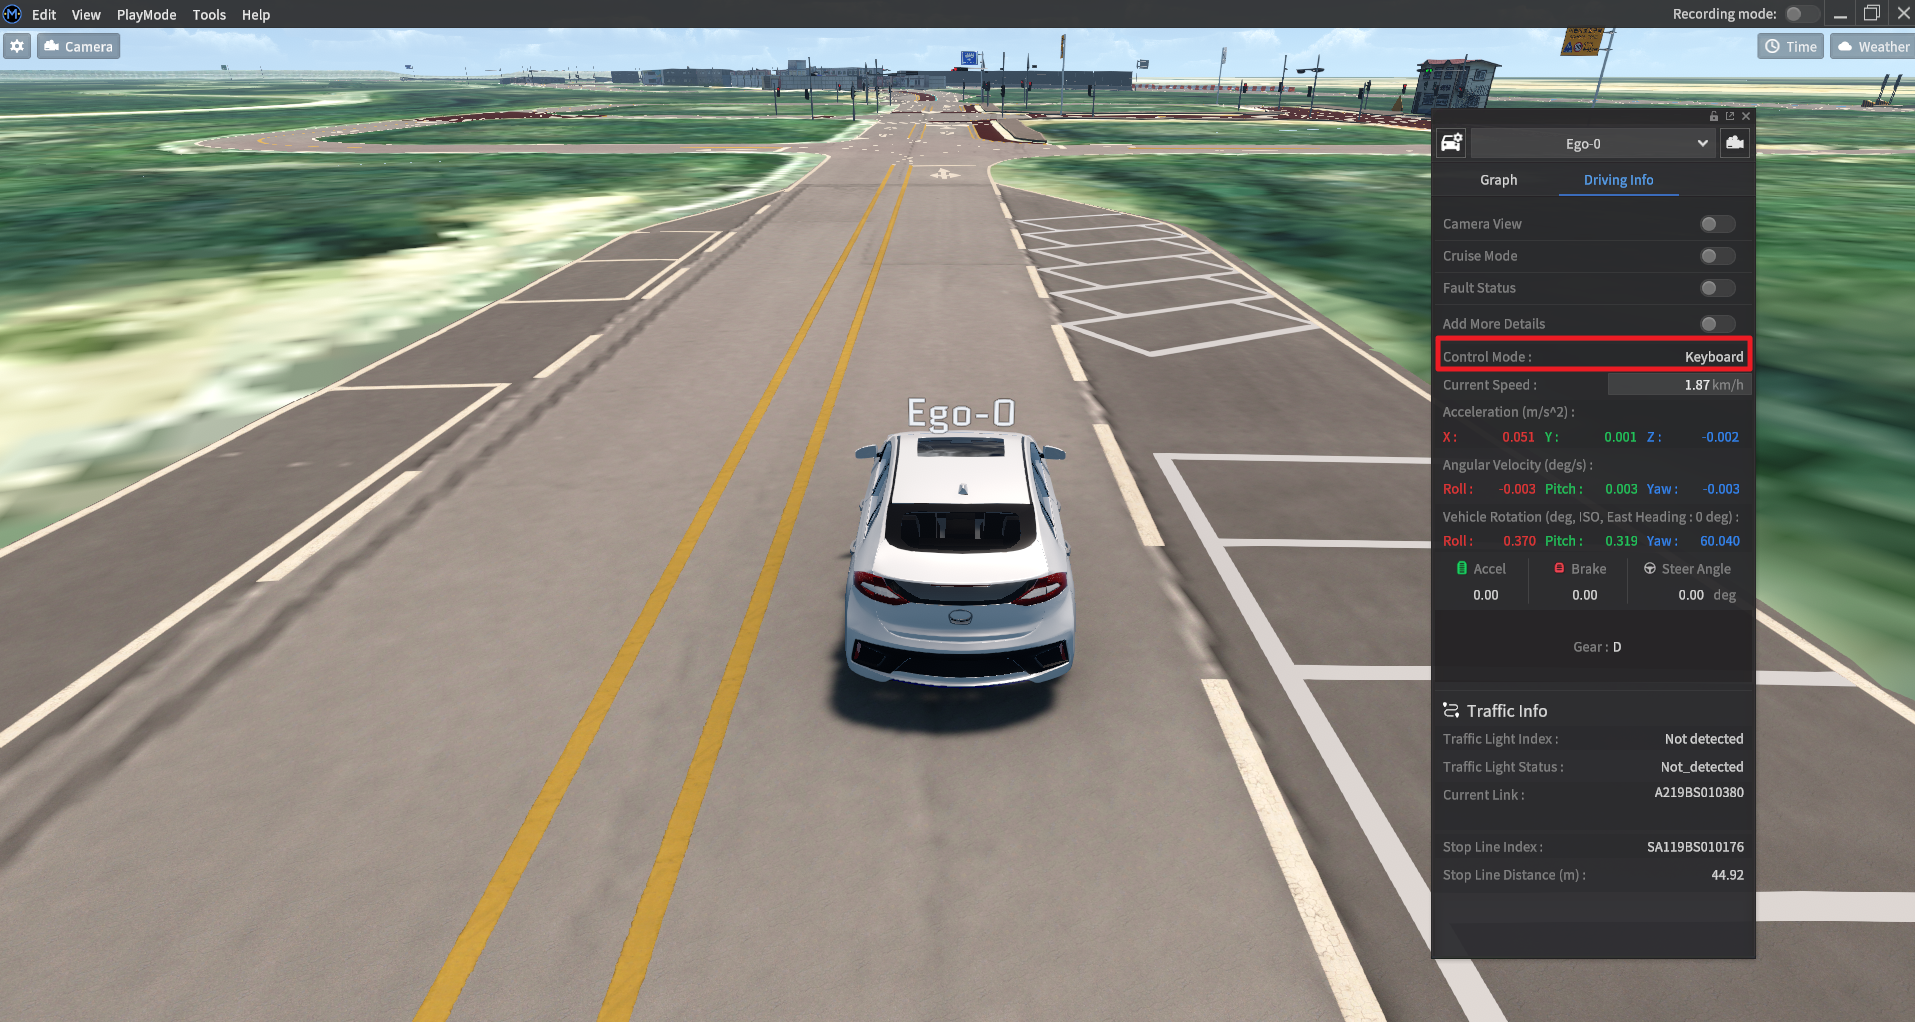
Press Q on Simulator screen to transition from Keyboard Mode to AutoMode
When changing to AutoMode, you can see the vehicle driving on its own.
The current drive mode can be checked by clicking the ego-vehicle, selecting the Driving Info tab, and inspecting the output of the current Control Mode.