Recording and re-doing scenarios with Re-Sim
The Re-Sim function allows users to record their simulations to save and playback later. Set up a simulation to record replayable data, scrub through the file, and overlay a recorded simulation playback scene with another simulation to compare results with Re-Sim.
The benefit of Re-Sim is the ability to take control of a recorded scenario at any point in time. This feature will allow users to find precisely when an issue occurred, and re-do that scenario under identical conditions.
Starting Re-Sim
The first step to using Re-Sim is to bring up the Re-Sim Manager window. Go to Edit >> Scenario >> Re-Sim Manager. Users can begin recording a scenario, start replaying an already recorded simulation, or close the manager window with the cancel button.
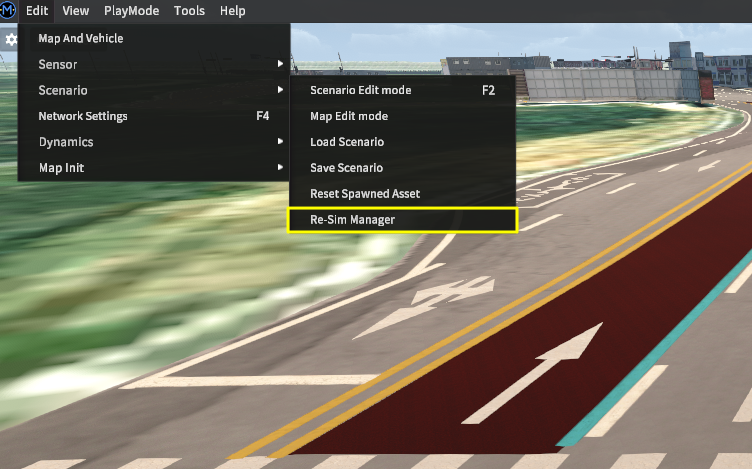
Accessing the Re-Sim Manager menu
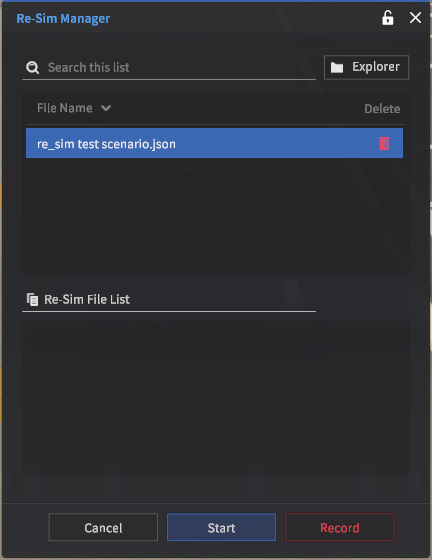
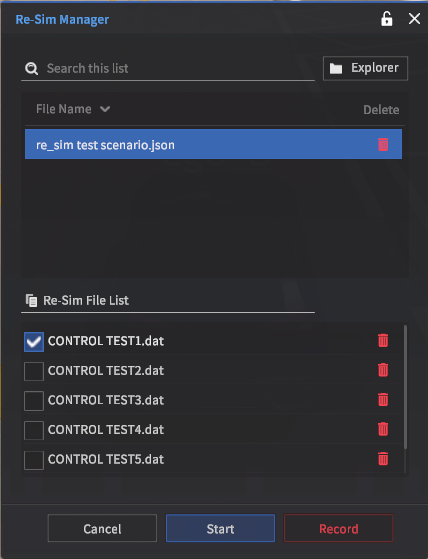
The top half of the window lists scenario .json files associated with the currently loaded map/environment, while the bottom half lists recorded Re-Sim .dat files associated with the selected scenario file.
Use the Record and Start buttons located along the bottom to enter their respective Record or Playback modes.

Re-Sim Manager GUI
Recording simulation scenarios
Before we start
Recording a simulation scenario requires the user to start from a saved scenario (read on how to create and save a scenario within MORAI SIM: Drive here).
This restriction is put in place to prevent users from starting a Re-Sim recording from a volatile state (such as taking a snapshot of the current simulation).
From the Re-Sim Manager window, select a scenario .json file and press Record.
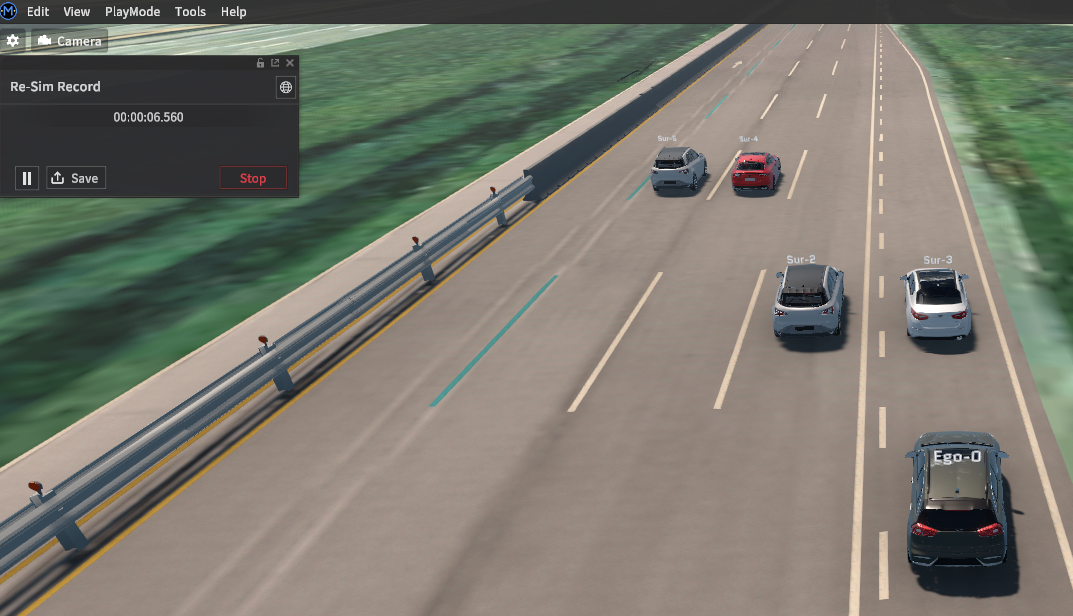
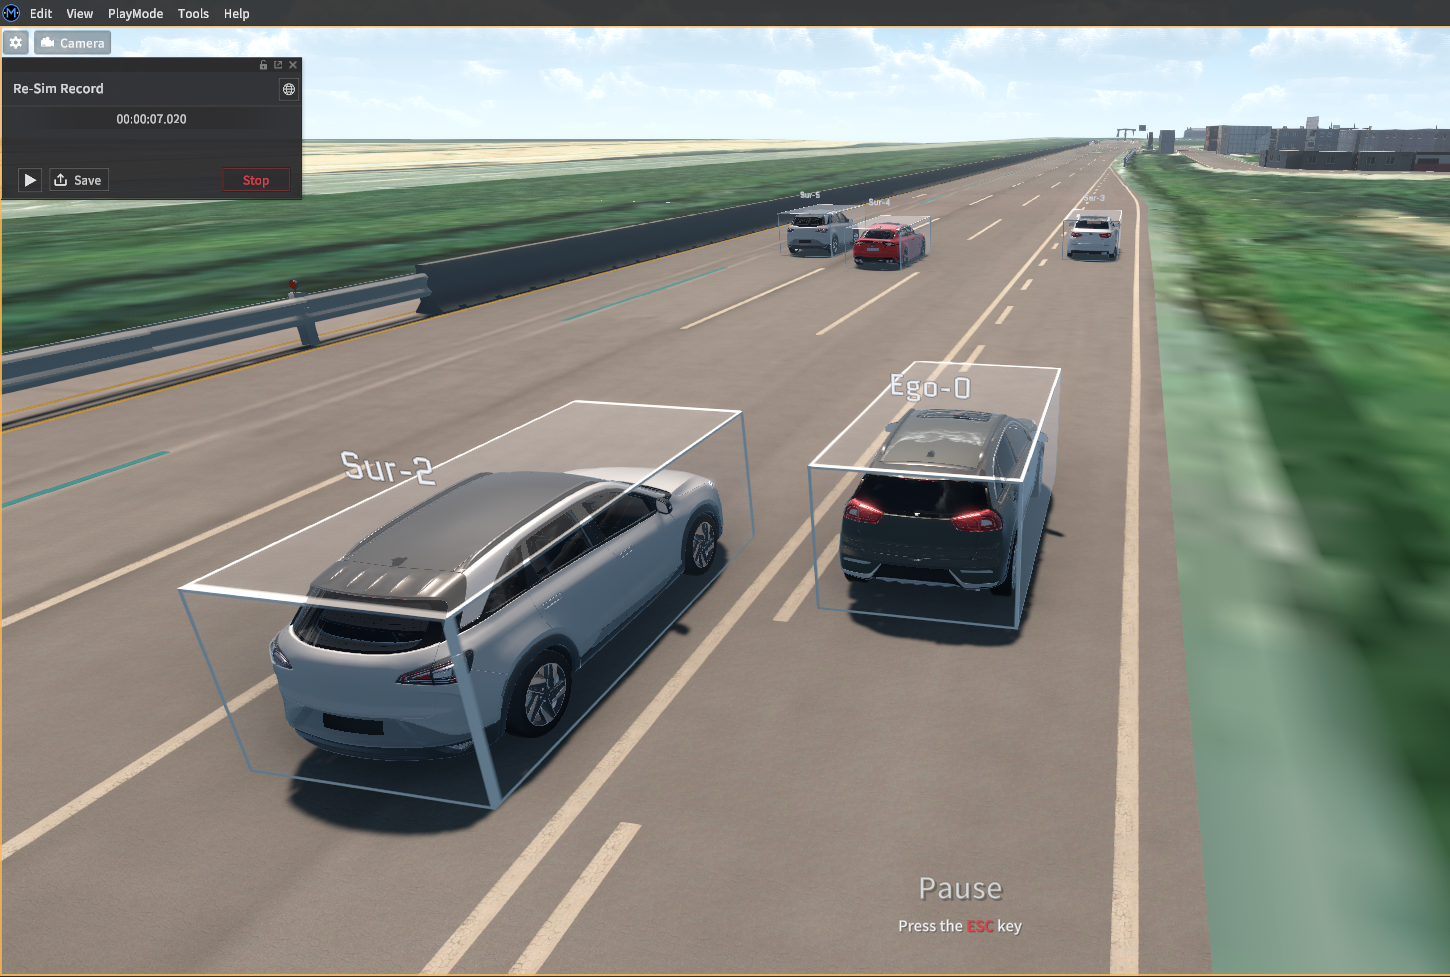
This will load the scenario in a paused state. Instead of the usual object list in the upper-left corner, is a new Re-Sim Record panel. This panel allows users to control the entire recording process from starting the recording to saving and exiting back to the Manager panel.
Press the Play button (▶) to unpause the scenario and begin recording the simulation. While recording, the current timestamp will continue to increase.
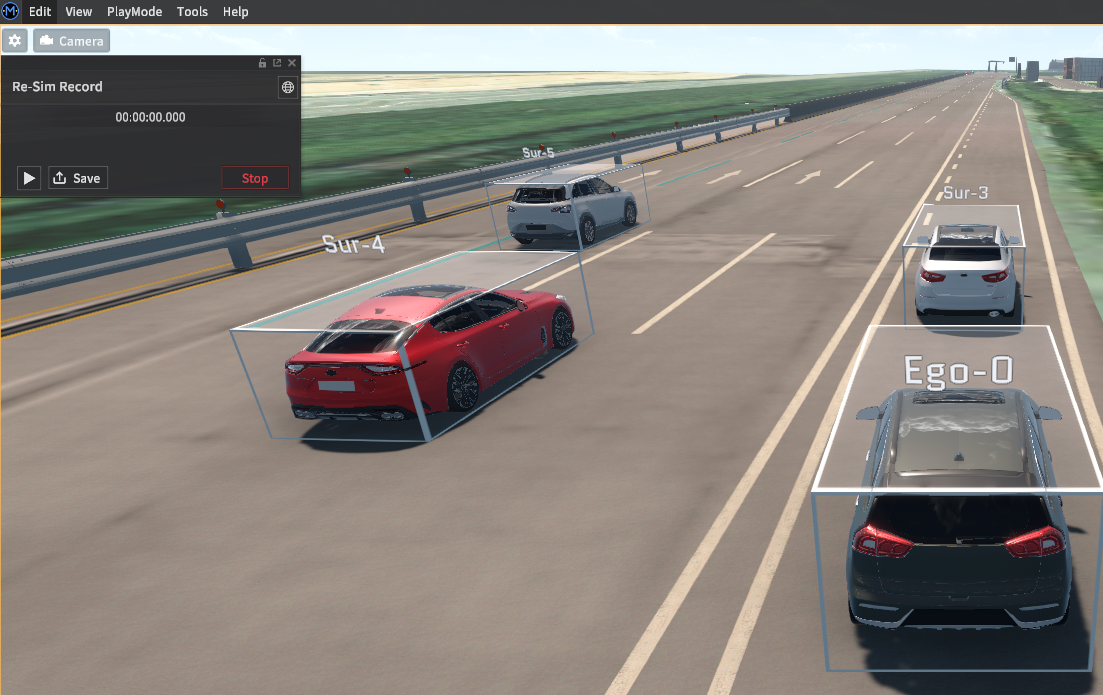
During the recording phase, the Play button will become a Pause (⏸) button, which you can use to temporarily halt recording. Users can go back and forth between the recording and pause phases to adjust the currently recording scene as needed.
Once the recording is complete, press the Save button to package all of the recorded data being held in memory. Skipping this step will discard all recorded data.
To exit the recording phase, press the red Stop button. If data was not saved before clicking Stop, all unsaved recorded data will be discarded.
Re-Sim’s data file structure
Re-Sim data files have a unique relationship that requires both the scenario .json files and the resulting recorded .dat files to begin playing back a re-simulation. The scenario files act as the initial condition, while the recorded data files are the changes to the simulation state recorded per simulation time frame.
Recorded data files are saved in their respective folders within the scenario savefile folder and are located in the following directories:
scenario
.jsonfiles:/MoraiLauncher_{os}_Data/SaveFile/Scenario/{Map Name}/.datfiles:/MoraiLauncher_{os}_Data/SaveFile/Scenario/{Map Name}/{Scenario File Name}
Playing back a recorded simulation
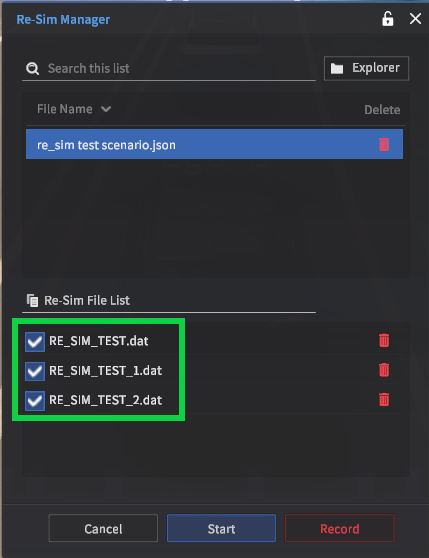
From the Re-Sim Manager window, select a Re-Sim record .dat file (from the bottom half of the Re-Sim Manager panel) and press Start. Note that recorded data files will only appear once a corresponding scenario file is selected beforehand.
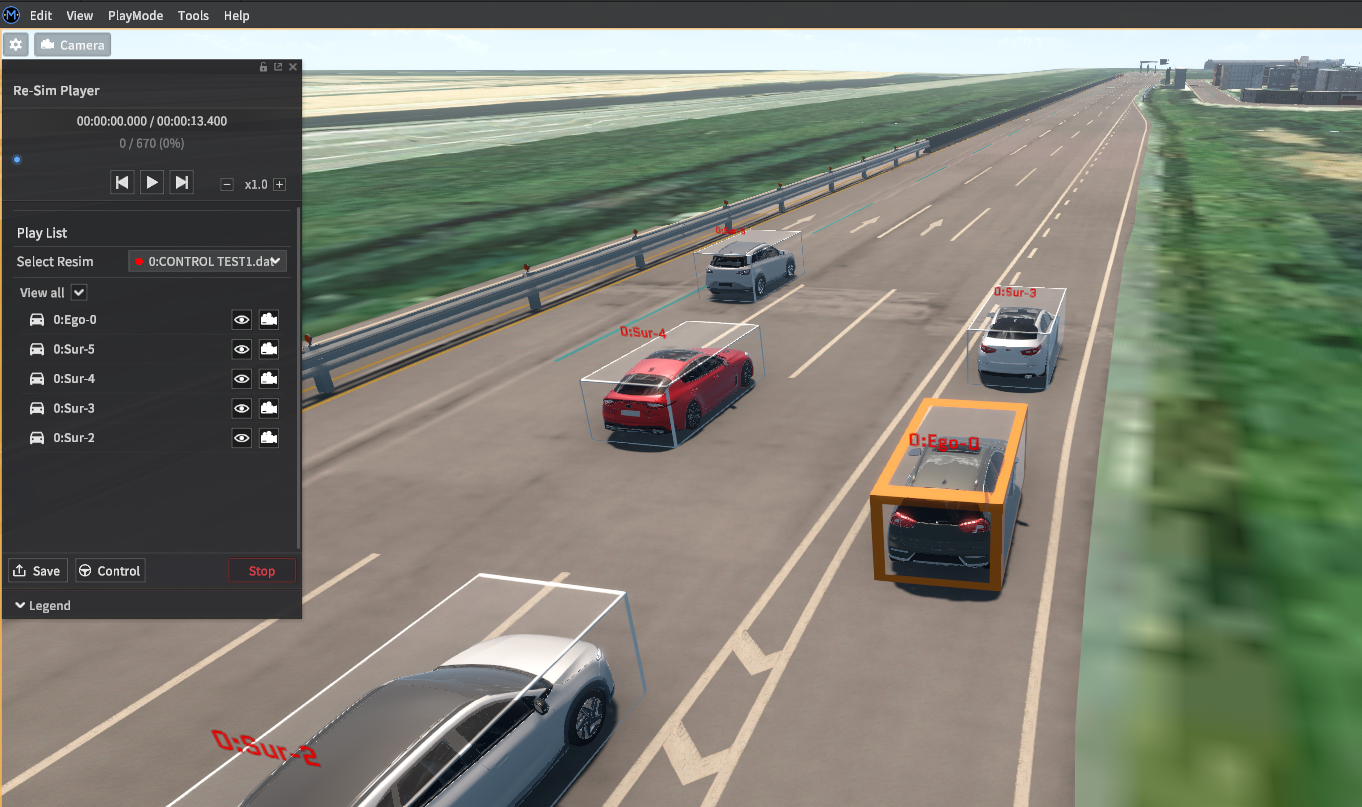
Just like the recording phase, the recorded data is loaded in a paused state. This time, in the upper-left corner, is the Re-Sim Player panel. This panel now controls the re-simulation phase.
The Re-Sim Player panel is divided into two sections: a Playback controller and the Playlist panel.
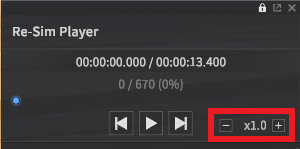
The Re-Sim Player playback controller panel
The playback controller can play, pause, fast-forward, rewind, and change the playback speed of the loaded recorded simulation data. The panel resembles the traditional scrubber UI of most conventional video entertainment software.
The play and pause buttons respectively start and temporarily pause the simulation. The fast-forward and rewind buttons will advance or rewind the simulation by a single frame, allowing the user to fine-tune the precise time interval they would like to examine.
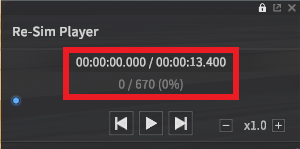
Like any scrubber, click and drag the progress bar (the blue dot between the time stamps and the play buttons) to quickly search through the recorded simulation data. Timestamps are displayed in a UNIX hh:mm:ss.sss format, or t/tn where t is the current time step count and tn is the total number of timesteps.

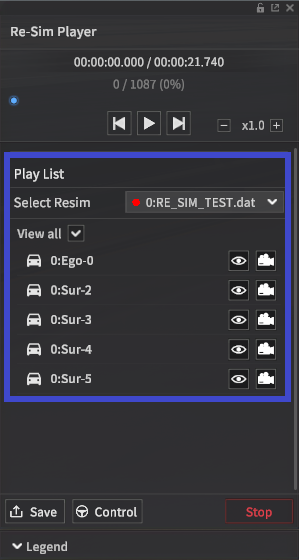
The Playlist panel
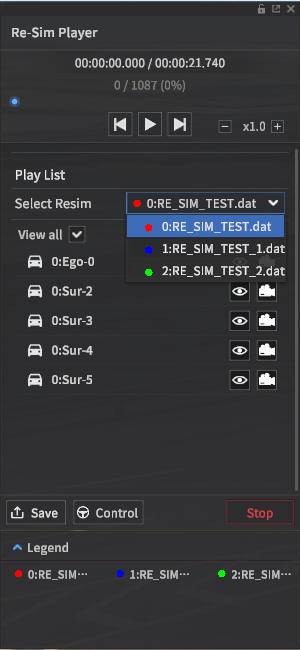
The Playlist panel gets its name from its main functionality - selecting from a list which recorded data file to re-simulate. The Select Resim drop-down menu will be populated with all the different .dat files associated with the current scenario. Each of these recorded data files can be simultaneously replayed by using the overlay feature which we explain here.
The typical use case, however, is to simply load a single .dat file.
All the vehicle models within the current re-simulation are listed in the panel below Select Resim. Each vehicle ID is accompanied by a toggleable eye icon and a camera icon button. Toggling the eye icon button will show or hide each individual vehicle model. The camera button will focus the current camera view on the selected vehicle. Use these buttons as a filter to identify the vehicles within the simulation scene. These visualization tools will become much more useful when handling multiple simulation recordings.
To exit the Playlist panel and end the re-simulation, press the Stop button in the bottom-right corner. This will return the user back to Re-Sim Manager mode.
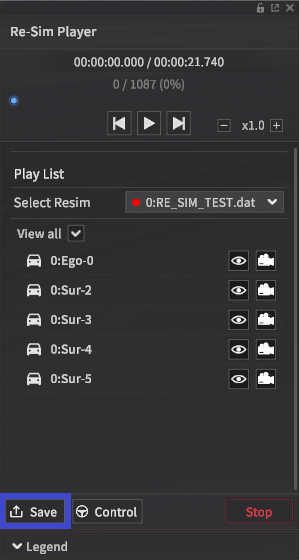
Saving new scenarios from re-simulation
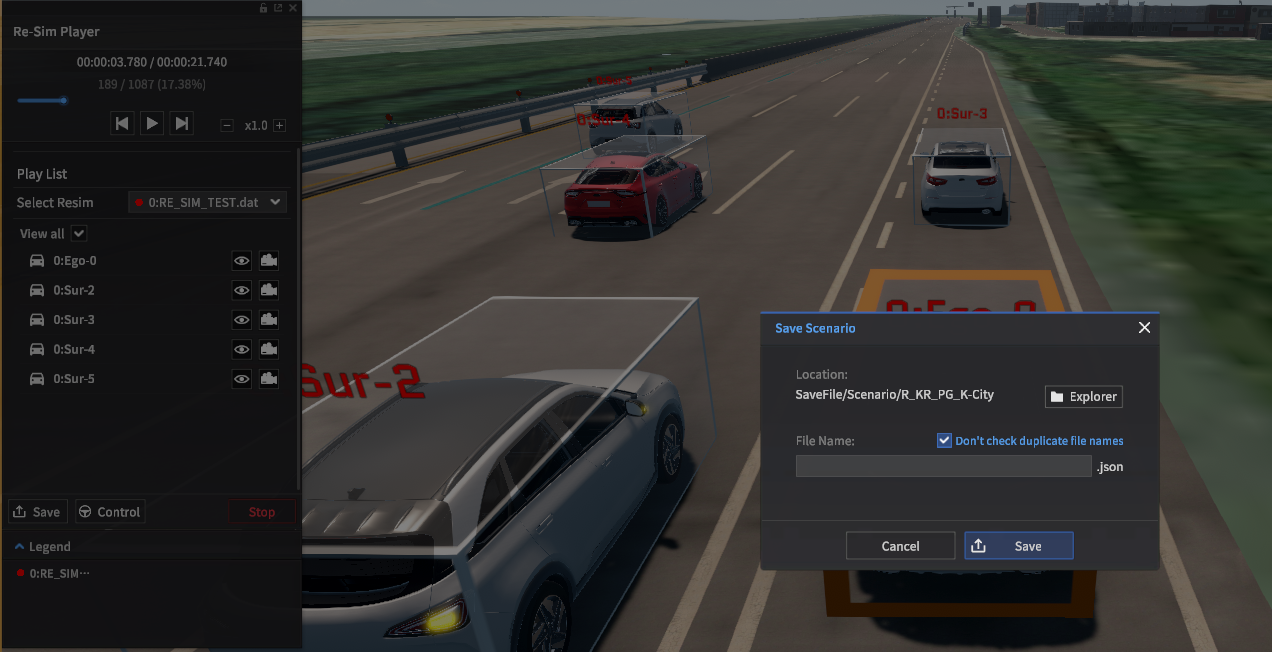
The Save button in the bottom-left corner can take a snapshot of the re-simulation’s current time step to build an entirely new scenario for further analysis. Once the user hits the Save button, a save UI will pop up and prompt the user to save a new scenario .json file.
Taking control at any point
Because Re-Sim is essentially re-enacting the simulation from a recorded initial state, it is possible to take control of the ego-vehicle and re-do the scenario from any desired point in time within the recorded data.
The Control button located next to the Save button in the bottom-left corner will immediately exit the Re-Sim Player and return to the Re-Sim Record mode. During this switch, the simulation state at the timestamp the Control button was pressed is saved and loaded back into the simulation scene. From this state, you can now modify the scenario or directly control a vehicle. Use this Control feature to run regression tests or to test the effect of changes to your AV software.
Playing multiple simulation files together with the overlay function
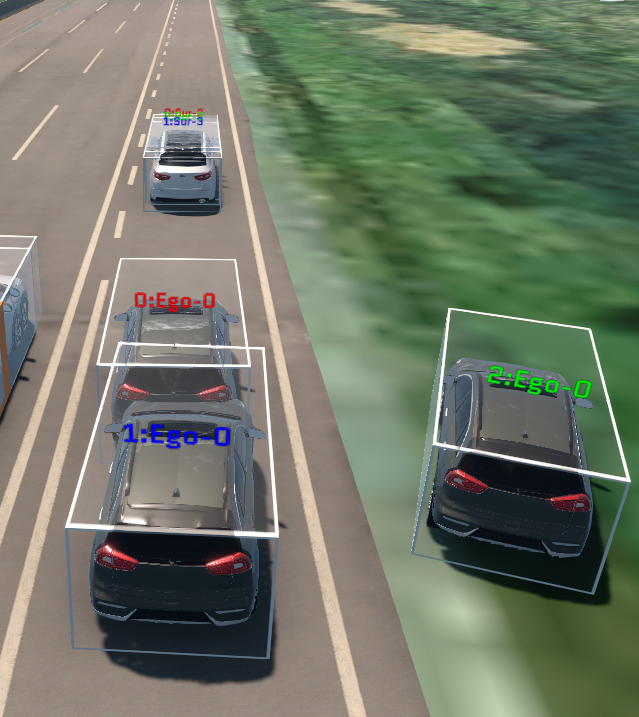
The Overlay feature enables multiple recorded data .dat files to be played simultaneously. Each file is differentiated by color labels, which are listed in the legend located along the bottom of the Playlist panel. Overlay supports playing ten different recorded data files at the same time.
To use the Overlay feature, simply select multiple recorded simulation data files from the Re-Sim Manager window.
After pressing Start to begin the re-simulation, the Select Resim drop-down menu should be populated with options that match the names of all the .dat files selected.
Once we load in, all vehicles are displayed within the simulation scene, and each vehicle’s source data file can be identified by the color of its label.