Autoware.AI quick start manual
This Quick Start Manual is a quick walkthrough to set up an interface between MORAI SIM and a sample autonomous driving algorithm stack. It is intended to provide first-time users a chance to familiarize themselves with the different features of MORAI’s simulation environment. It will not provide in-depth explanations or how-to's for specific features and/or functions - please refer to the rest of the documentation for details.
NOTICE All examples in this guide are run on the K-City Map (map code: R_KR_PG_K-City) distributed with MORAI SIM. If you do not have access to this map, please contact your account manager or reach out to a representative over any of our channels for support.
The Autoware.AI quick start manual is only applicable for native Ubuntu systems (Cannot be run with a VM)
Environment Setup
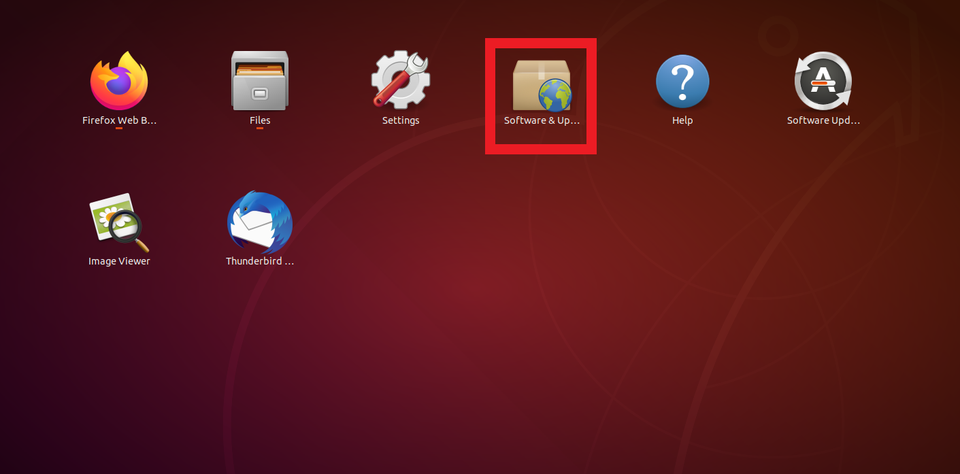
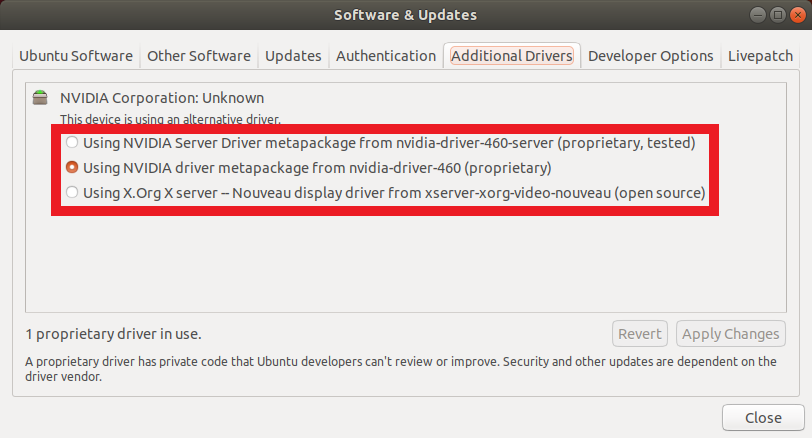
Graphics Drivers
Enable NVIDIA drivers within your Linux installation.
Docker Installation
Install Docker for Autoware using the code snippet below. Refer to this Gitlab link for more detailed instructions.
$ sudo apt-get update
$ sudo apt-get install apt-transport-https ca-certificates curl software-properties-common
$ curl -fsSL https://download.docker.com/linux/ubuntu/gpg | sudo apt-key add -
$ sudo apt-key fingerprint 0EBFCD88
$ sudo add-apt-repository "deb [arch=amd64]   $(lsb_release -cs) stable"
$ sudo apt-get update
$ sudo apt-get install docker-ce NVIDIA Docker Installation
To use NVIDIA graphics within Docker, a separate container provided by NVIDIA must also be installed. Use the commands shown here.
$ distribution=$(. /etc/os-release;echo $ID$VERSION_ID) && curl -s -L https://nvidia.github.io/nvidia-docker/gpgkey | sudo apt-key add - && curl -s -L https://nvidia.github.io/nvidia-docker/$distribution/nvidia-docker.list | sudo tee /etc/apt/sources.list.d/nvidia-docker.list
$ sudo apt-get update
$ sudo apt-get install -y nvidia-docker2
$ sudo pkill -SIGHUP dockerd
$ sudo usermod -a -G docker $USER
$ sudo service docker restartDownload Autoware
Clone the Autoware.AI docker (we will be using it later on) and MORAI’s example code library (shared_dir)
$ cd ~  && git clone https://gitlab.com/autowarefoundation/autoware.ai/docker.git
$ git clone https://gitlab.com/gusto94/shared_dir.gitNetwork Setup
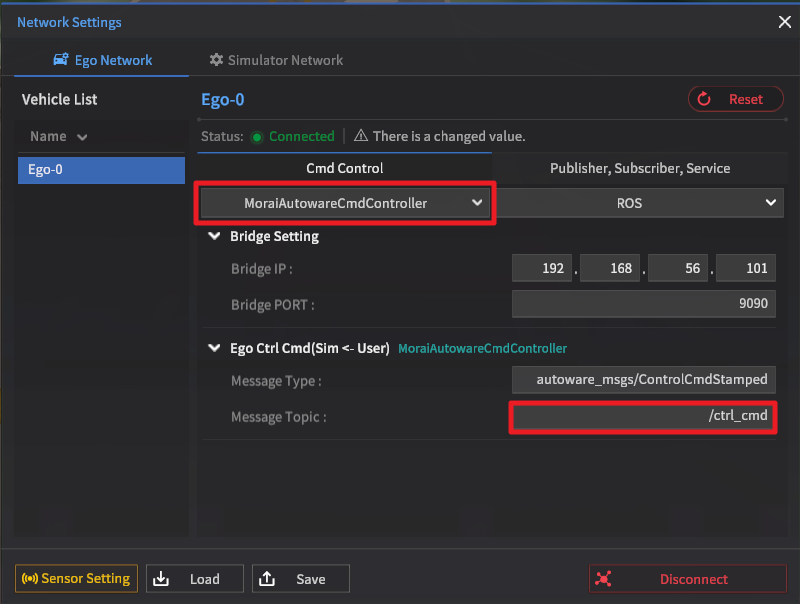
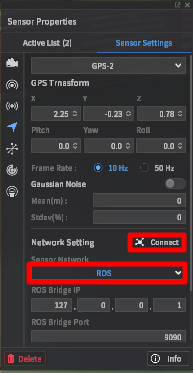
Configure MORAI SIM network settings as shown below.
ROS message topics typically come pre-programmed with a default name, but for the purposes of this tutorial, we will change the topics of three messages. Leave the remaining fields unchanged.
Ego Ctrl Cmd (Sim ← User)
Message Type: autoware_msgs/ControlCmdStamped
Default Topic: /autoctrl_cmd → /ctrl_cmd
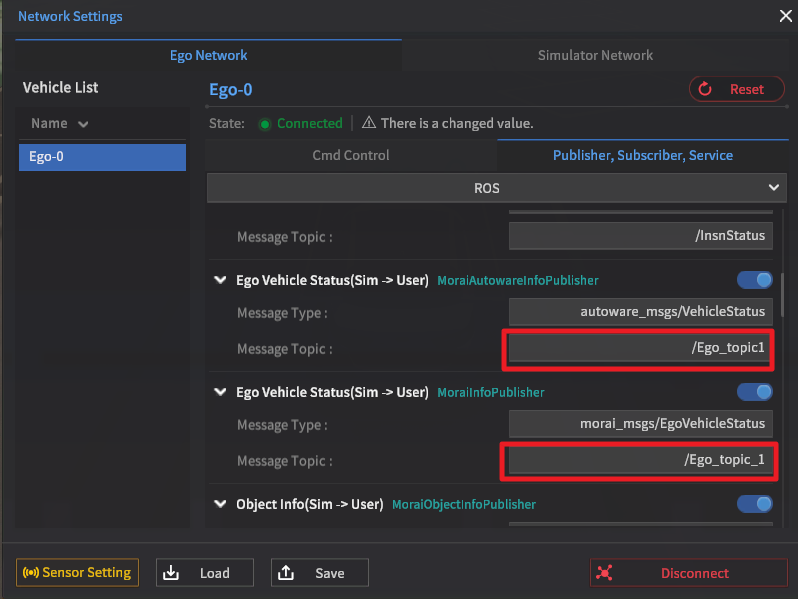
Ego Vehicle Status (Sim → User) - MoraiAutowareInfoPublisher
Message Type: autoware_msgs/VehicleStatus
Default Topic: /Ego_topic → /Ego_topic1
Ego Vehicle Status (Sim → User) - MoraiInfoPublisher
Message Type: morai_msgs/EgoVehicleStatus
Default Topic: /Ego_topic → /Ego_topic_1
Sensor Settings
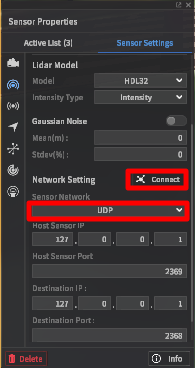
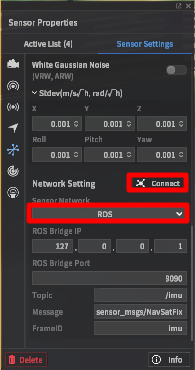
Set GPS, IMU, and camera sensors to communicate through ROS. Set all Lidar sensors attached to use UDP. Remember to click the Connect button once settings for each sensor model are finalized.

Run Autoware
Run the Autoware Docker
$ sudo docker/generic/run.sh -s -i oveflow/autoware -t 2.0.5

Run Terminator (or multiple terminals)
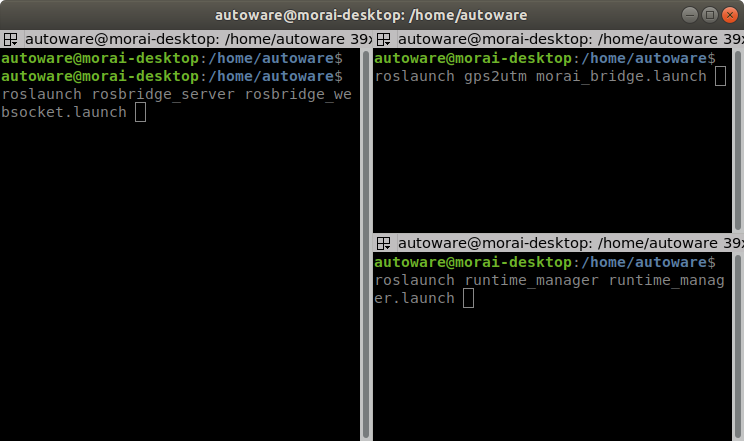
Once the Autoware container is up and running, launch the rosbridge for MORAI SIM, then the Autoware runtime manager. Either use multiple terminals as usual or make use of an emulator for multiple terminal windows (e.g. Terminator).
$ roslaunch rosbridge_server rosbridge_websocket.launch
$ roslaunch gps2utm morai_bridge.launch
$ roslaunch runtime_manager runtime_manager.launchAs shown in the example below, an emulator helps visualize multiple terminals in a single interface.
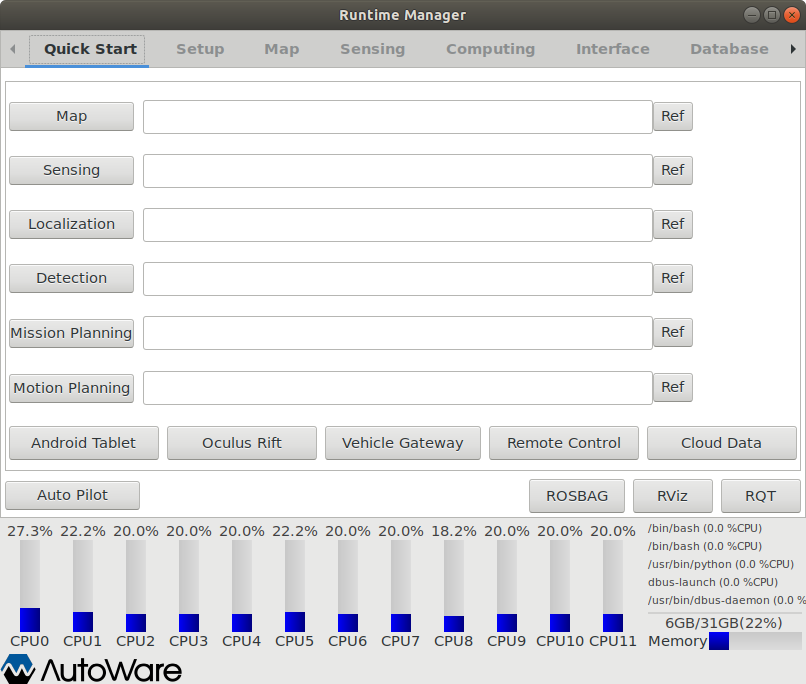
Once the Autoware Runtime Manager starts, the following screen should appear.
Setting up Autoware and Drive Testing
Configuring the Autoware Runtime Manager
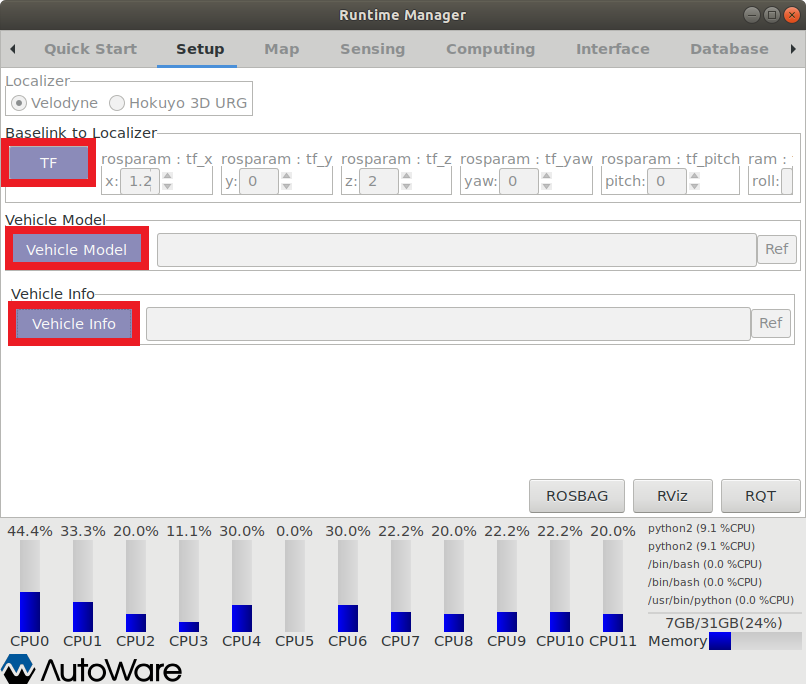
Setup
Under the Setup tab, enable the TF, Vehicle Model, and Vehicle Info fields.
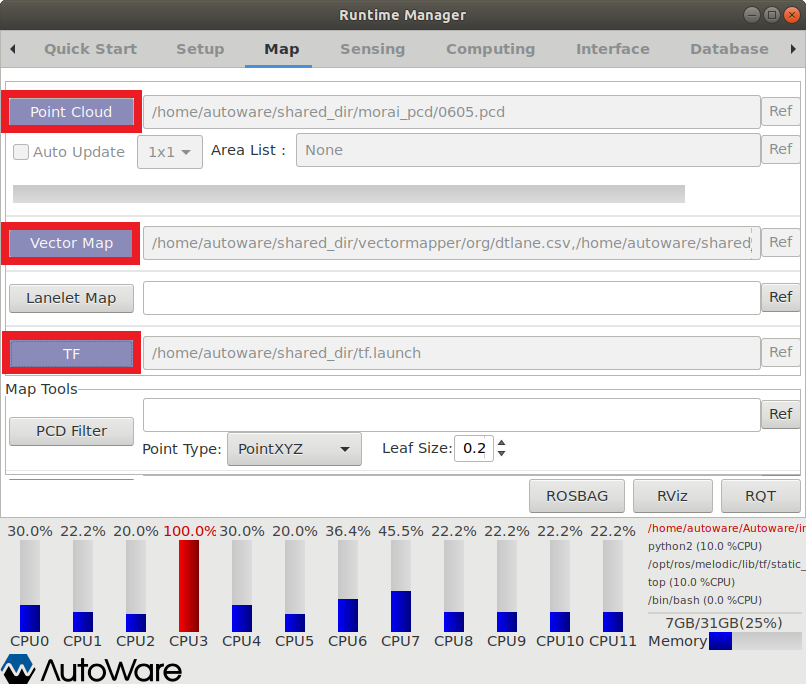
Map
Under the Map tab, enable the Point Cloud, Vector Map, and TF fields.
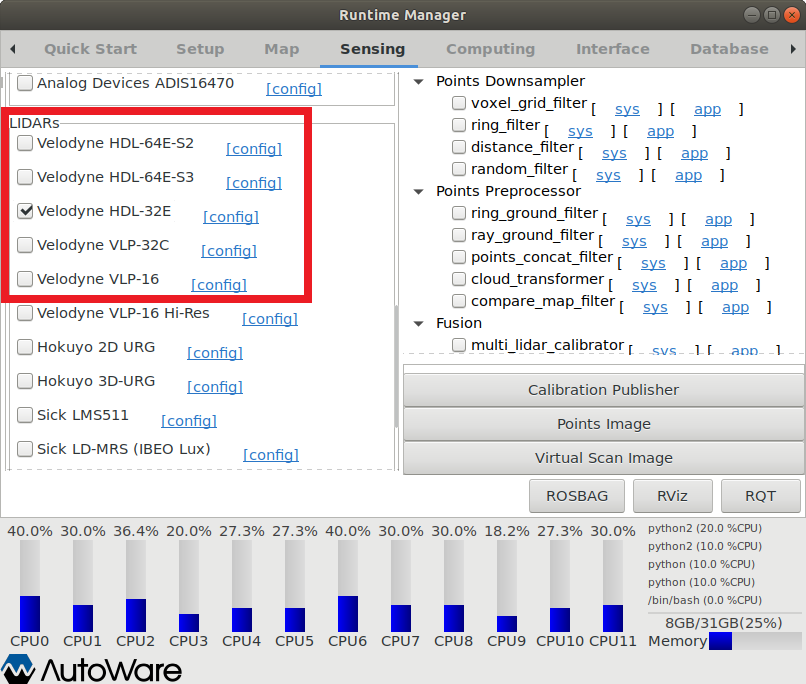
Sensing
Select the lidar sensor model to match the one selected within MORAI SIM.
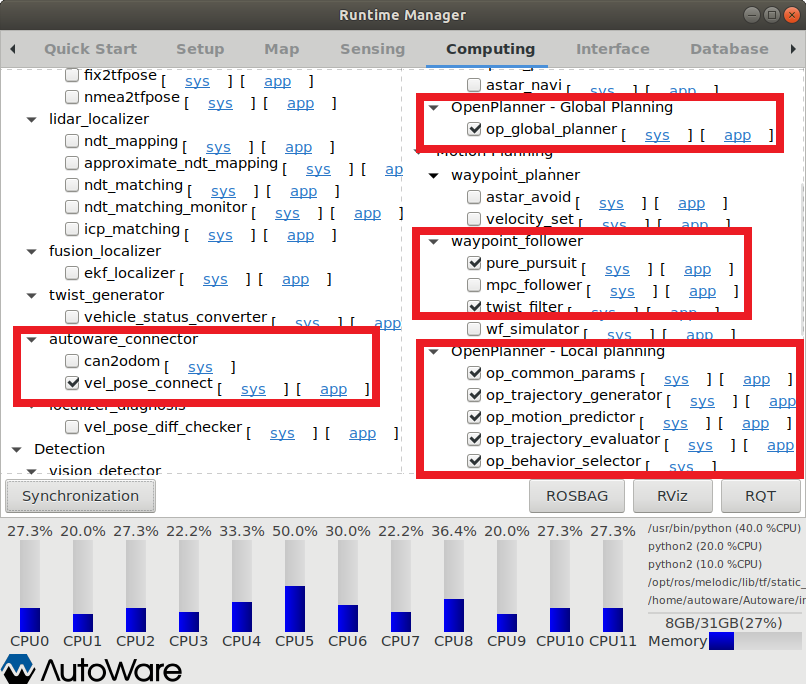
Computing
Enable the options as shown in the screenshot below.
autoware_connector
vel_pose_connect
OpenPlanner - Global Planning
NOTE (Global planning must be selected before generating a local path with Local planning)op_global_planner
OpenPlanner - Local planning
op_common_params
op_trajectory_generator
op_motion_predictor
op_trajectory_evaluator
op_behavior_selector
waypoint_follower
pure_pursuit
twist_filter
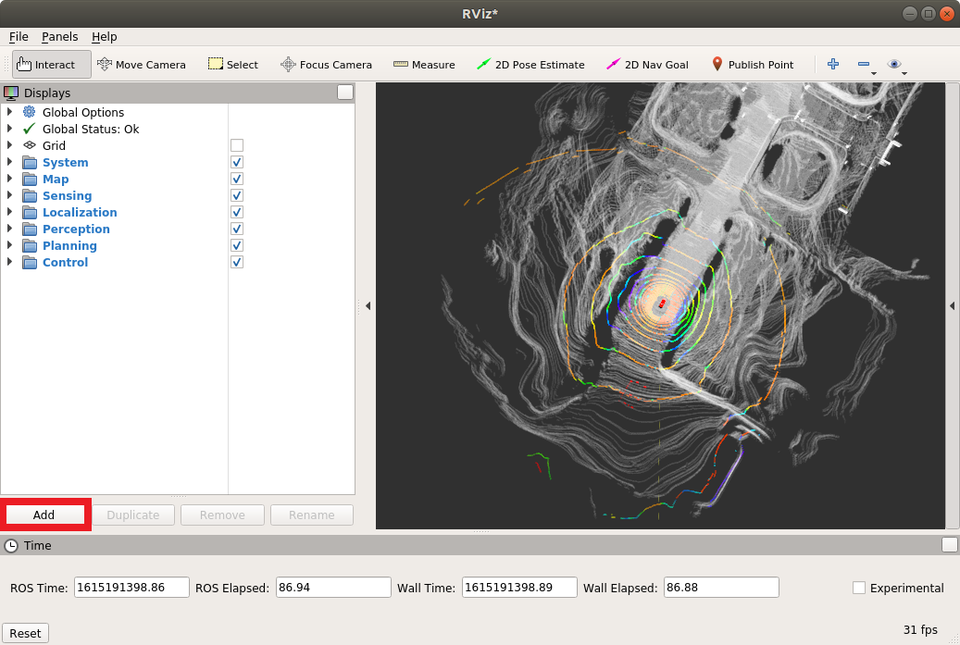
Initialzing with RViz
Click the RViz button in the lower right-hand corner of Runtime Manager.
In the lower left-hand corner of Rviz, click Add - By topic and add the following two rostopics as follows.
/vector_map_center_lines_rviz (Generate global_path)
This generates the global path - we can set the start and end points by setting pose values.2D Pose Estimate (Start location)
2D Nav Goal (End location)
/local_trajectories_eval_rviz
This then generates the local path.

Run MORAI SIM
Once everything is ready in Autoware, shift the ego-vehicle in MORAI SIM to Auto mode by pressing the Q key on the keyboard (while MORAI SIM is in focus).
The ego-vehicle should immediately start mirroring the vehicle in Autoware.