Simulator Settings and UI
Empty vehicle
By selecting the Map and Vehicle Menu, the Empty Vehicle can be selected via accessing the Vehicle tab.
Empty Vehicle
After selecting the Empty Vehicle, the viewpoint can be easily movable by manipulating the keyboard
W, S: front and back
A, D: left and right
Z, C: top and bottom
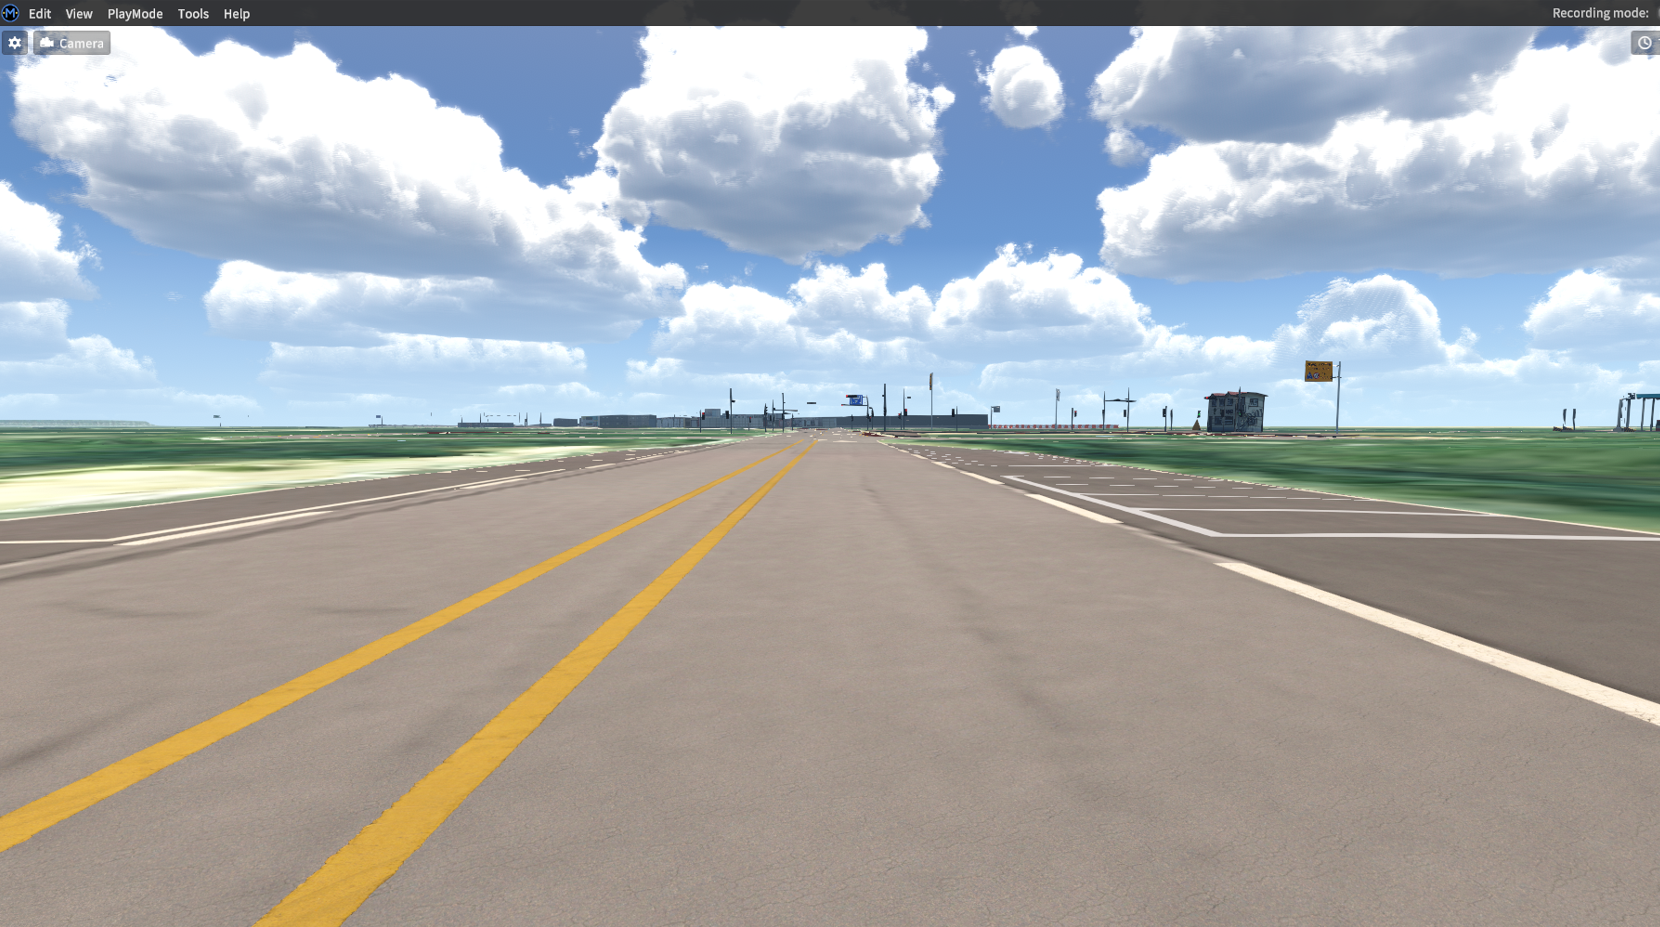
Screen: K-City Map without vehicle
Simulator Options Menu
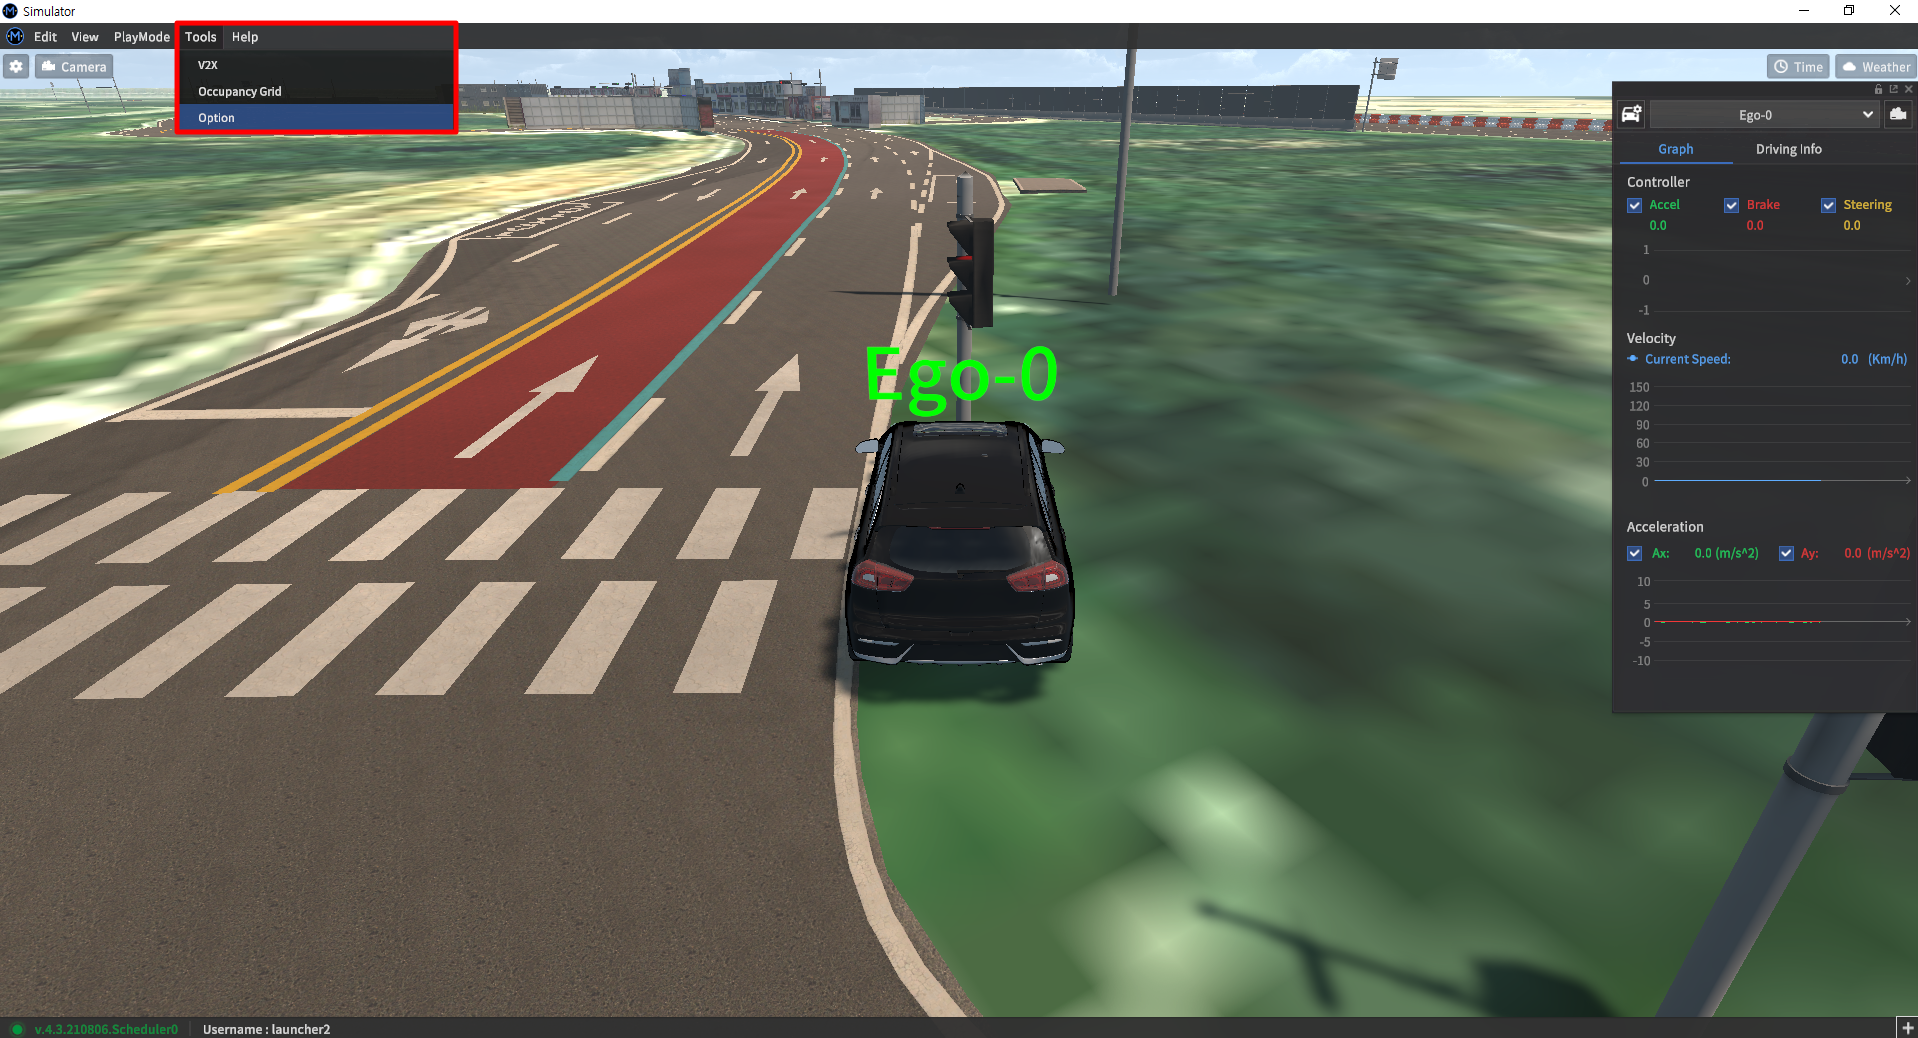
Access simulation settings through the Tools >> Option menu located on the main menu bar. Graphics quality, environmental settings, display options, and other user preferences can be enabled and disabled from the Options menu.
System
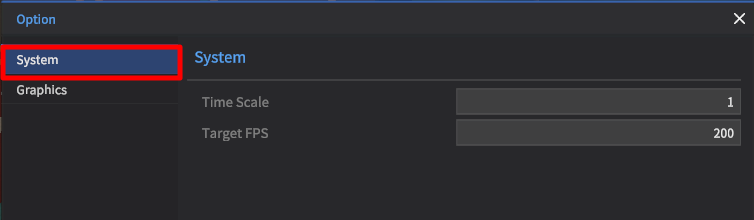
Time Scale: Adjust the speed of the simulation. Input value ranges are [0 : 2].
Target FPS: The default value is set to 60, but can be changed.
Graphics
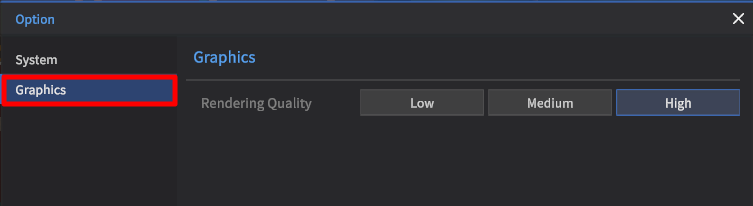
Quality: Sets graphics quality. It should be used only when computer performance issues prevent the use of the highest quality. Options are LOW, MID, or HIGH.
Environment Settings
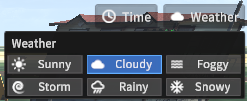
Environmental settings are changed by accessing the quick access menus located in the upper right-hand corner of the main simulator screen. Click either the Time or Weather button to expand the menus as shown in the figures below.


Time: Change the lighting of the scene by choosing a time. The default time setting is 1300hrs.
Weather: Change the weather condition of the scene during the simulation. The default weather set to Cloudy.
Display Modes
To accommodate a number of different use cases, MORAI SIM is equipped with a number of alternative display modes.
No Rendering
In No-rendering mode, the main visualization scene changes to a top-down 2D view. Objects are color-segmented by type. Access the feature from the main menu bar at PlayMode >> Graphics >> No Rendering.

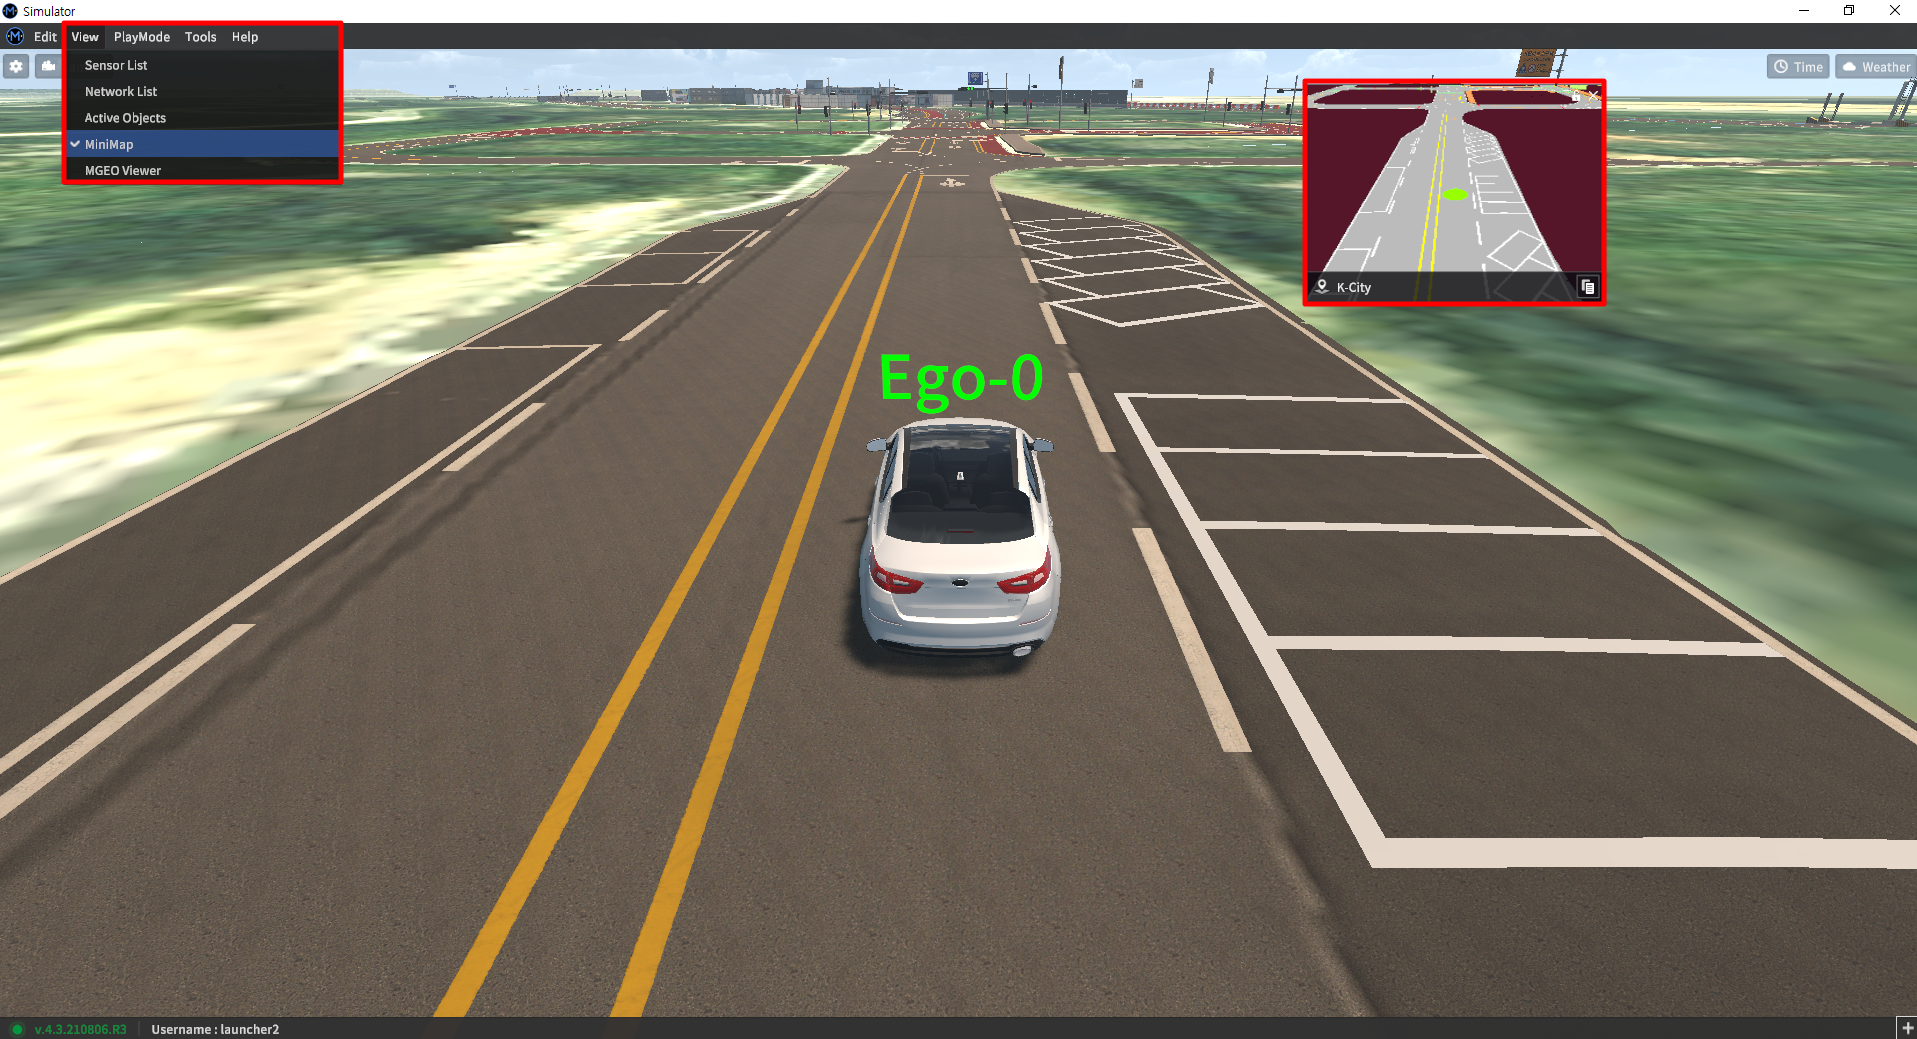
Mini Map
A small mini-map window appears in the upper-right corner of the main window. The mini-map is also color-segmented for ease of use. The mini-map toggle is located in View >> Minimap.
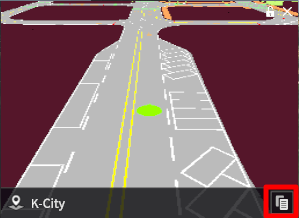
Map Details
When the mini-map window is active, the lower banner lists the name of the current map/environment and has a clickable copy icon button. Clicking the button will copy details on the current map’s projection and coordinate information.
Saving your settings
Re-opening multiple UI windows repeatedly can be a distraction and slow down workflows. The Workspace option can save up to five different windows and restore them on demand. Access Workspaces through View >> Workspace.
The workspaces saved will be listed at the top of the drop-down menu. Workspaces can be added with Save Workspace and removed with Delete Workspace.
Additionally, any changes made to these options are saved in a .config file within the installation directory.
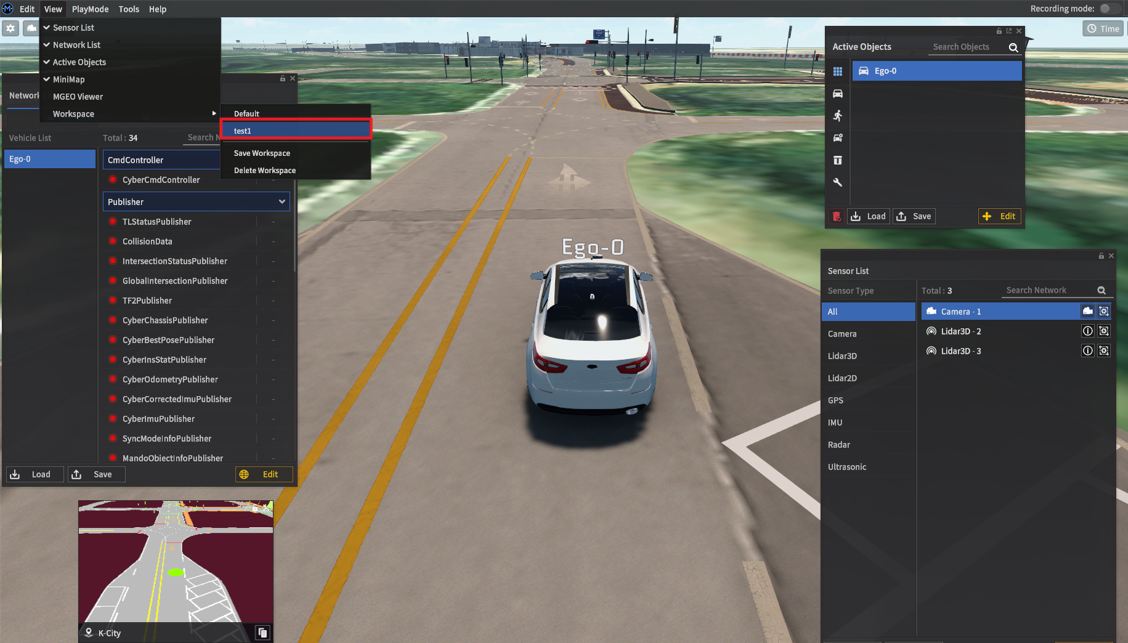
Display UI on test1 File.
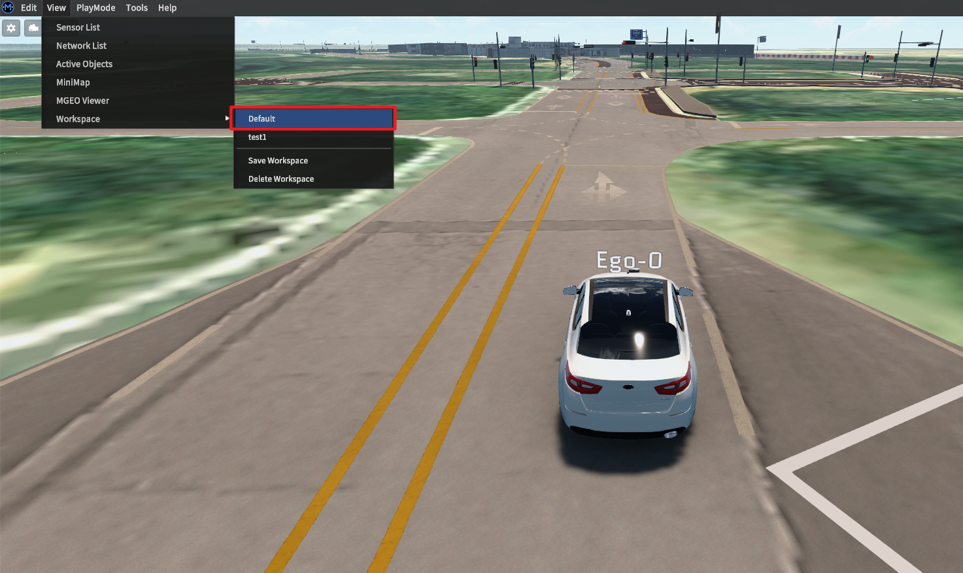
Display UI on Default File.
Viewport Settings
Viewport options toggle a number of useful information displays onto the main simulator screen. The Viewport Setting options are accessible through the gear icon button in the upper left corner of the main simulator screen.
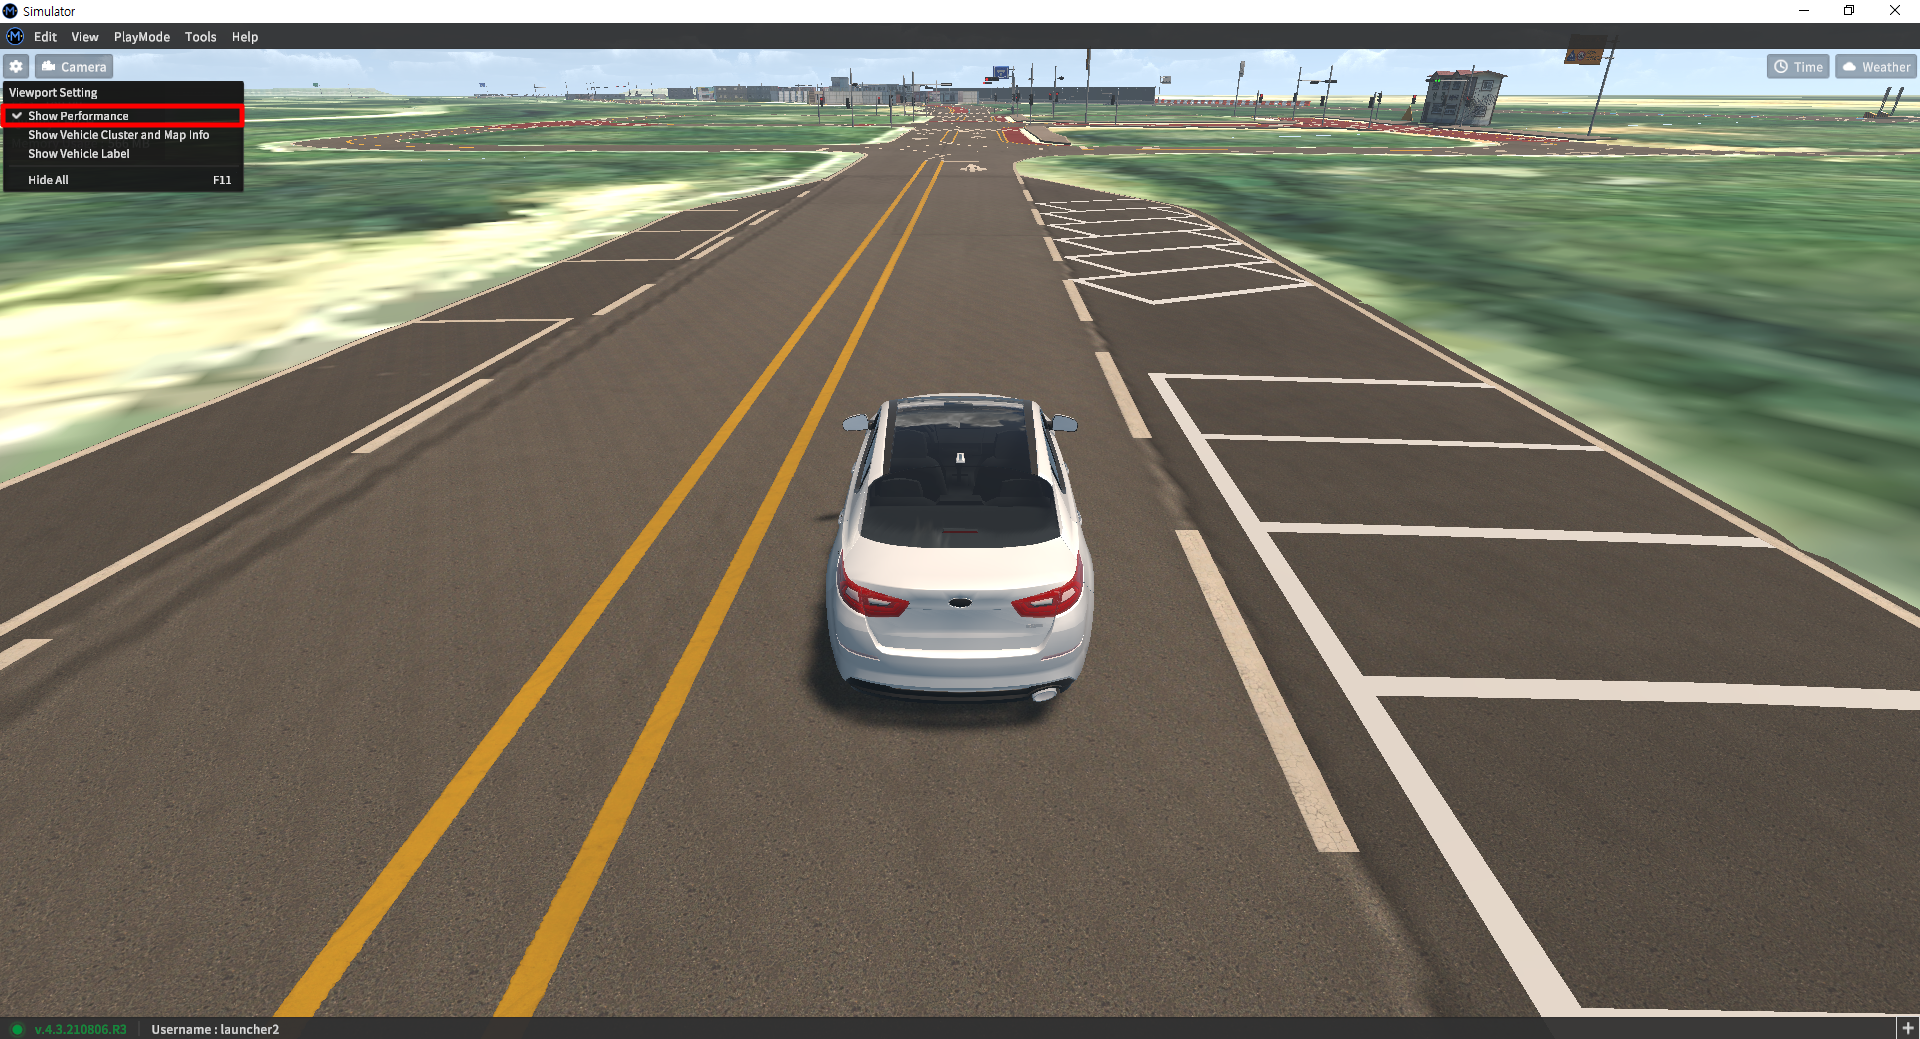
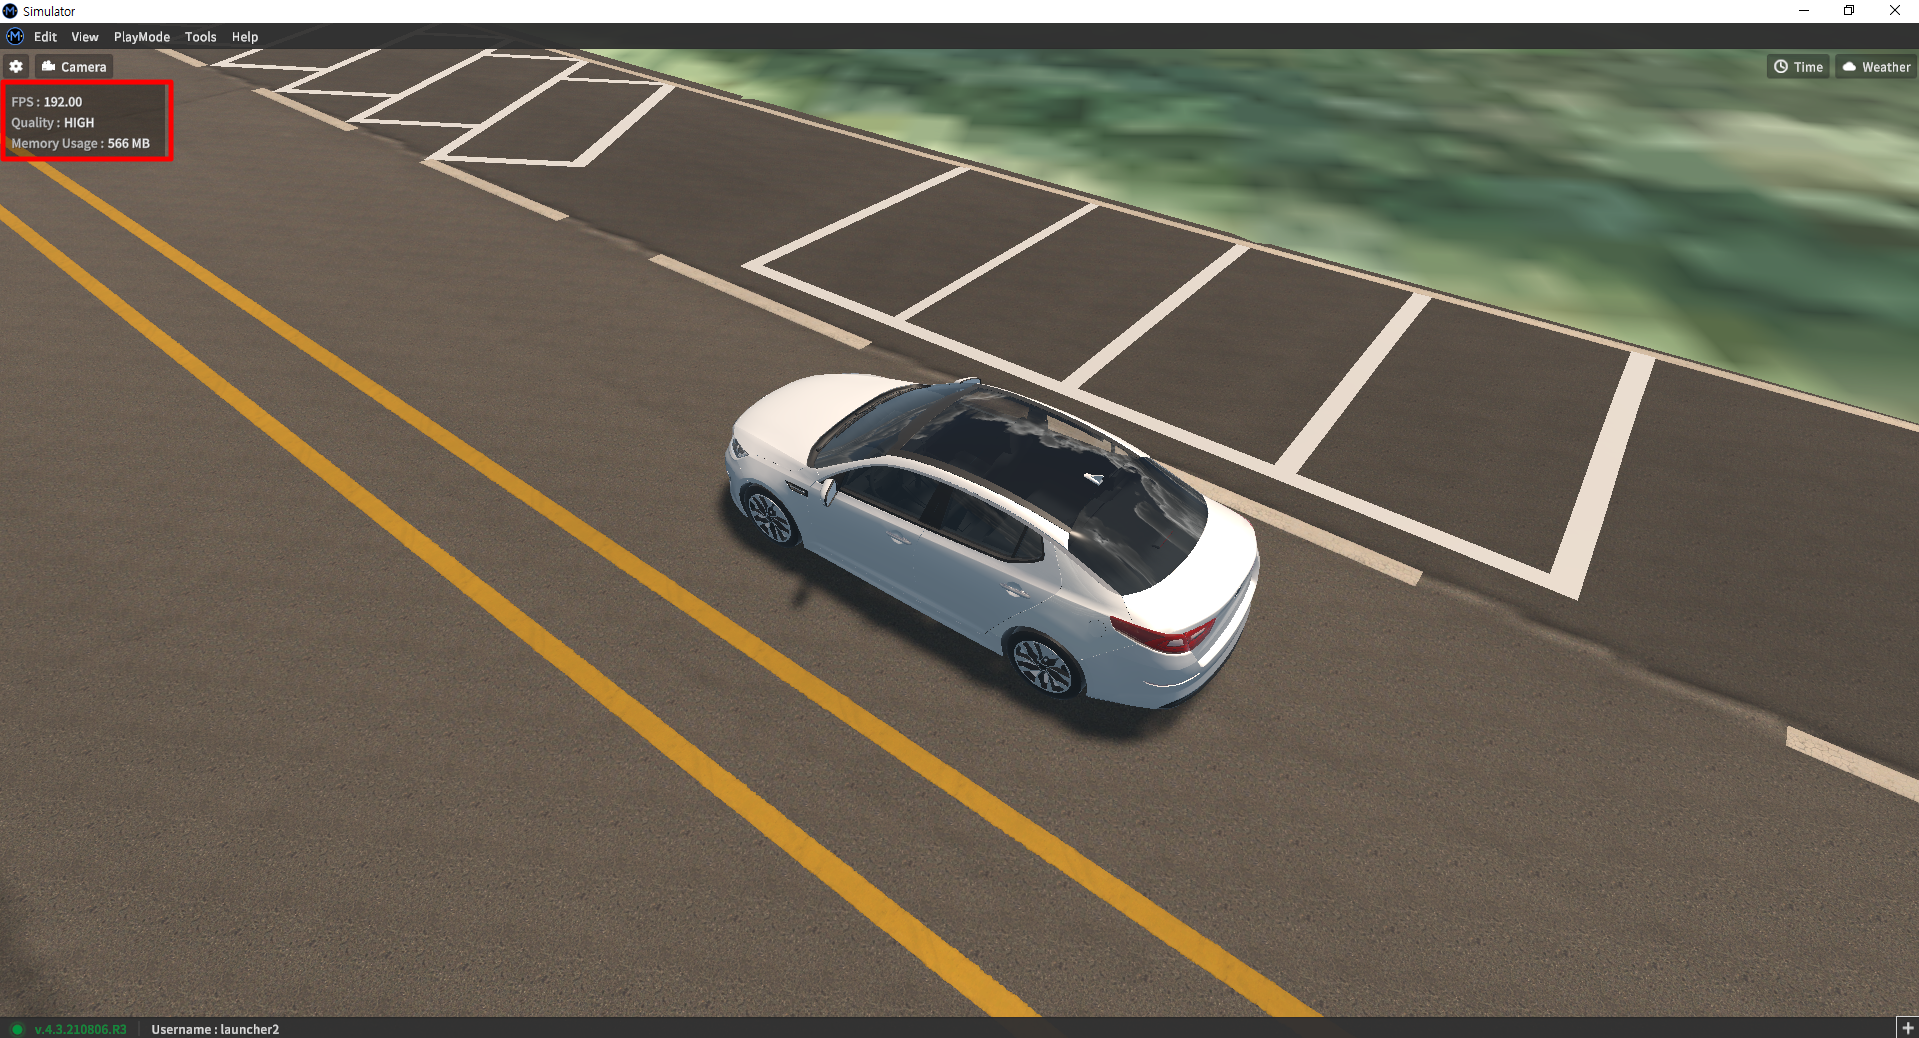
Performance Display
Enabling Show Performance will place a small box directly below the Viewport icon showing the current FPS, the current graphics quality setting, and the current amount of memory used by the simulator.
Show Vehicle Cluster and Map Info
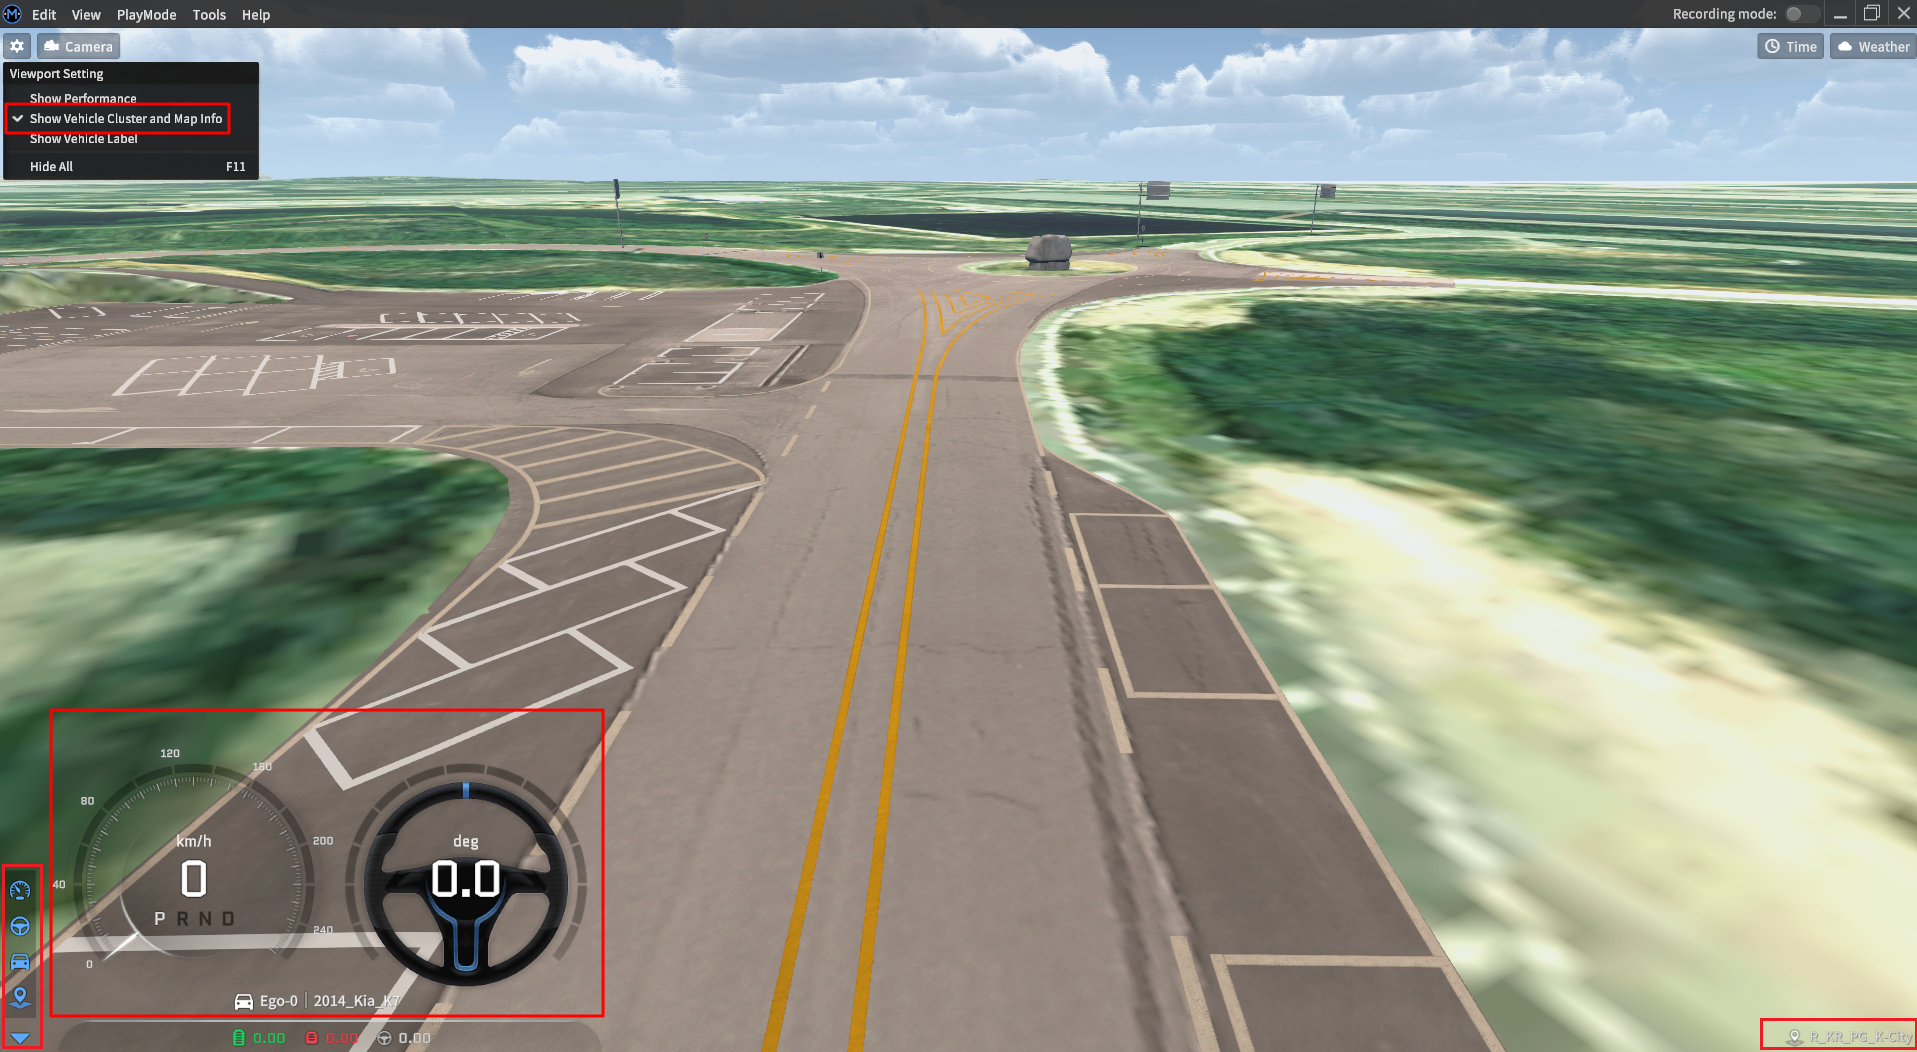
Vehicle Cluster Display
Enabling Show Vehicle Cluster and Map Info will place a speedometer cluster on the bottom-left corner of the main screen. Also, the steering information on the current vehicle can be retrieved or viewed by clicking the wheel button. This cluster contains information on the current vehicle speed, acceleration and brake commands, the current vehicle model, and the current map.
Vehicle Label Display
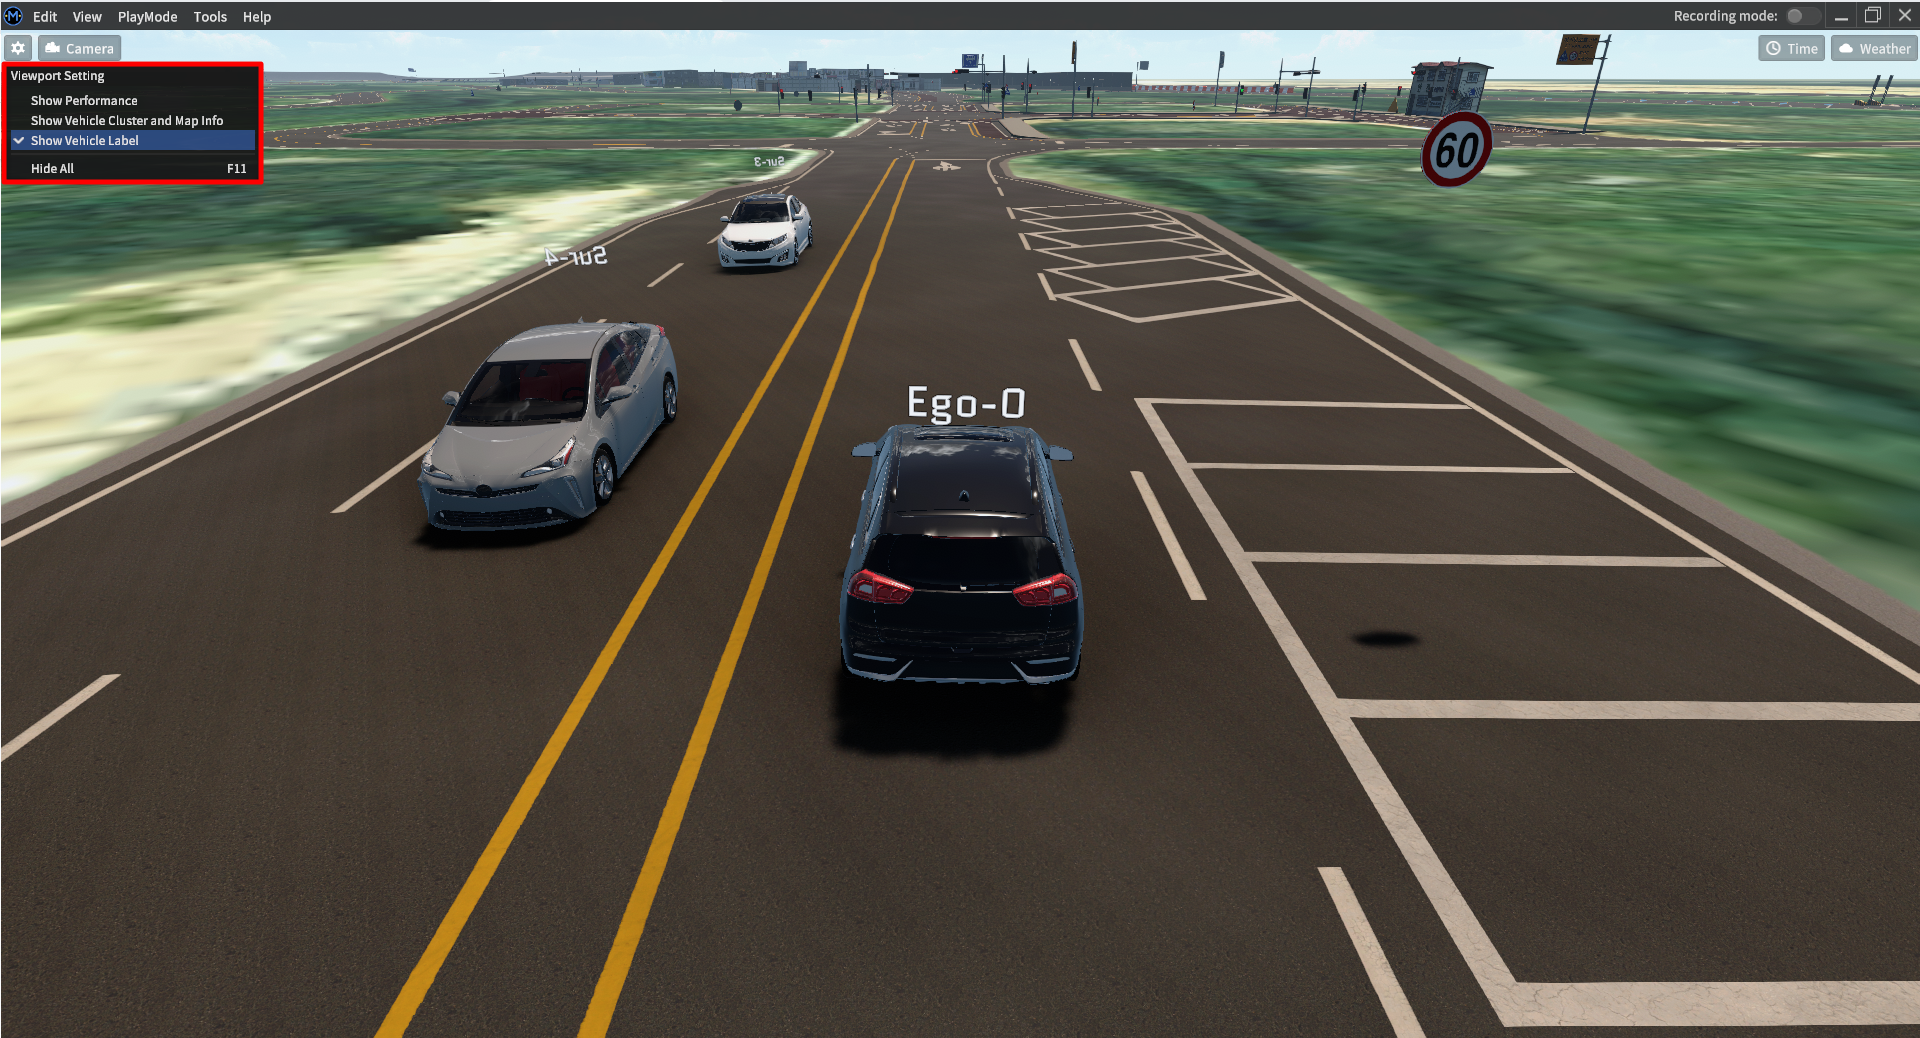
Enabling Show Vehicle Label will toggle a label that appears over each vehicle placed within the simulation scene. The labels are the unique identifying codes of each vehicle.
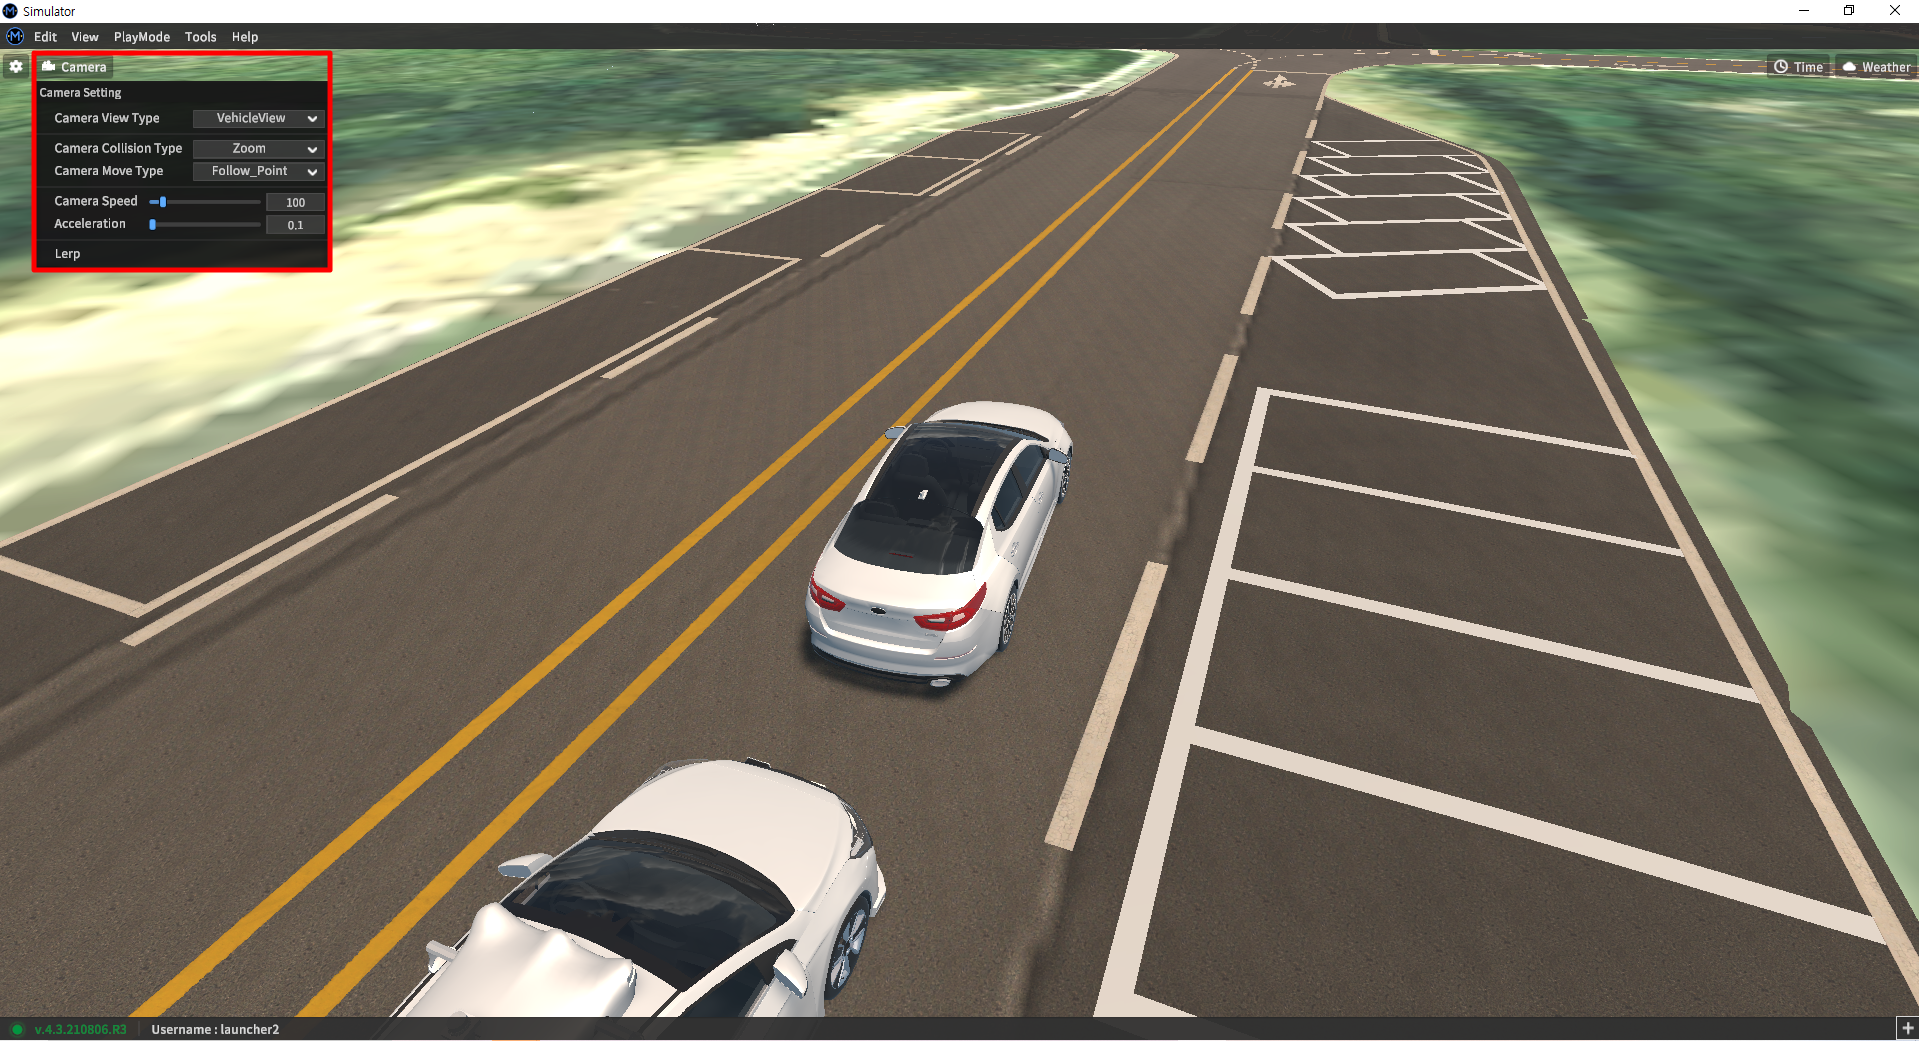
Camera Settings
Opens a separate UI that controls the scene camera. Detailed options are listed below.
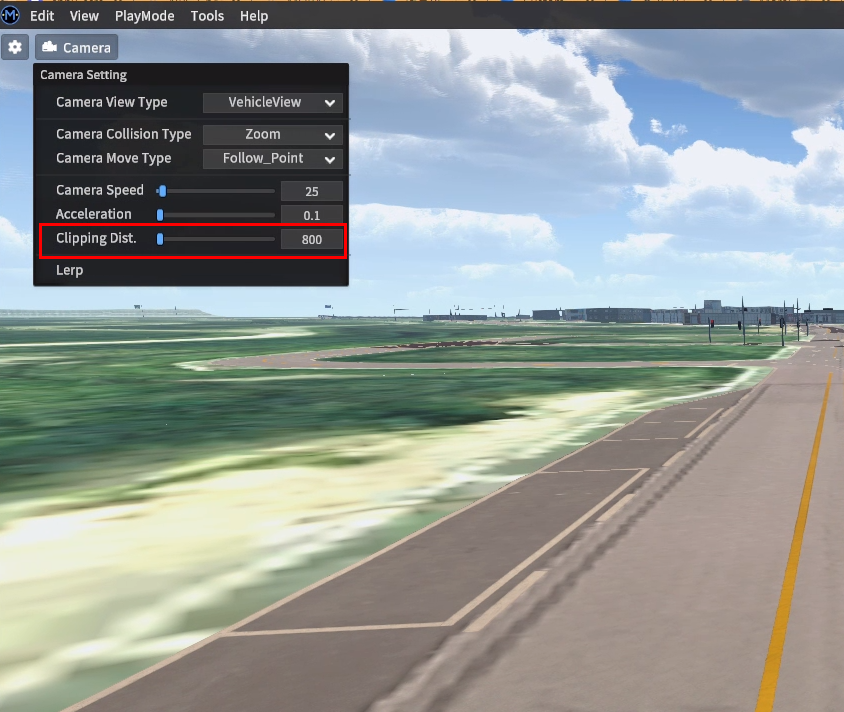
Camera Setting
Camera View Type
Perspective View: The camera is unlocked and can be moved independently of the main vehicle-in-focus. In this mode, the camera can be moved with the WASD keys.
Top View: The camera switches to a top-down view.
Vehicle View: The camera moves with and rotates around the main vehicle-in-focus
Camera Collision Type
Zoom: Automatically zooms the camera in front of any object that comes in between the camera’s POV and the main vehicle in focus.
None: The camera does not interact with any items or objects in a scene, which does not prevent the main vehicle-in-focus from being covered by objects (such as tunnels or trees), but provides a more stable view.
Camera Speed: Sets the speed at which the camera moves through the scene. Use the slider to adjust the value.
Camera Acceleration: Sets the acceleration at which the camera moves. Use the slider to adjust the value.
Use Lerp: Active only when the Vehicle View mode is also active. Smooths the movement of the camera when using the mouse to change the POV of the camera.
Saving specific scene camera positions
Sometimes you will need to quickly switch between different views of your 3D scene and environment to observe or analyze driving scenarios.
Save the current scene camera position with the – key (the hyphen key).
Cycle through the different saved scene camera positions with the = key.
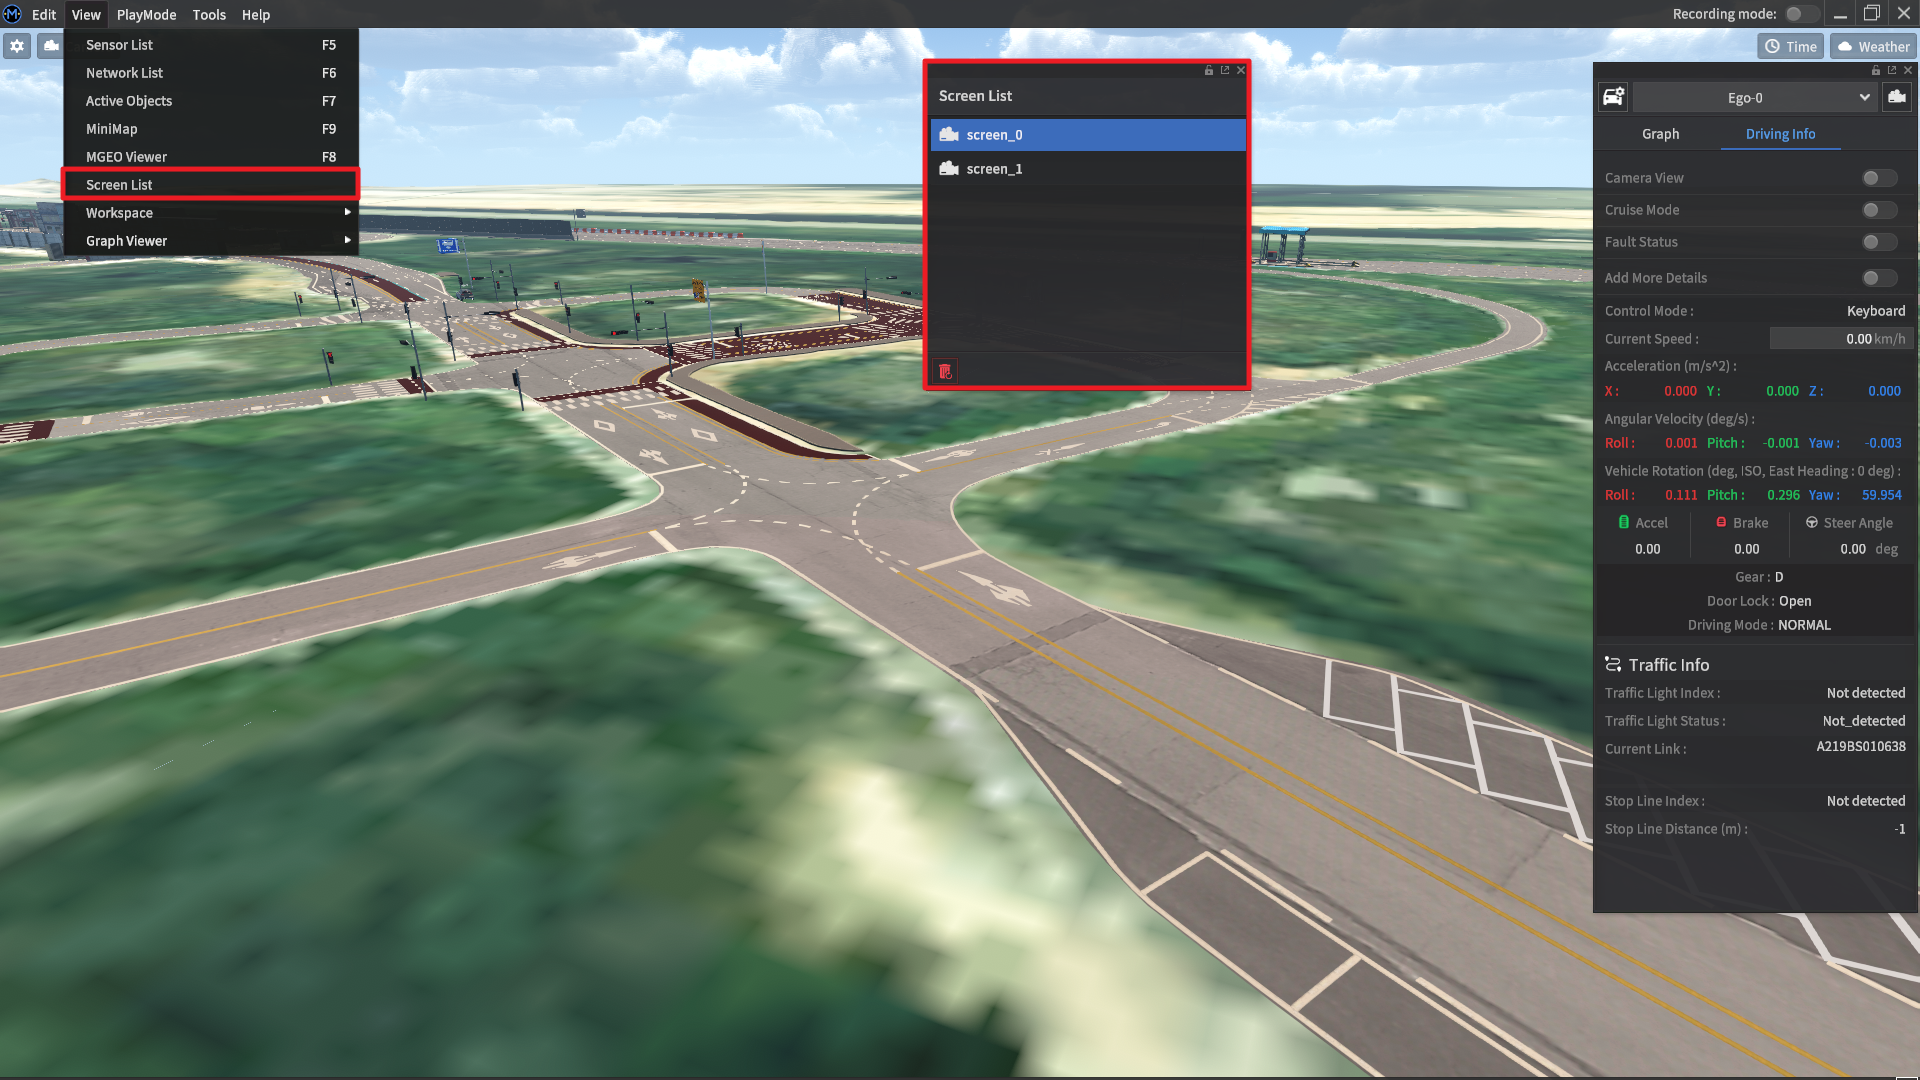
To examine all of the different positions you have saved and to edit the list of camera positions, go to View >> Screen List. This menu will bring up a separate window listing all of your saved camera positions. Double click any entry to automatically switch to the chosen position.
Examining the map
MORAI SIM provides tools for you to better determine the context of each 3D environment.
Measuring distances with the ruler feature
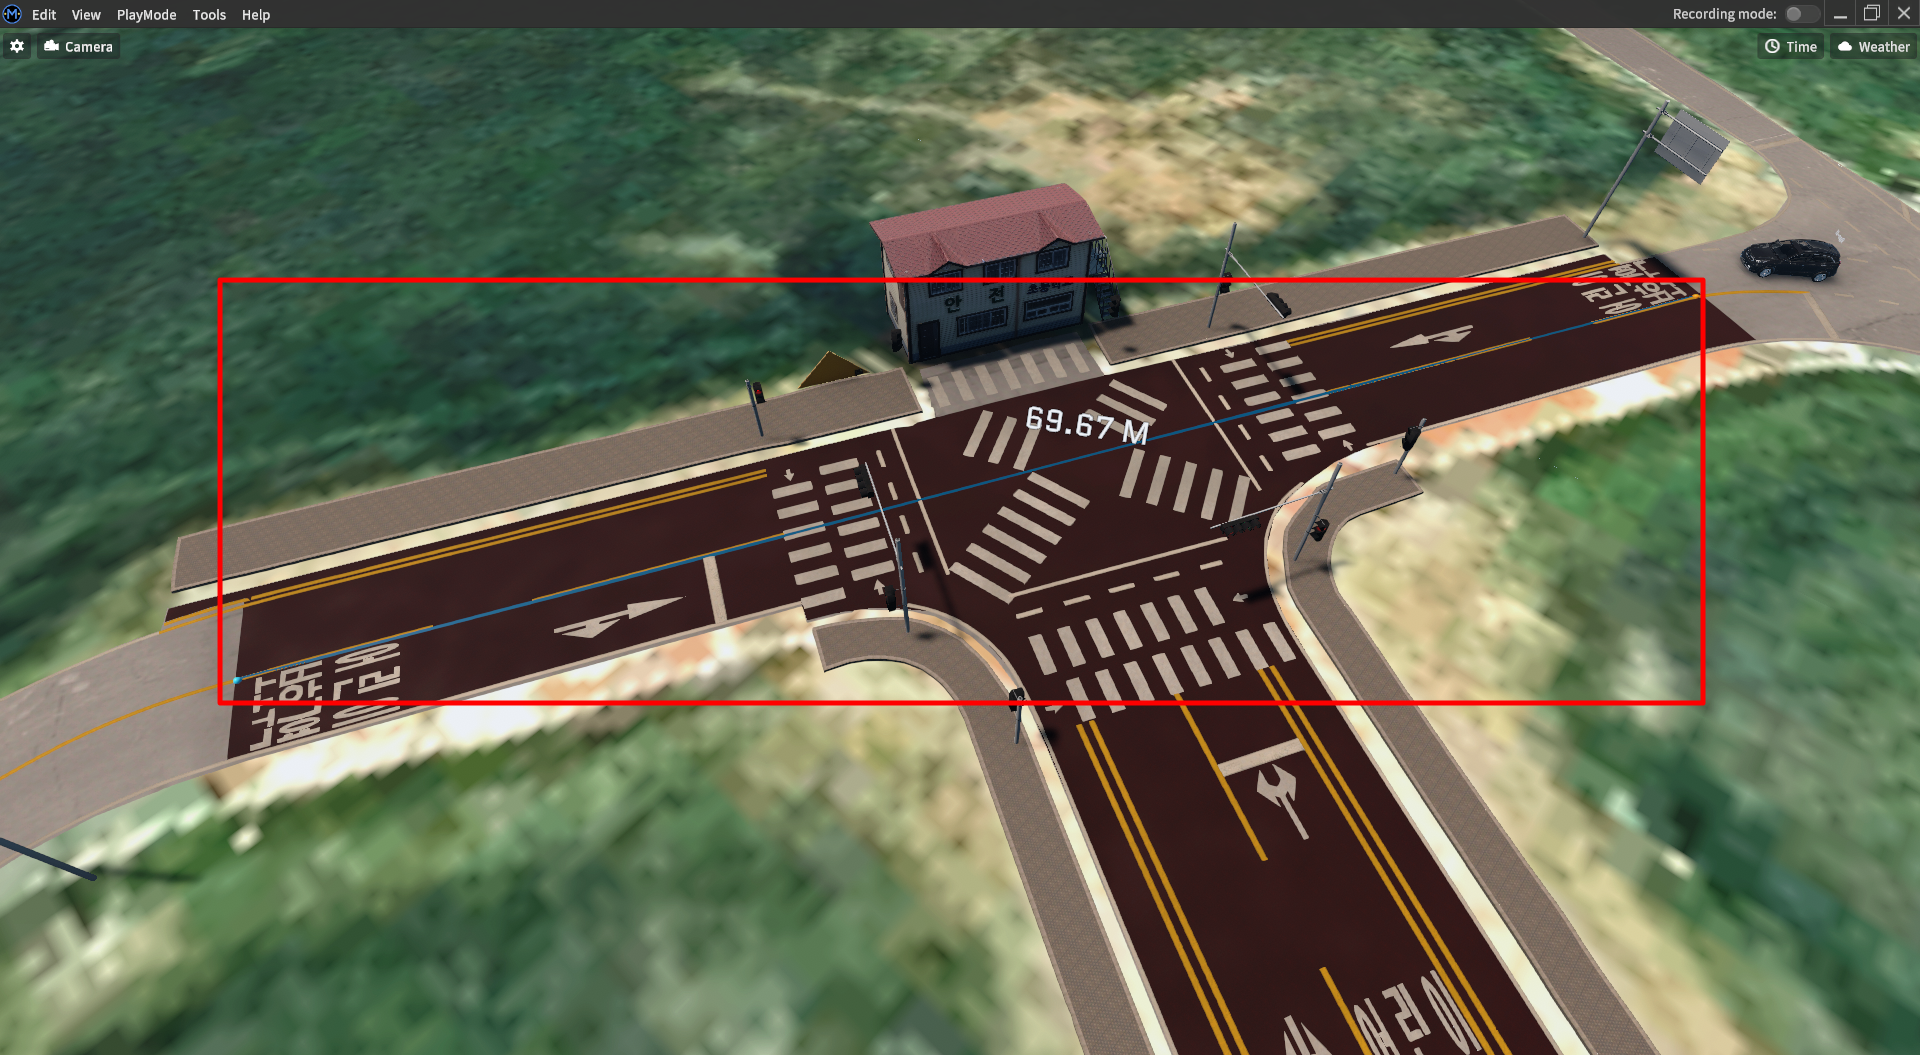
While moving the viewport around the 3D scene, use the ruler feature to measure straight distances in meters. While pressing Left Ctrl + Left Alt, Left-Click with the mouse to set a start point and endpoint.
The ruler currently only works for two waypoints.
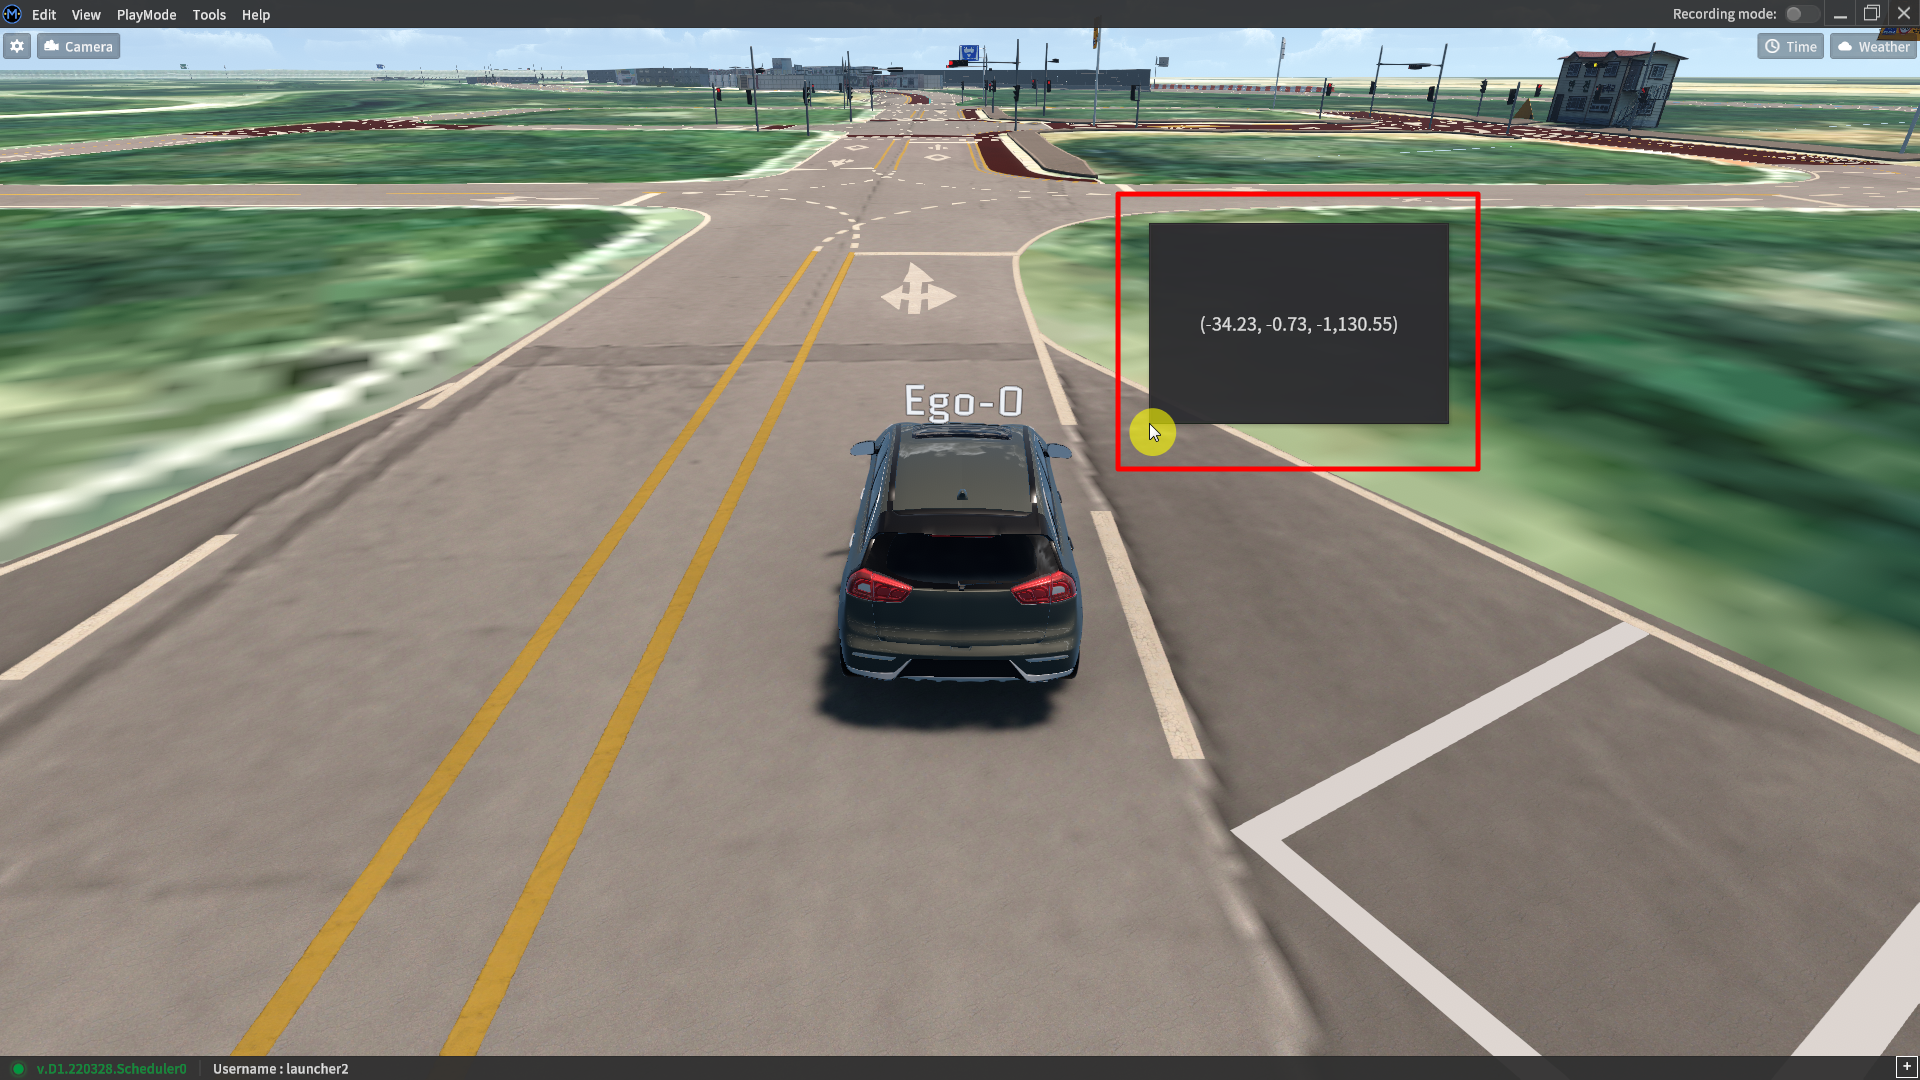
Look up local coordinates
Simply using the middle click (usually clicking the mouse wheel on most modern mice) will bring up a small window showing the local (x, y, z) coordinates of the point in the 3D scene.