Custom Map Creation
Overview
The Custom Map Creation tool (formerly named the Extra Asset Bundle feature) allows you to import your custom-made 3D environment assets - such as road surfaces, lane markings, and traffic signs - into MORAI SIM: Drive.
Custom Map Creation is only available on Windows.
A Linux (Ubuntu) version is in development.
Installing Unity
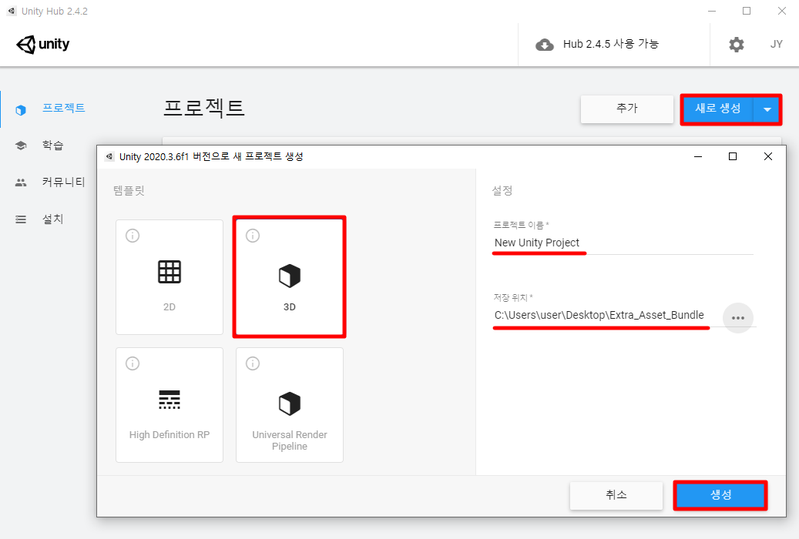
Some additional tools and software are required to use the Custom Map Creation feature. First, we need a working installation of Unity. Use the links below to install Unity version 2020.3.6.
Download Unity Hub here: Unity Hub
Use the following link in Unity Hub to get the Unity version compatible with MORAI SIM: unityhub://2020.3.6f1/338bb68529b2
Installing the custom map creation DLL
Importing custom MORAI maps is not a core feature of Unity and requires additional installation of our custom map .dll library.
Download the library files here.
Create an empty Unity project.
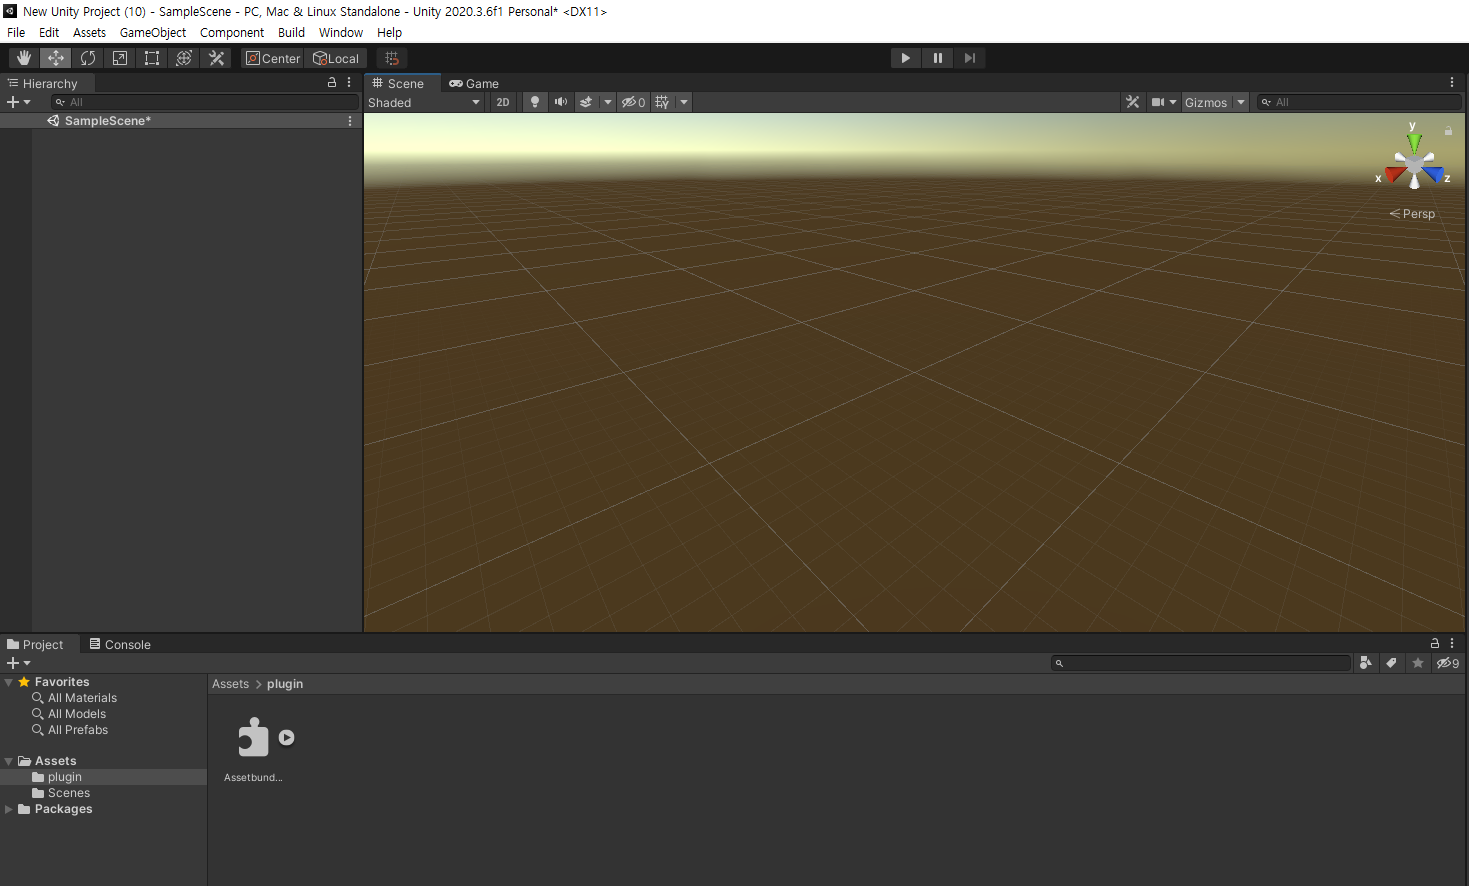
Create a folder named plugin within the project’s Assets folder and copy AssetbundleEditor.dll into the new folder.
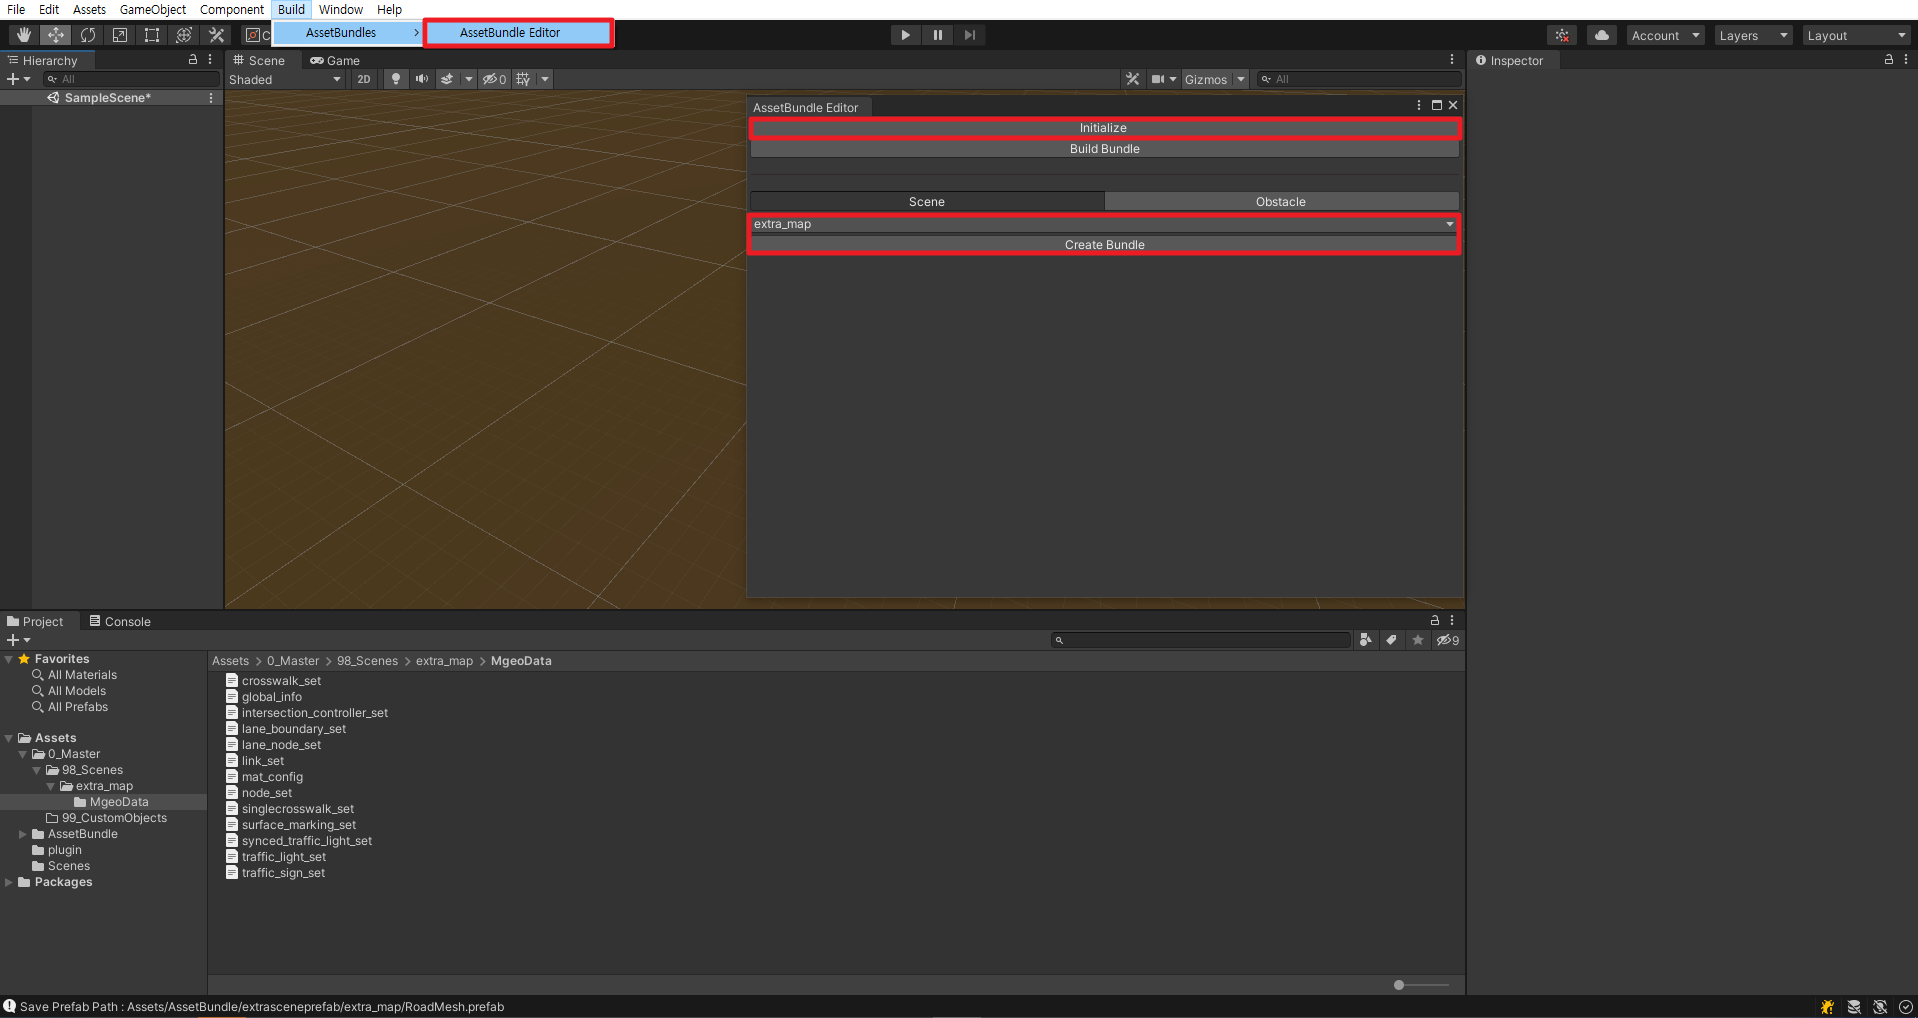
Adding the .dll file will enable a new menu along the Unity menu bar. Navigate to Build >> AssetBundles >> AssetBundle Editor - clicking the menu will create a separate tab next to the inspector titled AssetBundle Editor, as well as a number of folders necessary for custom map generation.
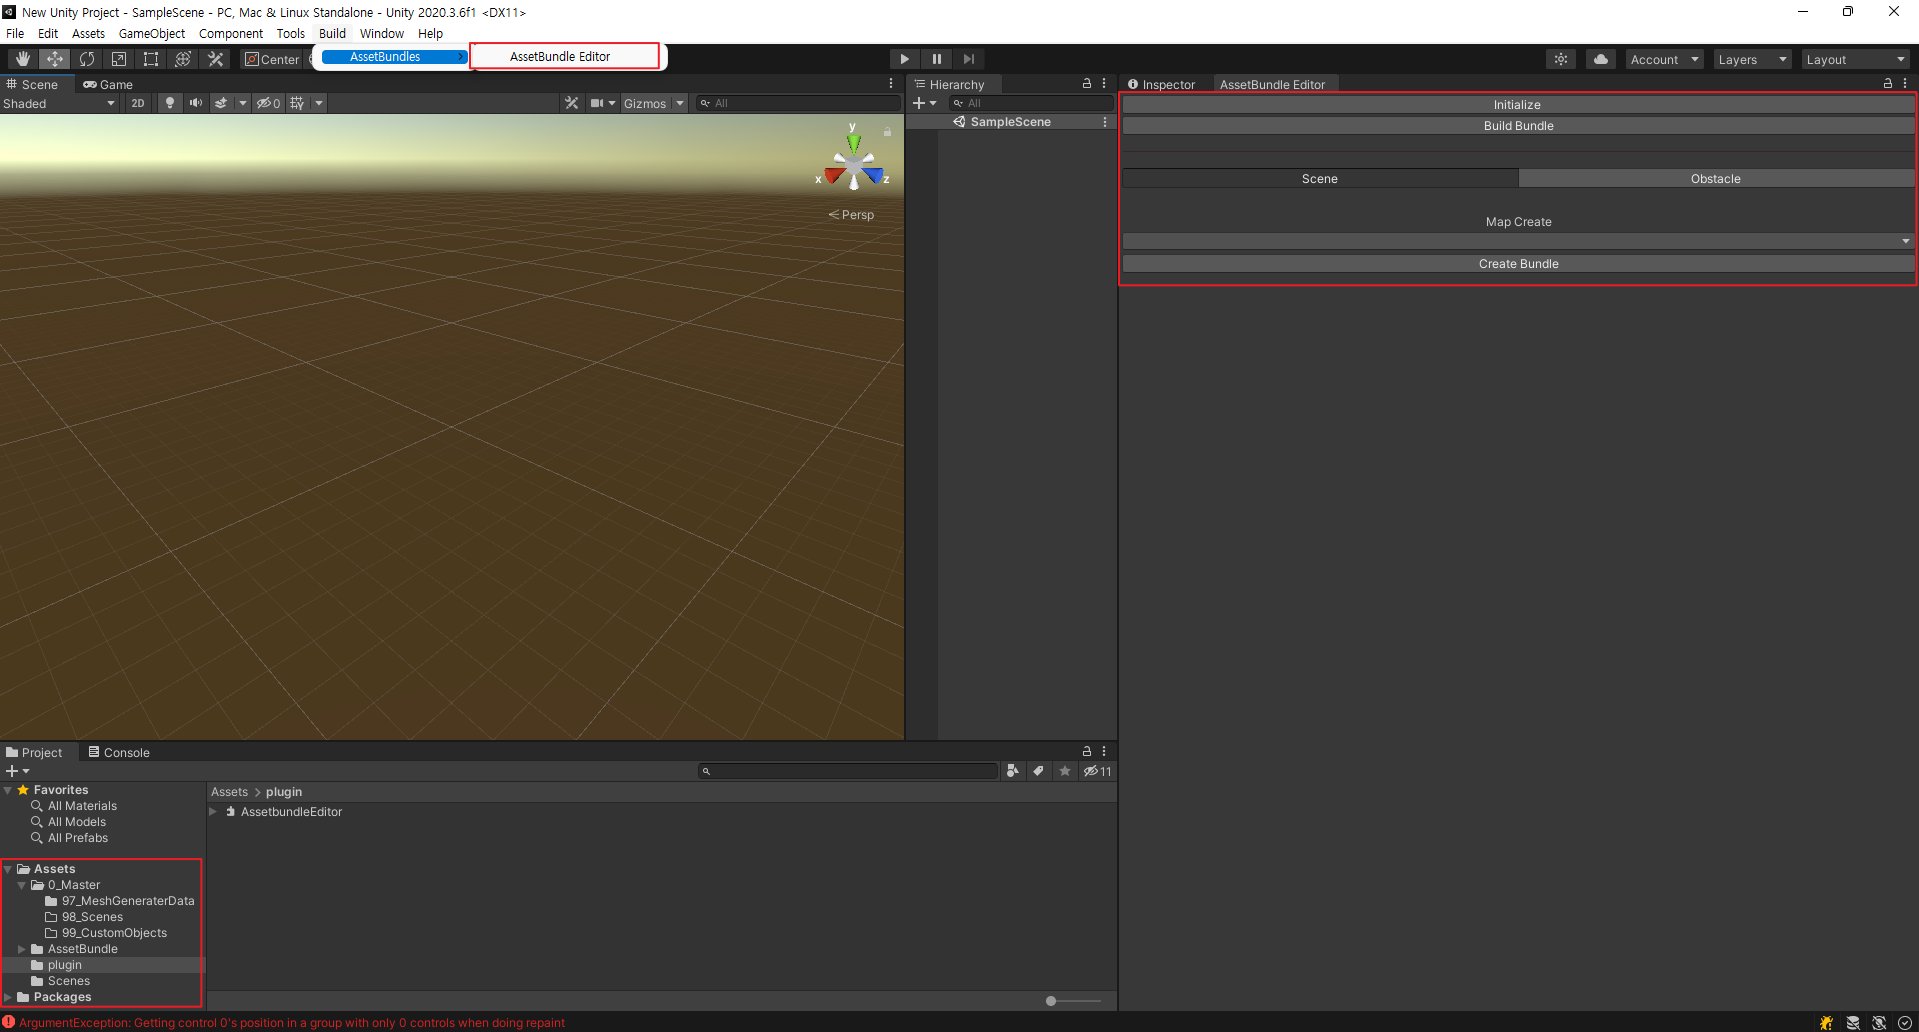
The AssetBundle Editor window offers the following UI buttons you can use to build your custom maps.
Initialize: initializes the Editor and prepares the system to import the necessary data and 3D mesh files.
Build Bundle: builds the custom map “bundle.”
Scene/Obstacle: switch modes between custom map or custom obstacle generation.
Building a custom map/3D environment
This entire process of building the custom map is a long and involved process. Use this guide is a step-by-step instruction manual.
The Unity Project folder should already be prepared for Custom Map Creation. Check if the folder hierarchies have been generated correctly by comparing them with the screenshots below.
Go to Assets >> 0_Master >> 98_Scenes and create a folder for the map. For this guide, we will use the folder extra_map. If you have any 3D objects (e.g. wavefront .obj or filmbox .fbx files) place them within this folder.
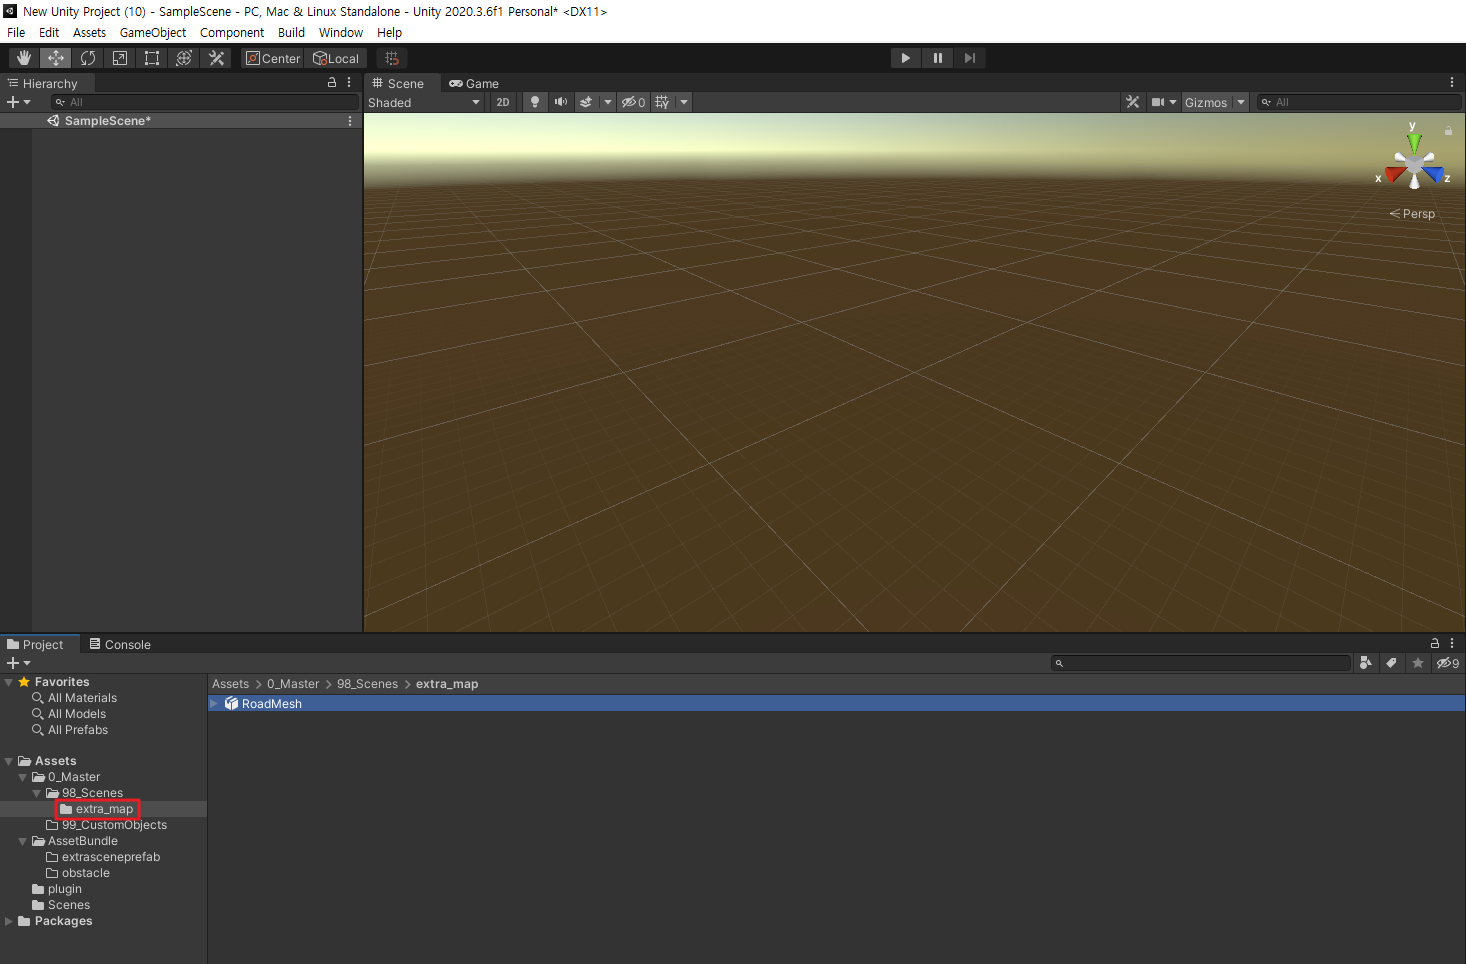
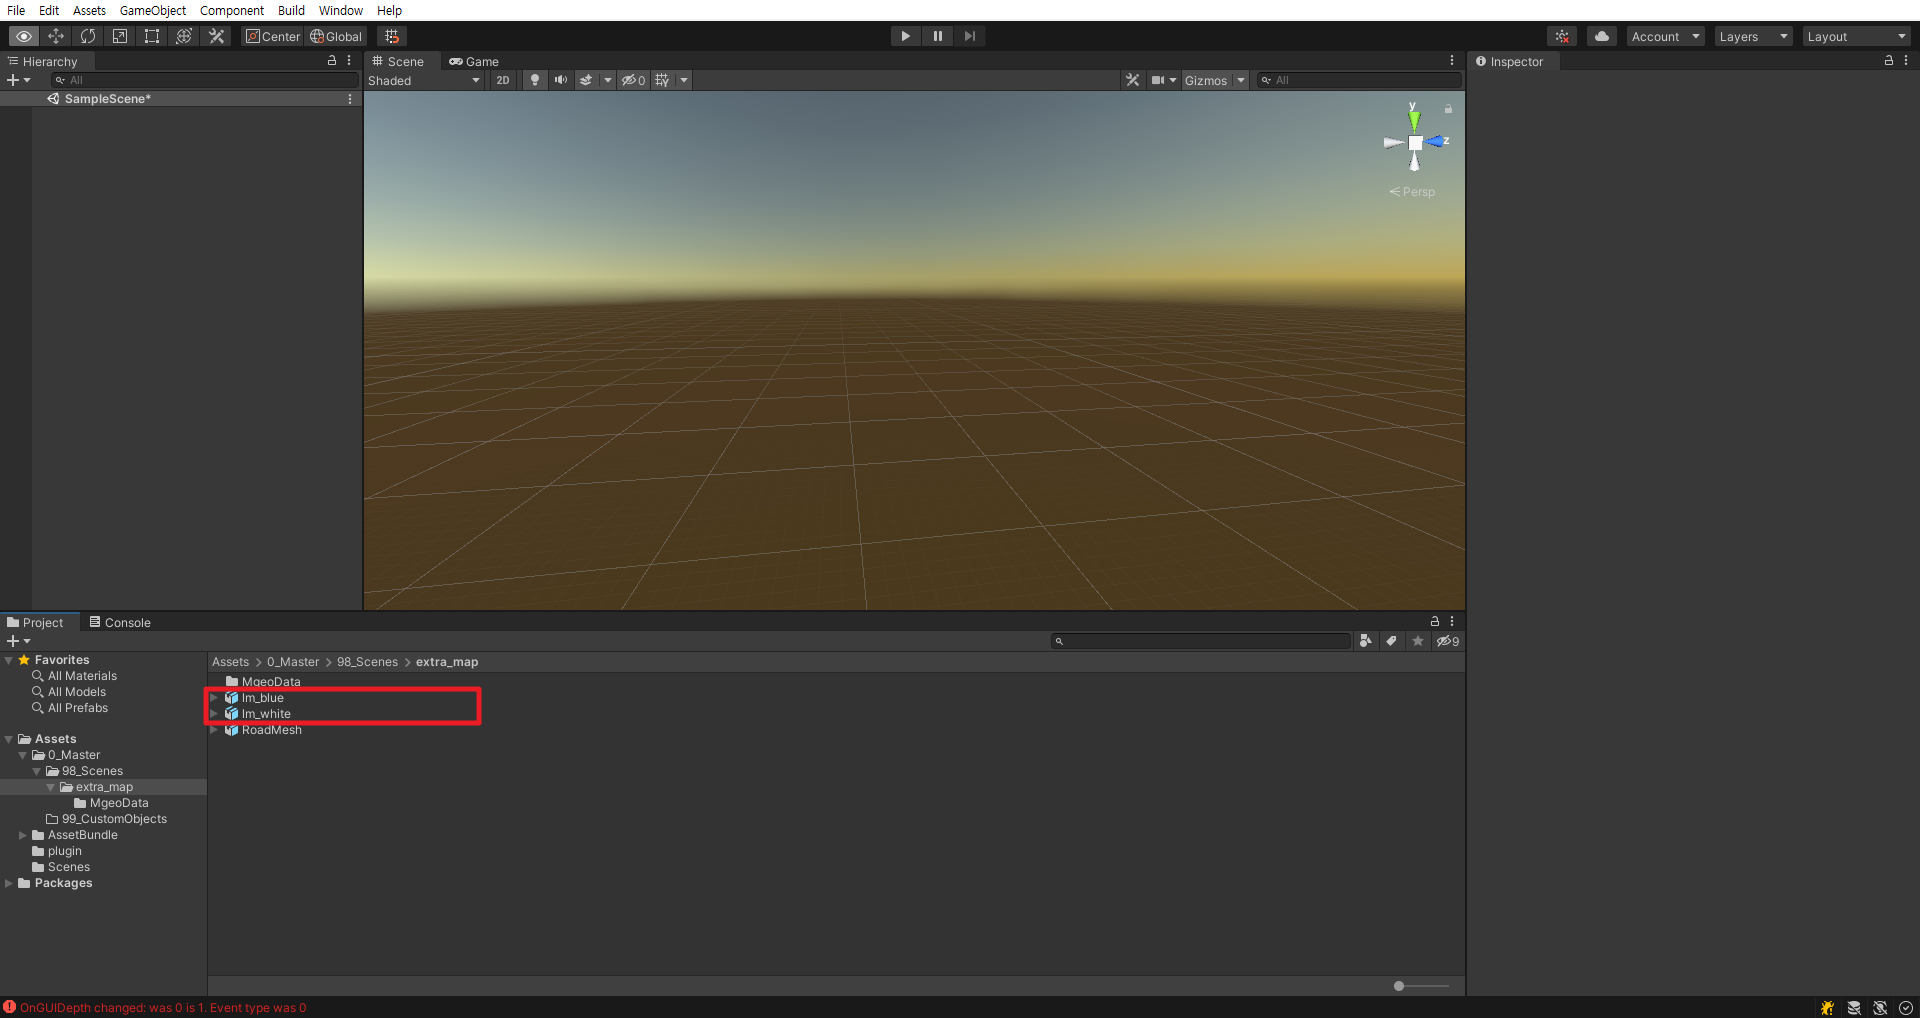
Within the extra_map folder, create a new folder named MgeoData. Place MGeo data into this folder.

Though MORAI SIM: Drive comes with default material textures that can be applied to the custom 3D assets added in the steps above, associations between textures and assets must be made beforehand. This can be done by adding a JSON file named mat_config inside the MgeoData folder.
Here is an example of a mat_config.json file for a Custom Map with a road surface, white lane markings, and blue lane markings.
{
  "Asphalt": [
    "RoadMesh.obj"
  ],
  "Lane_White": [
    "lm_white.obj"
  ],
  "Lane_Blue": [
    "lm_blue.obj"
  ]
}The current list of supported materials is as follows.
Material Type | Material File Name |
|---|---|
Road Surface: asphalt | |
Lane: white paint | Lane_White |
Lane: yellow paint | Lane_Yellow |
Lane: white paint | Lane_Blue |
Structure: concrete barrier / jersey barrier | |
Structure: soundproof wall | |
Structure: guardrail |
MORAI is continuously integrating new material textures into MORAI SIM: Drive, and this list will be updated with more assets every release cycle.
Now that all the assets are ready, go back to the AssetBundle Editor and press Initialize. The drop-down list below the Scene/Obstacle switch should activate with the folder name extra_map. Select it and press Create Bundle.
A new section titled extra_map should appear. Click the arrow next to extra_map to unfold the entire menu.
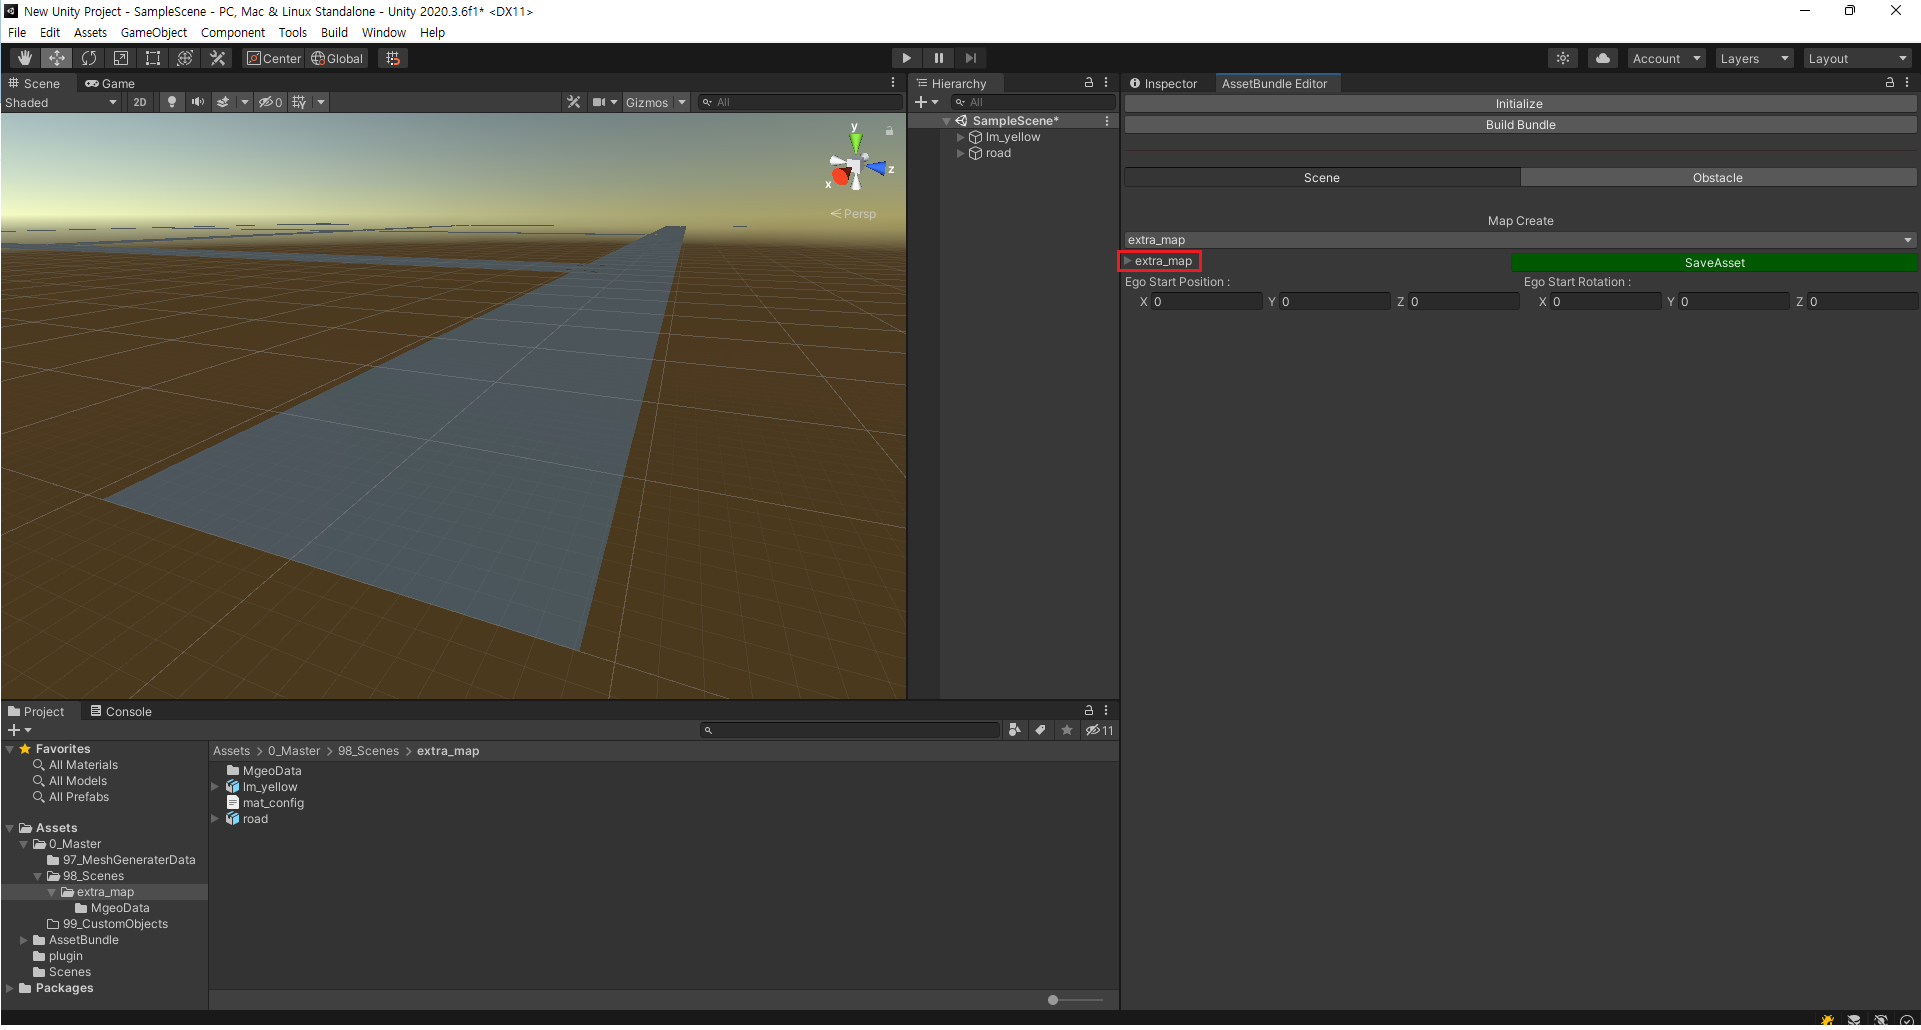
The AssetBundle Editor should now list all the different assets as GameObjects instantiated into the Unity scene. Confirm that the GameObjects match the 3D assets imported into extra_map.
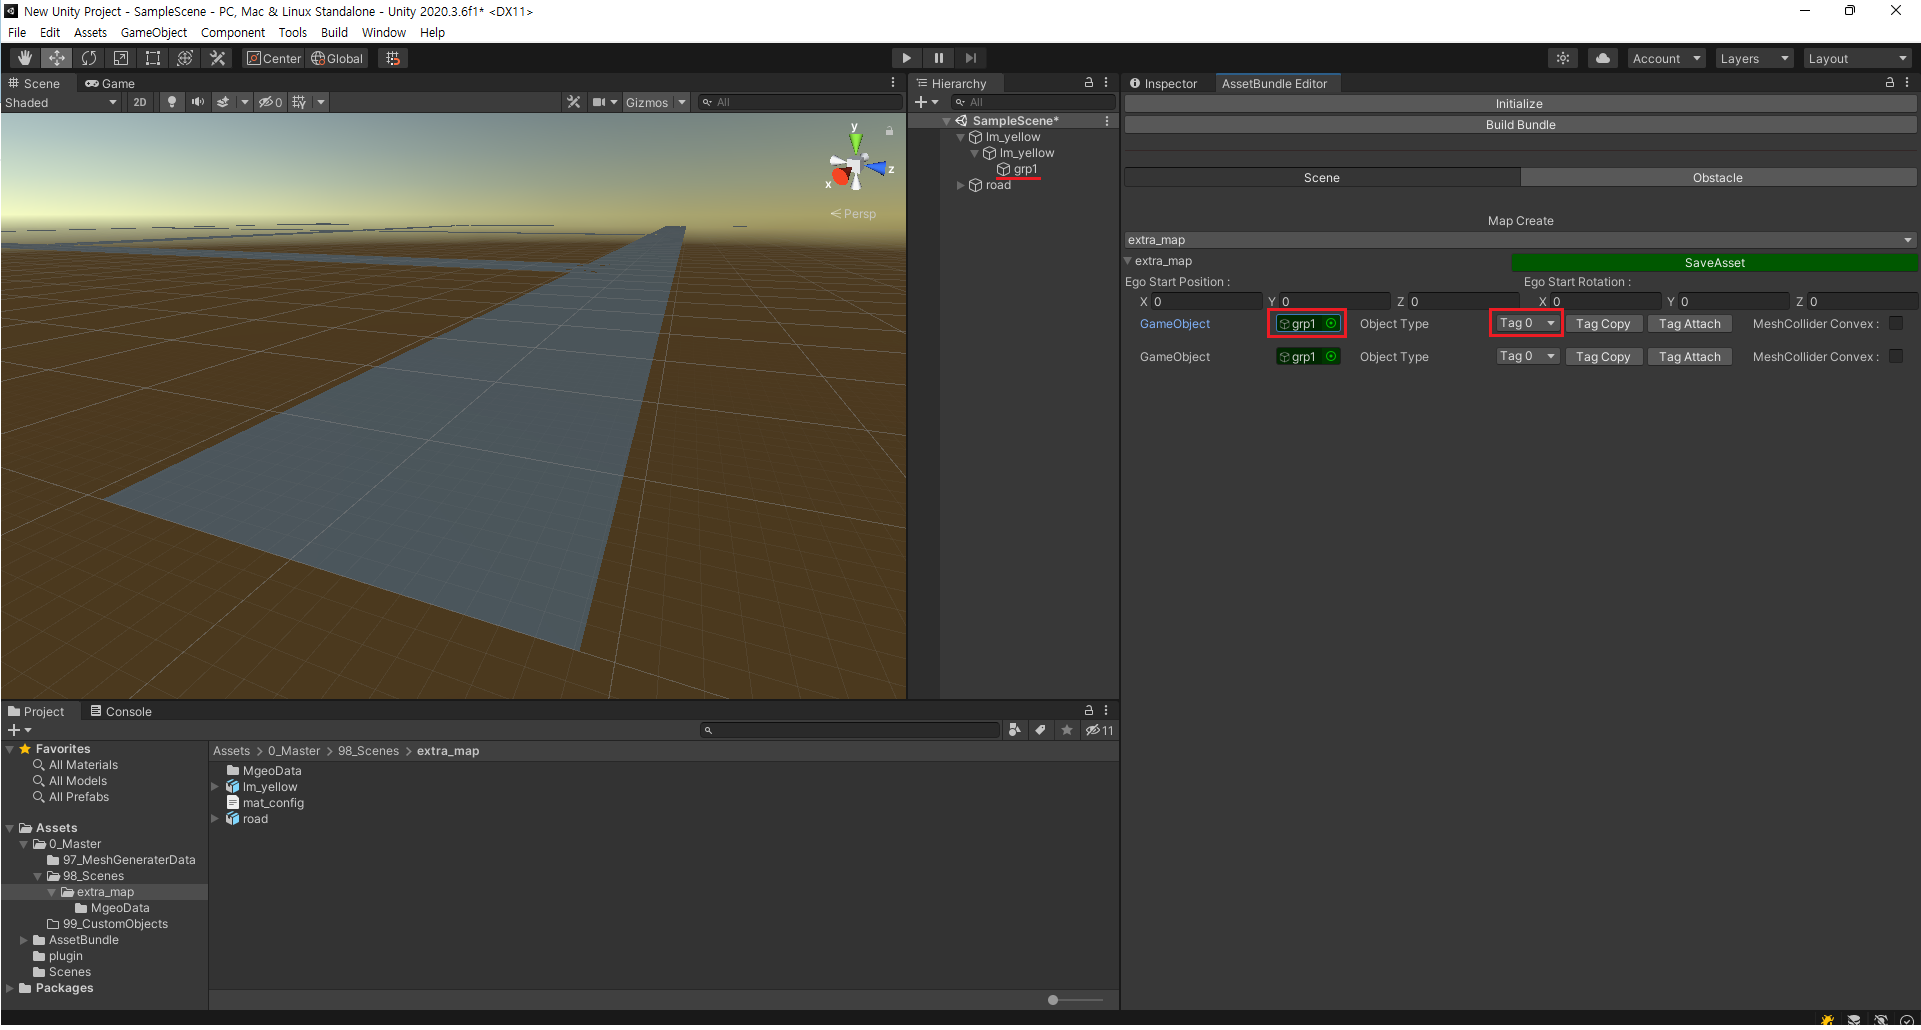
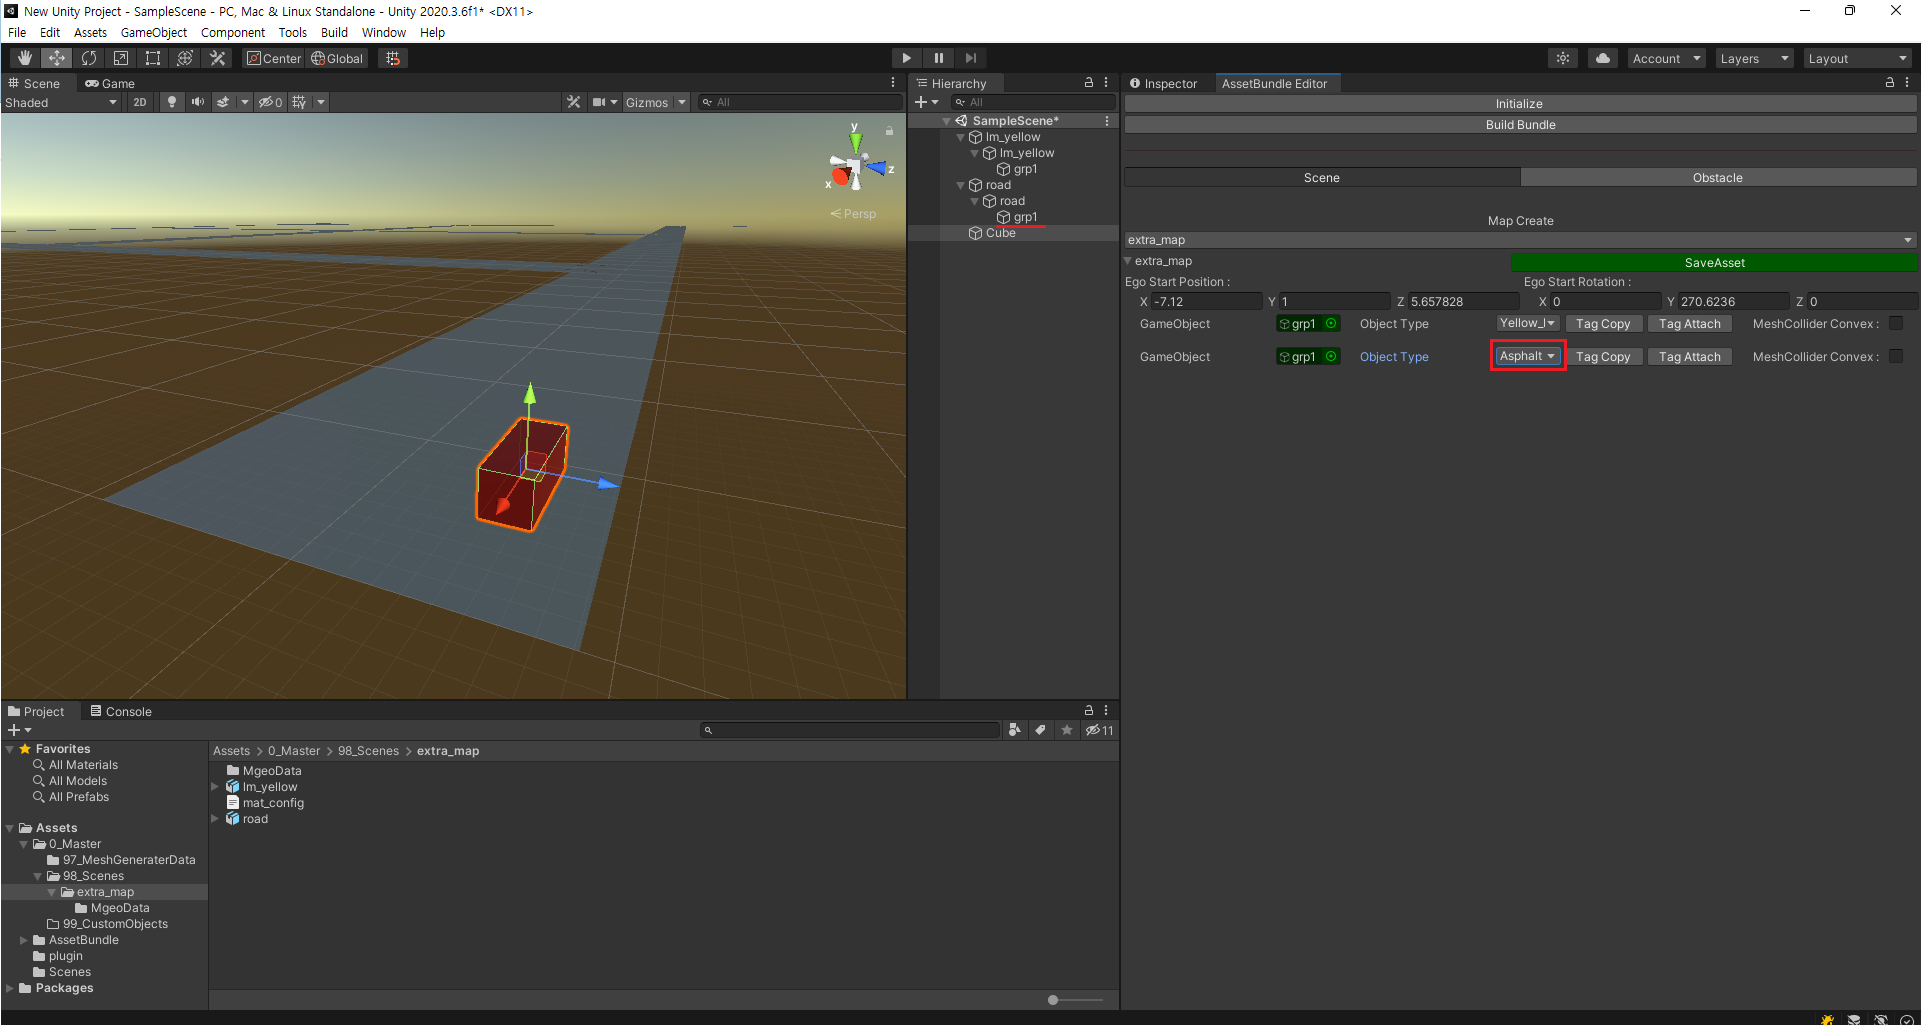
Each GameObject has a drop-down menu that initially reads Tag 0. This menu decides the segmentation associated with each asset. Open the drop-down menu and choose appropriate tags for each asset. For the example screenshot below, lane marking assets are being assigned the Yellow_Lane tag.

For every use case of the Custom Map Creation feature, we expect that some kind of drivable surface will be among the 3D assets imported. Clicking on the surface - for this example, a road surface - will generate an ego-vehicle in the scene view. This sets the initial position of the ego and the starting position of the simulator.
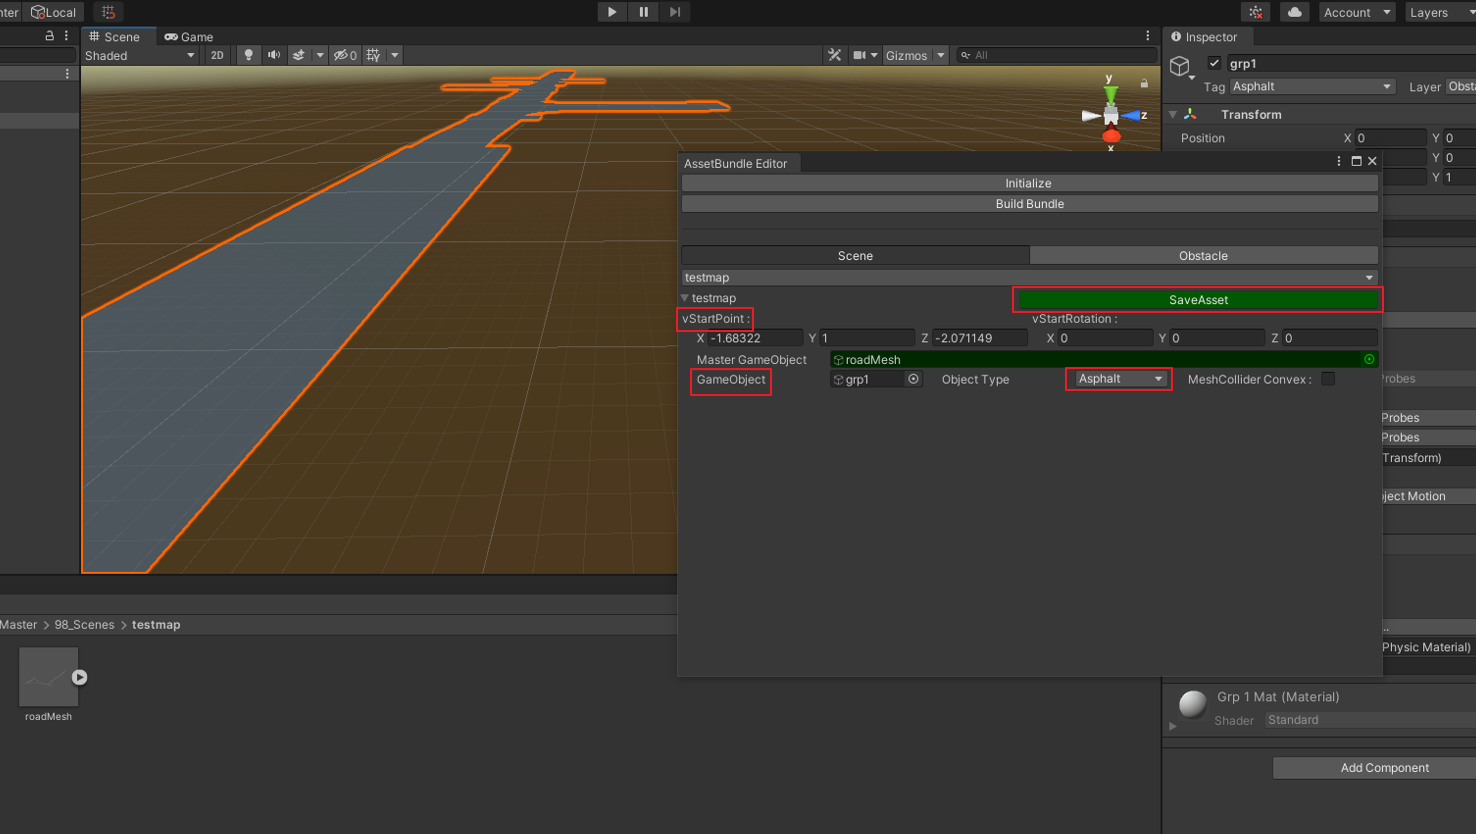
Now the AssetBundle Editor will have a new property vStartPoint and vStartRotation. Use these parameters to fine-tune the start location of the simulation and the ego-vehicle.
Once you are done with your work, press the SaveAsset button.
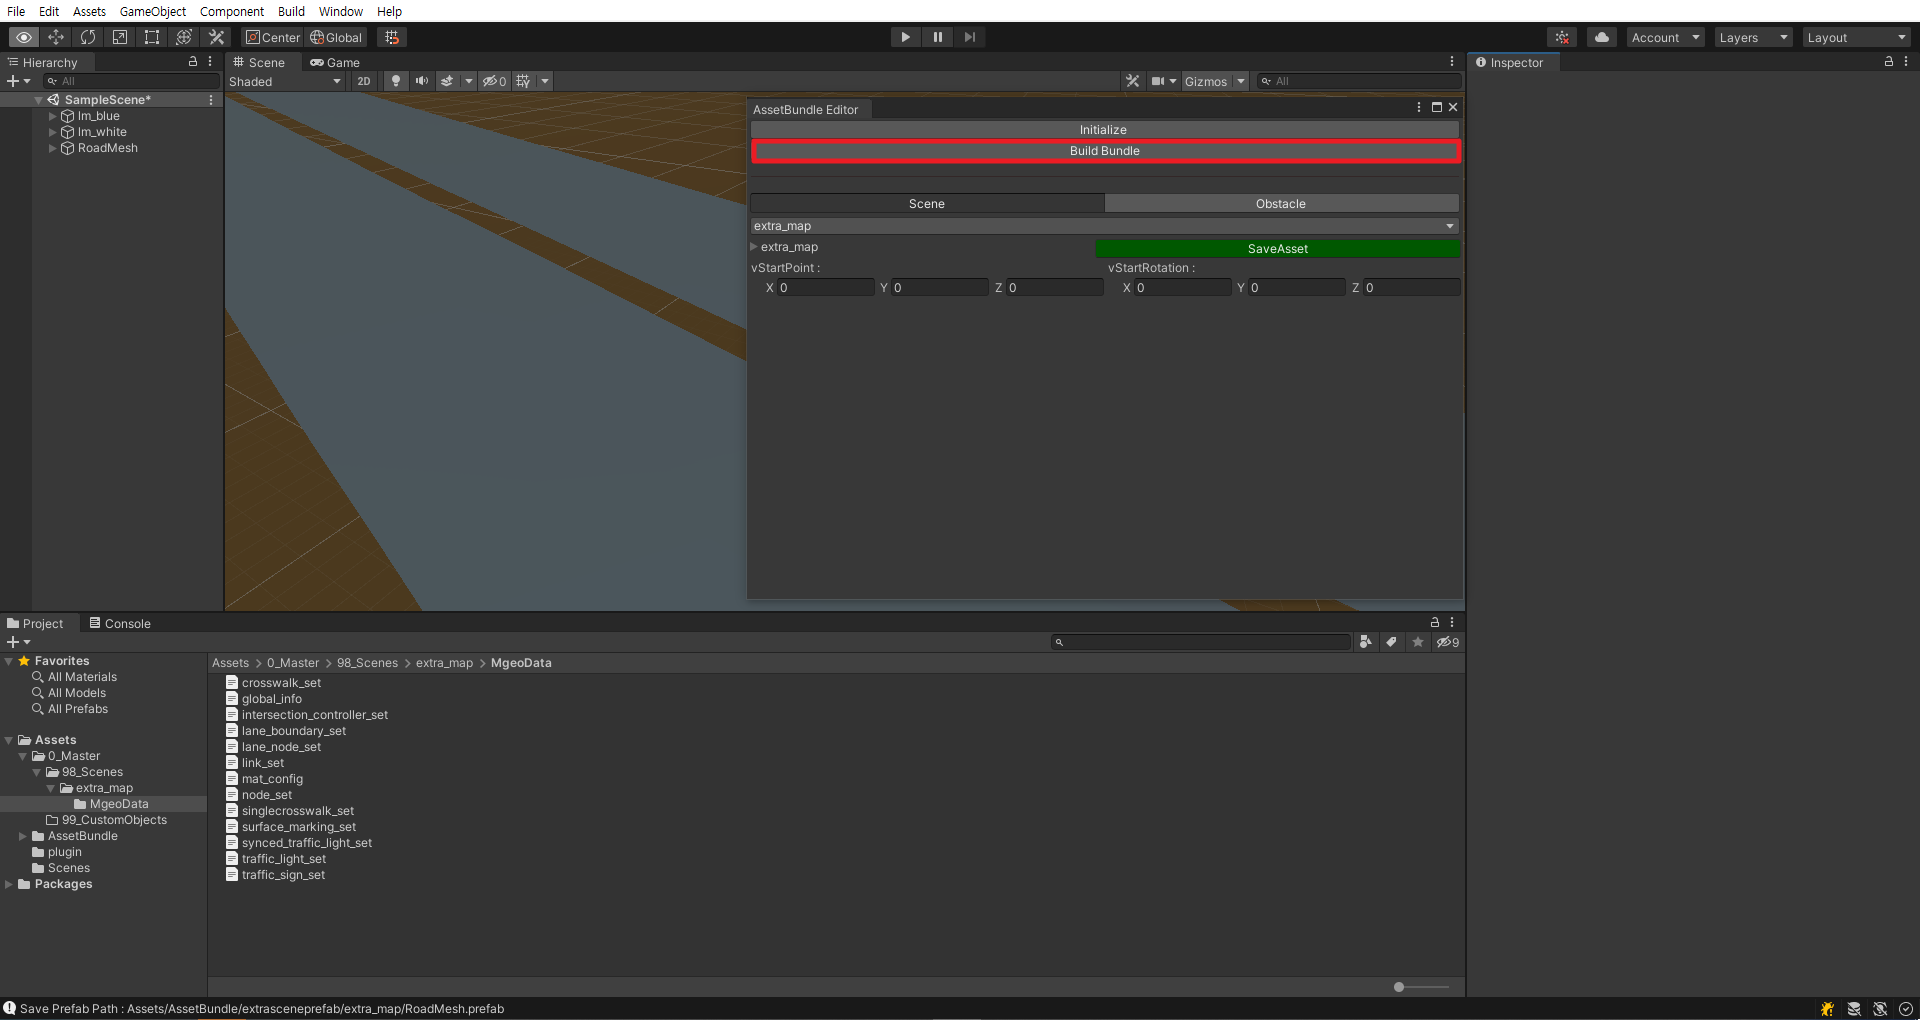
Finally, generate the complete Custom Map with the Build Bundle button.
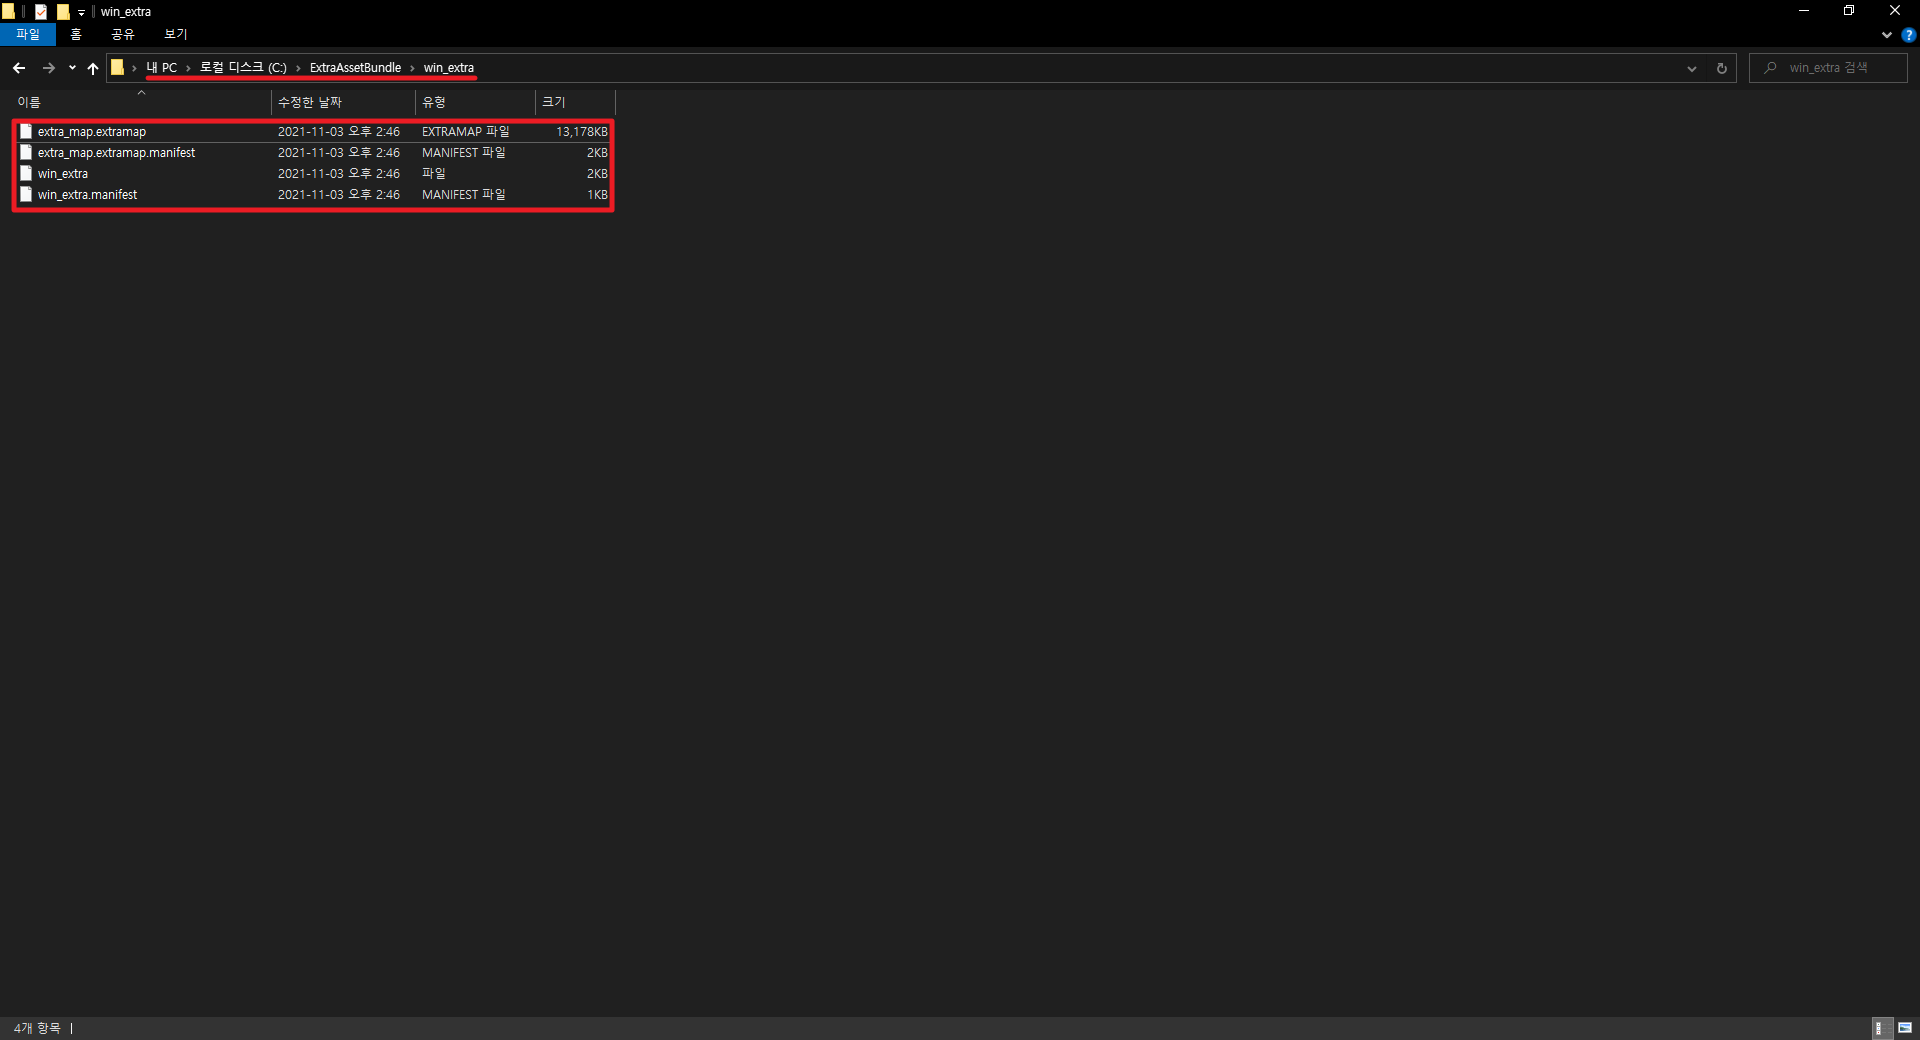
Custom Map asset files are generated in the following directory: C:\ExtraAssetBundle\win_extra\
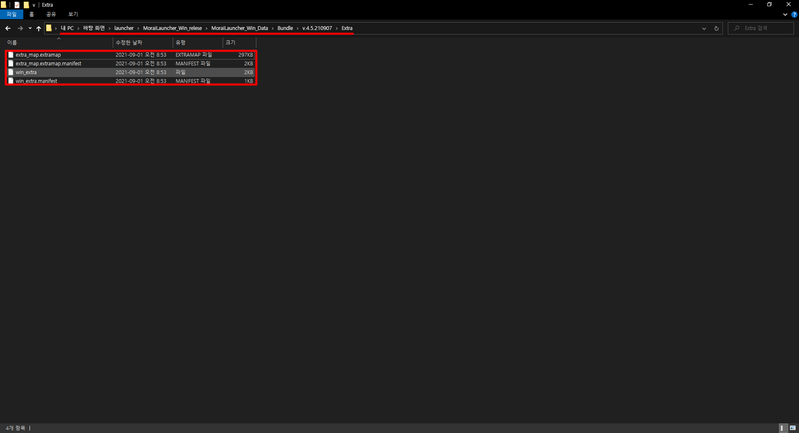
These asset files must be placed within the data path for MORAI SIM: Drive. Move all files to \MoraiLauncher_Win_Data\Bundle\[Version]\Extra
Once the asset files have been safely moved, start MORAI SIM as normal, except this time when prompted to choose a map and vehicle, select the map V_Extra_Scene from the map list. This will make MORAI SIM search the local system for Custom Map assets in the Extra folder.
While loading, a new Extra Scene Selector window will pop up with a list of maps. As we named the map folder in this example extra_map, that is the name that shows here.
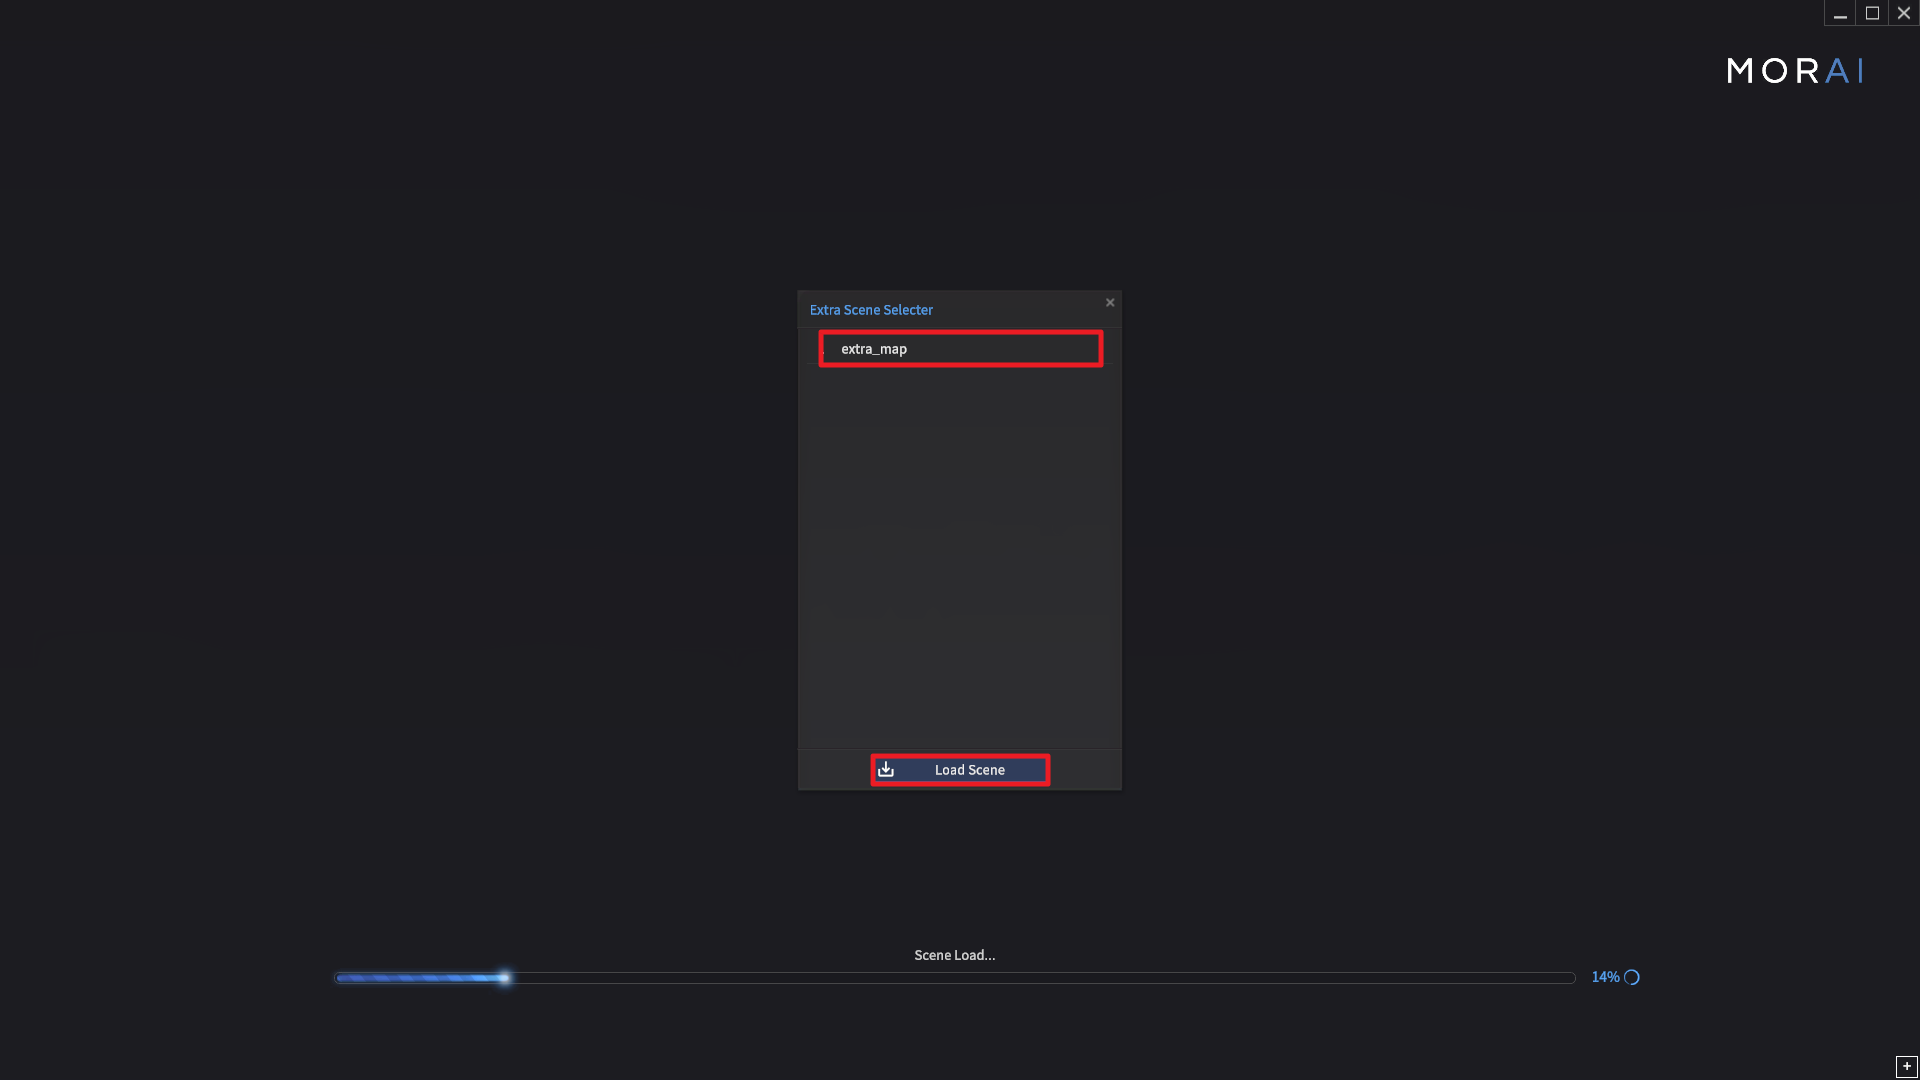
The Custom Map will then load and you may see a result like the one below.